What is Projection Mapping and How to Do It
TL;DR: Projection mapping is an audiovisual technique used in 2026 to project video content onto 2D or 3D physical surfaces, turning everyday objects or buildings into dynamic displays. To do it easily, you only need a computer, a projector, and beginner-friendly software like HeavyM to map visuals instantly without coding.
It is now common to see architectural constructions and landmarks blazing through the night in big and small cities. Enthusiasts and curiouses alike wander around, and are awed by the wonderful visual miracles. While strollers don’t know how to name these “illuminations”, they might not even be aware they’ve seen them before and on smaller structures. For aficionados, this wonderful piece of technology they’re witnessing is none other than projection mapping.
Outgrowing its function, projection mapping is nowadays used to enhance artistic performance in concerts and theatre, provide an atmosphere for a product launch or even animate a corporate event. And with mapping solutions flourishing, the path to delivering immersive experiences has never been clearer. However, some questions need to be answered first: what is projection mapping? What are its specificities? How do you do projection mapping? Is there any training to learn projection mapping? We provide all of the answers in this article.
What is projection mapping?
Firstly, let’s define what projection mapping is (also known as projection mapping). Projection mapping is a projection technique used to turn objects and elements into a display surface for video projection. This method appeared in the 2000’s and consists of projecting videos and visual animations by playing with their asperities thanks to one or more video projectors.
The objective of mapping is to create optical illusions by putting visual content on static volumes.
The projection surface is the fundamental distinction between 2D and 3D projection mapping.
Even though the nomenclature is not necessarily known by the public, examples that can be provided are self-explanatory.
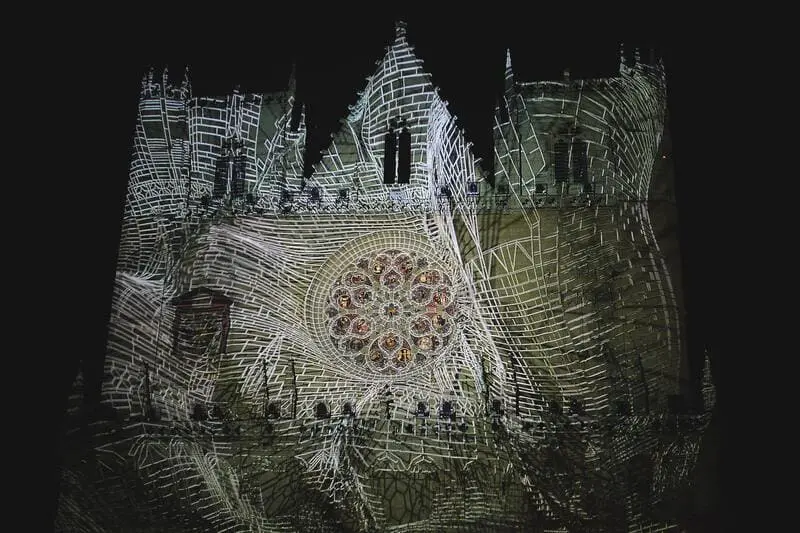
Indeed, monumental mapping – projection of videos on monuments – is the most well-known video mapping form. It accounts for 3D elements and therefore uses 3D video mapping.

2D mapping is usually done on flat or curved surfaces where the measurables are length and height. By comparison, 3D projection mapping is used to account for depth and other spatial concerns. e.g. When working with objects and textured surfaces.
So we know that any 2D and 3D physical element can become a projection surface. That means quite literally any object and anything.
As can be seen, the three-dimensional factor brings more attention and interest to the creation. The more there is a dimensional interest, the more spectacular and relevant the projection mapping is. A 3D projection mapping intrinsically generates more value and takes on a true meaning.
In effect, going from 2D to 3D provides an enhanced experience for the spectator.
For instance, here are some of the most exceptional 3D projection mappings.
Where do you do projection mapping?
So far we’ve stated the importance of differentiating 2D from 3D mapping. In the same regard, projection mapping surfaces are infinitely varied. They range from the facade of a monument to an architectural detail, from a stage set to a small object or a simple wall… Geometric accessories are also an excellent option to easily obtain a strong visual impact.
All elements of reality can be transformed and metamorphosed by this virtual technology. This technique goes further than light design thanks to software that allows creating trompe-l’oeil in motion, spectacular optical illusions and 360° projections!
Projection mapping is the possibility of designing surprising graphic and visual environments that bring the public into an immersive atmosphere to live an experience of mutating reality… towards another reality!
Projection mapping: who can do it?
Huge Projection Mapping Projects
We know projection mapping can be applied to absolutely any physical element. Meaning anything from infinitely small to gigantely colossal. And for this latter part, the market is occupied by the AV big players.
They create massive works by combining several high-performance projectors for a single project. Both the visual rendering outstanding and financial expense are outstanding.
AV big players are, in general, technical providers who supply the essential technology for great experiences. They collaborate with creative agencies to create the audiovisual material that will be shown.
The agency is responsible for generating 3D material that will match the building flawlessly and exclusively. The agency is provided blueprints, prototypes, or designs in any format so that they should work on them before the event. The content development process is critical, and it is sometimes offered as a service by AV companies.
Projection Mapping for any projects
On the other hand, projection mapping software have democratized the discipline – once reserved for technical experts – by making it accessible to the widest possible audience. Mapping is now available to events professionals and agencies, experienced artists and entertainment specialists.
Here are some examples:
This stone mine mapping is a real-time audiovisual performance during which music and images are created live underground.
In this 5-part journey, visuals are linked to the sound using audio and CV information, driving generative patches in TouchDesigner.
Creative technologist Data.Flaw created an exciting gamified experience. Indeed, he brought interactivity to another level by connecting a PlayStation 5 controller to HeavyM 2 via OSC.
French music band Free for the Ladies used projection mapping in their set design when filming and the result is electrifying. Filling their instruments and faces with color waves thanks to the most user-friendly mapping software, music vibes are flowing through the screen.
How do you do projection mapping?
The creation of a mapping requires a certain discipline and consists of several steps:
- Prepare your equipment: projection mapping tools are few, you will need a computer, a video projector, a video projection surface, a cable to connect the computer to the video projector and a software: we recommend HeavyM.
- Identify the projection surface: this consists in choosing the projection surface: an object, an architectural element, a decoration or an accessory specially designed as a structure adapted to 3D projection mapping: the Olga kit. This triangular structure kit is a reference for the construction of 3D projection mapping sets. Easy to assemble, to hang and made of M1 fireproof material, it is perfect to create beautiful animations!
- Choose (a) video projector(s) and identify the appropriate positioning(s): the next step is to choose and position the video projector according to a distance calculation in relation to the projection surface to be covered. The power of the video projector is chosen according to the size of the projection surface (5,000 lumens for small projections and up to 20,000 lumens for monumental projections) and the ambient light level. The projector must be stable, at the right height and correctly focused to obtain an optimal rendering of the animations. After several adjustments, its placement must be definitive to avoid any risk of shift with the mapping to come. See our detailed article to help you choose your video projector.
- Develop a storyboard, model the projected surface, create motion design: certainly the most creative step, but also the most complex. This is the time to create animations that perfectly match the projection surfaces. These creations are usually made by motion designers and then exported as video files. The technicians in the field will then adapt these video creations to the projection surface using projection mapping software.
To avoid complications, HeavyM offers simplified solutions for an intuitive and stress-free creative process. The software has built-in visual effects that can be combined without limit and it adapts all imported photos and videos, as well as content from other applications, directly to the projection surface. It’s a phenomenal time-saver!
HeavyM: your indispensable tool to create a unique projection mapping!
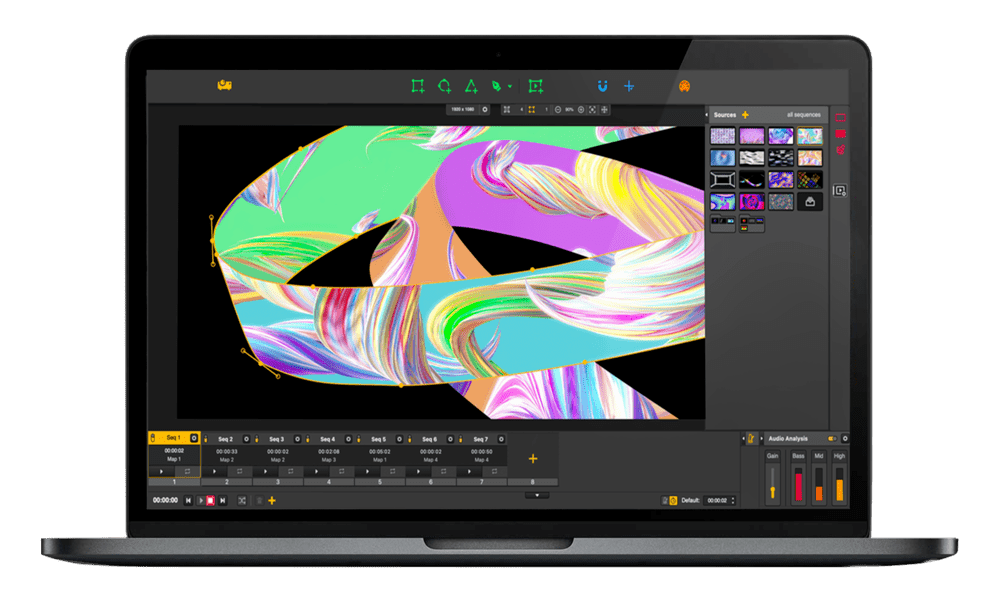
To create an unforgettable mapping, you will need powerful and efficient software. HeavyM for instance, is compatible with Mac & Windows.
In addition, the software offers interesting features such as a sound reactivity module – automatic synchronization of the mapping with the music – and ready-to-use visual effects.
A complete and easy to use solution that allows you to create quality mappings in 5 steps:
1) Choose your mapping surfaces

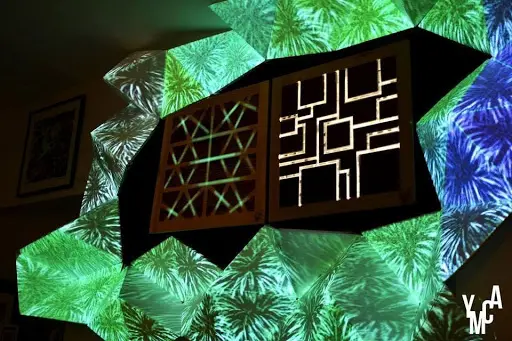
You can use HeavyM in any location and on any surface. The projection surface can be the front of a building, your car, a pair of shoes, or any scenery of your choice. You can also use our Olga kits specially designed for projection mapping. The ease of use and rendering of projection mapping designed with HeavyM and the Olga kit have led some customers to turn art projects into permanent installations. This is the case for the Sheron project below.
2) Place your projector

All models are compatible with HeavyM, you just need to make sure that you position your projector so that your entire volume is covered by the projection beam.
Check out our tips to help you choose the best projector for your project.
3) Define the area of your mapping

HeavyM’s playful and intuitive interface, thanks to its drawing tools, allows you to draw outlines perfectly adapted to your projection areas. The operation is simply done with your mouse.
The projection mapping appears directly and instantly on the projection surfaces you have chosen.
4) Add visual effects

Create your projection mapping in just a few minutes with the ready-to-use animations designed by our teams. They automatically adapt to your surface designs. Easily animate, color and bring your sets to life with the world’s most complete and varied library of effects.
Here is a demonstration:
5) Import your own content

You can use your photos or video clips, HeavyM automatically adapts them to your projection mapping surfaces.
You can also integrate video content from other applications, HeavyM is compatible with Syphon & Spout technologies, for example.
Several players have already tested HeavyM software to boost their corporate events, their stage installations or their artistic decorations. For example, the YMCA used HeavyM to build an elegant stage design for a DJ set at the Angoulême comic book festival. The audience was transported into a visual universe inspired by the world of comics!
Do you also want to create an incredible graphic installation? Choose HeavyM!
Projection mapping: which HeavyM license to choose?
Whether you are a professional, an amateur, a student or a teacher … HeavyM offers you a package adapted to your needs. The choice is yours:
- The HeavyM Live offer, ideal for live performances and artistic projects. which comprises all of the essential features
- The HeavyM Pro & Pro+ package with advanced features such as multiple outputs or video export for audiovisual professionals who work on complex projects
- The HeavyM Demo offer to test the product for free
Students and teachers who subscribe to the HeavyM offer receive a 30% discount on the product.
How to learn projection mapping?
If you wish to gain expertise on the subject of projection mapping, training courses are available. Count a few thousand euros for a complete course ranging from the history of mapping, to the deployment of the workflow, to a technical application.
Other effective and inexpensive solutions also exist to learn projection mapping:
Every year the Video Mapping Festival takes place in Lille. It gathers all professionals and amateurs of the industry who are invited to share their creations over a two-week period. It’s an opportunity for the enthusiasts of this discipline to discover the novelties of projection mapping, the innovative tools and to exchange with professionals on the subject.
Without a doubt, projection mapping becomes child’s play with HeavyM.
To learn how to use it and to dig into the features of the tool, you can follow the tutorials available on our Youtube channel and on the website.
In just a few minutes, you’ll get the tips on how to use HeavyM and its features.
With HeavyM, artists, designers and amateurs can learn the basics of projection mapping and more! Today, many schools and trainings use HeavyM to teach their courses and train young and not so young people to projection mapping practices. This is the case of Unisphères, the Visual Arts of the Academy of Lyon… A tool tested and approved by many users!
The HeavyM team, the FAQ and the blog are at your disposal to answer your questions and to enlighten you on the specificities and origins of this discipline.
More good news: HeavyM offers free webinars to learn the basics of projection mapping. These will be available by downloading the trial version of the product.
As you can see, mapping can become an accessible and easily achievable practice as soon as you have the knowledge and the right tools to grasp it. To avoid wasting time and to make your events spectacular in the blink of an eye, choose HeavyM, the intuitive and easy-to-use projection mapping software!