How to succeed in your first projection mapping project

There you go! You are ready. You have a laptop and a suitable projector and just downloaded HeavyM. Projection mapping transforms ordinary surfaces into dynamic displays by projecting digital content onto them. This technique offers endless possibilities, allowing you to project onto buildings, cars, or any object, and transform them into engaging visual displays in a variety of settings. There are two main projection mapping techniques: 2D and 3D. 2D projection mapping is about creating 2D shapes and masks filled with content. 3D projection mapping involves texturing a 3D model of a real-life object and re-projecting the textured version onto the object. Video projection is the foundational technique that enables these dynamic transformations, whether you are working with 2D or 3D mapping. You are now ready to create your first video mapping.

Are you still a little bit unsure of how it works? No worries! Just read this article to find out more about getting started in projection mapping and the 4 steps to follow for a successful mapping. Projection mapping has rapidly gained popularity in various fields like marketing, entertainment, and education. It integrates creative concepts with technical planning to create immersive experiences. The first public display of projection mapping occurred in 1969 at Disneyland’s Haunted Mansion ride. A notable example is using projection mapping to create visual universes inspired by comics or to highlight cultural heritage sites. Projection mapping is increasingly democratized, making it accessible to a wider audience beyond technical experts. Today, its applications can be seen at events and landmarks all around the world.
Succeed your mapping - Cover top

First and foremost:

  • How much time is required? Plan 2 hours for the assembly and the creation of your mapping.

  • What do I need? 1 computer, 1 projector, 1 screen or projection surface, 1 cable to link your computer to the projector, 1 computer mouse (recommended).

  • How much space do I need? With an : a wall hanging surface and a distance of 2 to 3 meters between your projector and the wall (depending on your projector). You can projection map with a single or multiple projectors that are stacked and blended. For larger projection surfaces, you might need multiple projectors that are stacked and blended together. AV companies often provide high-performance equipment and technical support for large-scale projection mapping projects. Do you need more information on projectors? Take a look at our tips.

When planning your space and setup, consider the need to build or construct the physical setup or projection surface. This manual process and careful planning are essential for a successful projection mapping experience.

Choosing the Right Tools

  • Selecting the right projection mapping tools is the foundation of any successful projection mapping project. The choice of projection mapping software, such as HeavyM or TouchDesigner, will determine how easily you can create, map, and control your visuals. For projects with larger or more complex projection surfaces, you may need multiple projectors to cover the entire area seamlessly. In these cases, edge blending software becomes essential to merge the images from different projectors into one cohesive display.

    When choosing video projectors, prioritize models with high brightness (lumens) and high resolution to ensure your images are vivid and sharp, even on large or textured surfaces. The physical space and location of your projectors also play a crucial role—make sure there’s enough room for setup and that nothing obstructs the projection path. Proper planning and the right combination of mapping software, projectors, and supporting tools will help you achieve the best possible quality for your projection mapping work, whether you’re working on a small installation or a large-scale immersive experience.

The 4 key steps of a successful mapping :

1. Your structure or projection surface

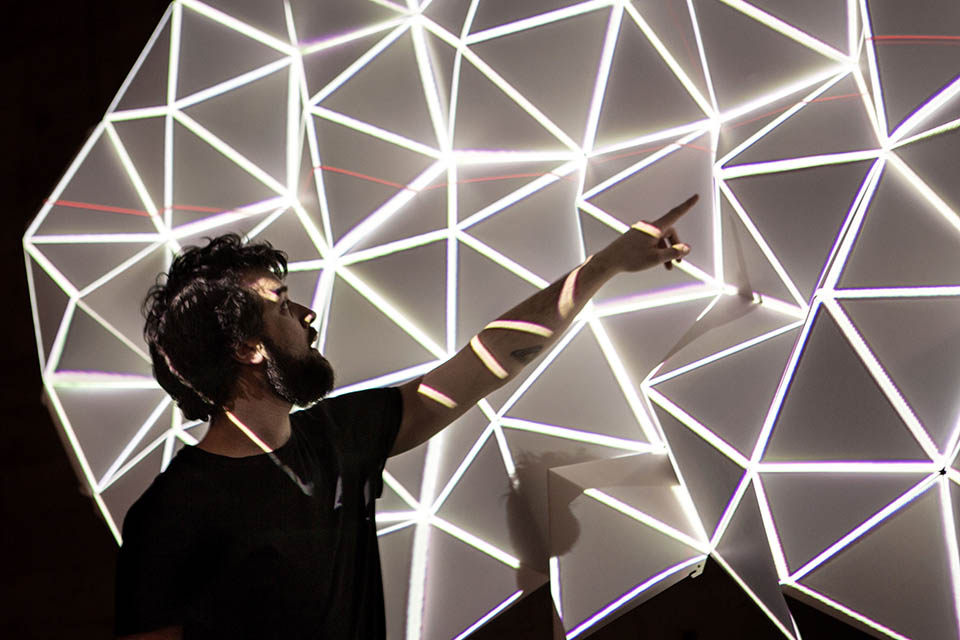
When creating a video mapping, the first step is to decide on the surface you will be projecting on. Follow your imagination: a piece of furniture, an architectural element such as stairs, the facade of your house, a building or other large architectural structure, a stage decor, a board or one of your own creations. Buildings are a common and ideal surface for outdoor projection mapping, and different types of buildings, such as those with glass windows, may require special preparation for effective results. Projection mapping allows for the transformation of common objects into interactive displays. Projection mapping can bring everyday objects to life, like shoes and cars. Some projection mapping projects are designed as permanent installations, customized for specific venues and intended to be long-lasting features. Many projection mapping projects aim to enhance audience engagement and evoke emotions. Projection mapping uses maps to align visuals precisely onto irregular surfaces, ensuring the content fits perfectly. Objects are mapped to fit complex 3D shapes, which enhances the visual impact and creates immersive experiences. For example, projection mapping has been used on shoes, cars, famous landmarks, and in artistic performances—these examples showcase the versatility and creativity of the technology. You can also use our Olga kit. We created this kit which includes several triangles surfaces that were made for video mapping.

2. Positioning your video projector

Your mapping needs to be created under the same conditions as the ones where it’ll be projected and the equipment shouldn’t be moved afterward to make sure there are no shifts or distortions. Projection mapping projects can be created in as short as one week, but they require more time for content creation and planning, especially for new users. The complexity of projection mapping content significantly impacts the overall budget and timeline for a project. Content creation for projection mapping often requires weeks or months of planning and development before execution. High-quality graphics, including motion graphics, video, and 3D animation, are essential for enhancing the immersive experience of projection mapping.

Plan the location of your computer and projector ahead. You might need to lift them. Don’t forget people might walk around your installation and secure all cables. When setting up, use reference materials or guidelines, such as technical specifications or digital models, to ensure proper placement and performance. Understanding your audience size and location is crucial for a projection mapping project. This technique is often used to boost nighttime tourism by creating captivating light and sound shows. Projection mapping can enhance live theatrical performances by transforming sets with immersive visual displays. Companies and organizations often employ projection mapping to deliver captivating promotional events.

Where to position your video projector?

Depending on your projector’s focal length, its zoom, and its projection angle, you can define the maximum and minimum distance between the projector and the wall. Ideally, the video projector should be placed at the center of the zone you wish to cover, and as close as possible to your projection surface so as to maximize luminosity. Choosing the right display surface impacts visual clarity; lighter surfaces work better than darker ones and should ideally support high resolution to maximize visual impact . The ideal projection mapping surface is lighter in color to allow content to shine brightly. High-brightness projectors, like RGB pure laser projectors, are ideal for larger projection mapping projects.

To avoid complicated calculations, we advise you to visit the website called Projector Central. Its guidelines will help you find the best location for your projector. Some software features automated camera-based alignment and recalibration, streamlining the mapping process. When using automated camera-based alignment, it is important to align digital cameras within 3D software to match the projection masks and the projectors’ positions. This ensures that cameras and projectors are precisely aligned for seamless visual mapping. Free versions or trials for projection mapping software are available for personal use. Projection mapping software often features automated camera-based alignment to remove manual setup hours. Show control is also available in many media server software solutions, allowing you to manage playback, timing, and automation for complex projection mapping presentations.

Is your projector positioned well?

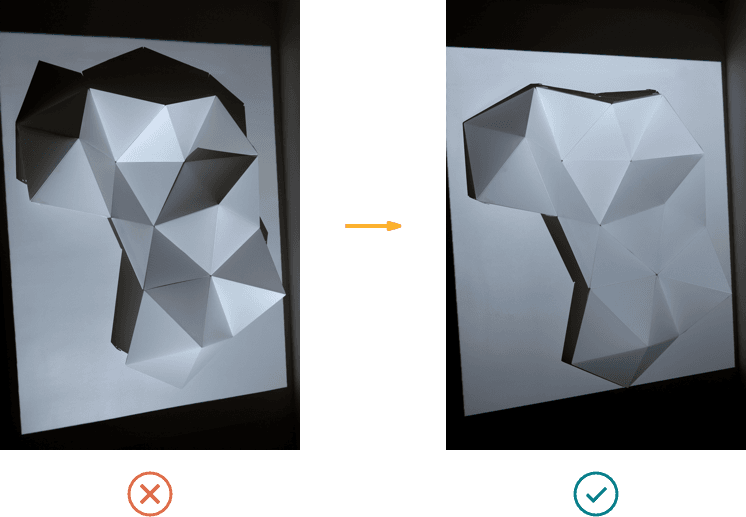
To be sure your projector has been positioned properly, it needs to be on. You can then make sure all pixels are well spread out across your projection surface. They shouldn’t be too distorted. Using projection mapping software can compensate for imperfections in a surface to improve image quality. Projected visuals are carefully aligned with the physical features of the surface to create optical illusions and enhance the environment. Pay attention to other shapes or objects which might hide your projection surface and create shadows. Projections can transform surfaces and environments, creating immersive visual experiences for viewers. Using projection mapping software can simplify tasks like alignment, warping, and blending for multi-projector setups. High-quality visual content is essential to achieve the desired effect and fully utilize the capabilities of projection mapping.

Proper placement of the projector allows avoiding unwanted shadows
position-projector

3. Focusing

Make sure your structure and your projector DO NOT move once you’ve started creating your mapping. For 3D mapping, it is necessary to recreate the scene in specialized software before projecting. Video projection is then used to transform the prepared scene into a dynamic display, allowing digital content to be mapped accurately onto the surface. For more about advances in projection mapping technology, see our dedicated section.

Adjusting the focus will make your projection sharper
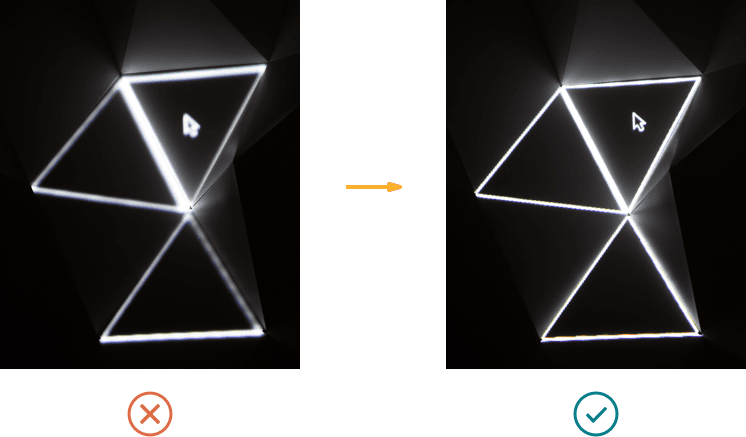
It is crucial to adjust the focus BEFORE you create your mapping. Otherwise, setting the focus would lead to shifting afterward, which means you would have to start over. After focusing, projecting videos onto the prepared surface creates visual illusions and enhances performances, bringing the mapped content to life.

4. Mapping

Make sure your structure and your projector DO NOT move once you’ve started creating your mapping.
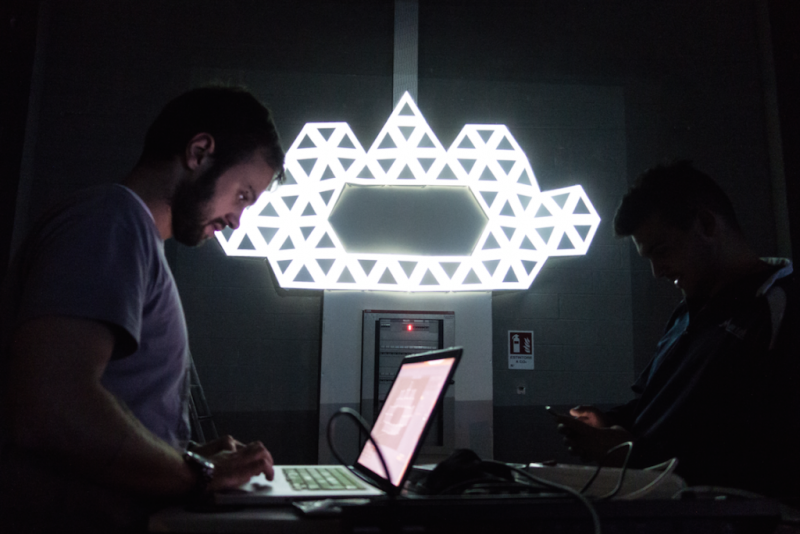
Permanent stage design- Olga and HeavyM

Two things to plan for: sleep mode and your background picture. Set up your computer’s energy settings to make sure your mapping doesn’t stop if your computer goes into energy saving mode. Projection mapping software is designed to be accessible and easy for any user to operate, regardless of technical expertise.

Similarly, pay attention to the background picture. If a window closes, it is better to have a plain black background picture, both to preserve your audience’s eyes and to avoid showing everyone a family picture!

If you are using a Mac computer, there is an additional setting. Under “Preferences” and “Mission Control”, make sure the box “Displays have separate Spaces” is unticked. Otherwise, a menu bar will stick to the top of your projection display.


Within HeavyM

Now, time for FUN! Using HeavyM, place shapes on the whole mapping surface. Each shape must be adjusted depending on the zones you wish to project on. For inspiration, check out these projection mapping examples made by the HeavyM community.


Content Development

Content development is at the heart of creating immersive experiences with projection mapping. The visuals and video content you choose should captivate your audience and complement the unique features of your projection surface. Start by considering the size, shape, and material of your display surface, as these factors will influence how your video clips, images, and 3D models appear when projected.

Use professional tools like Adobe Premiere and other video editing software to craft high-quality video content, and don’t hesitate to incorporate audio elements to enhance the overall effect. For more complex projects, creative agencies can assist with content creation and development, ensuring your visuals are both engaging and technically optimized for projection. The goal is to create optical illusions and dynamic scenes that draw viewers in, making them feel like they’re part of the projection. By focusing on quality and relevance, your content will help transform any physical element into a memorable, immersive experience.

Overcoming Challenges

Every projection mapping project comes with its own set of challenges, but with the right approach, these can be overcome. One of the most common issues is aligning the projected image perfectly with the projection surface, especially when dealing with irregular shapes or multiple projectors. Mapping software offers powerful tools for fine tuning, allowing you to adjust and warp the image until it fits the physical element of surface precisely.

For complex projects that require multiple projectors and edge blending, a solid understanding of the technology and careful planning are essential. Environmental factors like ambient light, sound, and audience movement can also impact the quality of your immersive experience. By anticipating these challenges and using advanced mapping software, you can adapt your setup and content to ensure a seamless and engaging projection. Remember, attention to detail and a willingness to experiment are key to overcoming obstacles and delivering a stunning final result.

Best Practices for Success

To achieve outstanding results in projection mapping, it’s important to follow a set of best practices. Start by clearly defining your project’s objectives and understanding your audience’s expectations. Choose a projection surface that suits your creative vision, considering its size, shape, and material for optimal image quality. When creating visual content, use high-resolution images and videos tailored to the specific surface you’ll be mapping.

Proper calibration and alignment of your projectors are crucial for a seamless, bright projected image. Don’t overlook the importance of sound—well-designed audio can elevate your mapping work and create a truly immersive experience. By focusing on quality at every stage, from planning to execution, you’ll be able to create projection mapping projects that captivate and inspire your audience.

Measuring Success

Evaluating the success of your projection mapping project involves more than just technical performance—it’s about the impact on your audience and the achievement of your goals. Use technology and tools like surveys, social media analytics, and direct feedback to connect with your audience and gauge engagement and satisfaction. Track key metrics such as the number of viewers, duration of the experience, and levels of interaction to assess the reach and effectiveness of your mapping work.

For a deeper understanding, consider qualitative methods like interviews or observational studies to measure how your projection mapping influenced emotions and perceptions. By combining these approaches, you can gain valuable insights into the quality and impact of your projects, helping you refine your techniques and create even more compelling immersive experiences in the future.

To be continued

Learn more about projectors

We have created a detailed guide to choosing the right projector for your needs. Discover our tips and mistakes to avoid in this guide that explains the different features step by step.

Explore the HeavyM software

HeavyM is a video mapping software that is capable of generating visual effects and projecting them on volumes, decorations or architectural elements. HeavyM is Mac and Windows compatible.

en_USEN

A gift for you!

00 Hours
00 Mins
00 Secs

Create your account and download 20 video loops for free