Introduction to the HeavyM shaders to create your own VFX
Introduction
You’re interested in creating your own visual effects in HeavyM? In this article, we will introduce the exciting creative possibilities offered by the shaders. By the way, what is a shader?
A shader is a computer program that runs on your computer’s graphics card. It allows you to quickly manipulate the data that is displayed on your screen or your video projector: the pixels.
It is a little-known technology because considered abstract, but shaders are very much present in our daily lives. These small computer programs realistically simulate complex visual effects such as rain, fog, light reflection, object relief, etc. They are therefore widely used in video games, films requiring special effects, TV sets… and in digital art, the field that we focus on here.
In the HeavyM software, the built-in shaders offer many possibilities. It is also possible to import your own shaders, thus increasing endlessly the number of combinations!
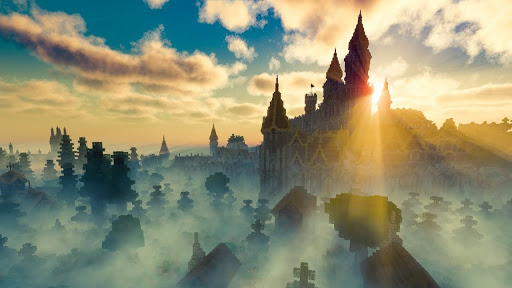
Example of a video game using shaders: Minecraft
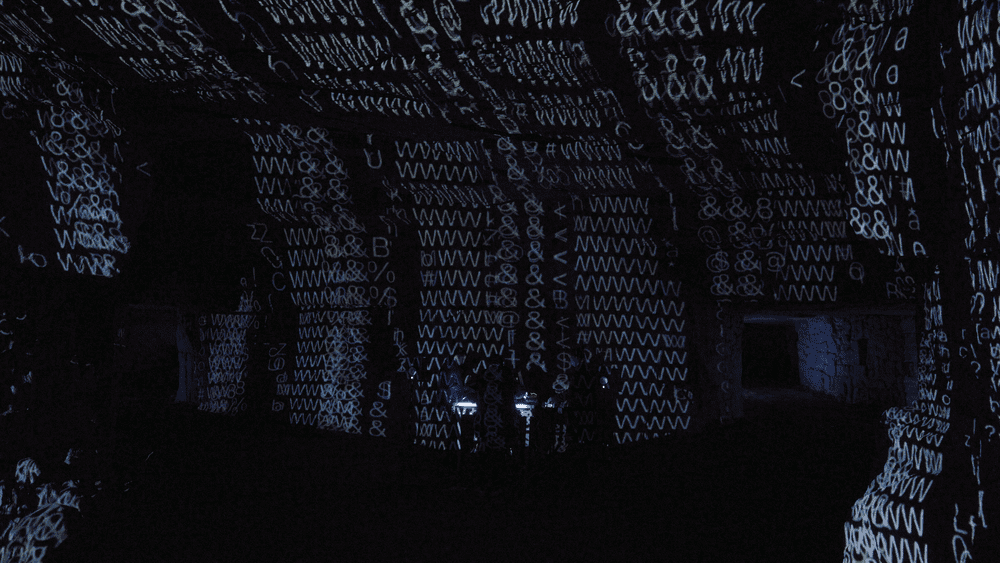
Example of a shader using during a projection mapping performance
Part 1: Shader technology
To better understand the idea of shaders, let’s take as an example the creation of a drawing by hand. It is necessary to draw one by one the elements that compose it. You would start with geometric shapes such as circles, rectangles and lines and then add colors. You would proceed step by step as if you had to copy the drawing manually. With shaders, the process is much faster because all of these operations are performed at once, like a stamp applied to your sheet of paper with a single gesture. What’s even better is that this stamp can change depending on the information given, such as the time, the position or the colors of elements already present on your sheet.
Why are shaders fast?
Shaders are very light programs because, unlike softwares such as HeavyM, which contain several hundred thousand lines of code, a shader generally contains only a few hundred lines at most. Shaders’ speed is mainly due to the architecture of the hardware that allows them to run: the graphics card. In order to use HeavyM, you surely had to pay attention to this matter as it allows you to multiply the possibilities offered by the software.
As opposed to your computer’s CPU, which processes tasks one after the other, your graphics card’s calculations are done in parallel. Instead of having a single processor with significant computing power, the graphics card has a multitude of small processors. This means that they can perform tasks simultaneously. By relying on this parallelization, shaders can perform complex graphic calculations in a few milliseconds.
The advantage of shaders: interactive art
Thanks to the speed of execution of shaders, it is possible to create images in real time, i.e. they are generated at the moment they are seen. The term real time is used in contrast to the term precomputed, which applies to a video file that is rendered frame by frame. Rendering calculations can be very time consuming and can take up to several days! With shaders, you can directly manipulate the images, just like in a video game. Interactive digital art relies on this real-time principle because it allows you to generate visuals that react to music or people’s movements. To see two examples of performance mixing music and visuals, take a look at the work of Weirdcore for Aphew Twin’s concerts or Nonotak’s performances.
Types of shaders
Shaders are nothing more than text files with a particular extension. We will see that there are different types of shaders. The common factor is that they are coded in the GLSL language: OpenGL Shading Language. There are other types of shaders depending on the platform and the hardware but here we will focus on OpenGL based shaders. To use shaders in HeavyM, a graphics card supporting OpenGL 2.0 is required.
Pixel shaders or Fragment shaders
The fragment shader or pixel shader is a shader whose purpose is to calculate the color of each pixel individually. It takes as input the data of each pixel of the image (position, texture coordinates, color) and outputs its color.
It is these shaders that you will be interested in using with HeavyM. They are usually .FRAG files, or .FS files in the case of the ISF format. The ISF format provides a standard for GLSL shader fragments, so that they can be more easily interpreted by interactive applications.
Vertex shaders
Vertex shaders are used to transform the input peaks into pixels.
It is a .VS file sometimes accompanying the pixel shader, having the same name and being located in the same folder.
Where to find shaders?
You don’t need to know programming to use shaders with HeavyM. In addition to the built-in library existing in the software, platforms exist to find new shaders without having to create them yourself. The community of shader artists is growing and you can often freely use the works they share.
To find .FS: https://www.interactiveshaderformat.com/
To find .FRAG: http://glslsandbox.com/ and https://www.shadertoy.com/
Warning: .FRAG are not supported in HeavyM. It is necessary to convert them to .ISF and we provide a method below to do so.
Be sure to check the rights of use in the license usually specified at the beginning of the shader code. If there is no particular indication, the copyright applies by default and we strongly advise you to discuss with the author of the program if you wish to make commercial use of it.
Develop your own shaders
To create your own shaders, we advise you to use the ISF format directly so that they are compatible with a maximum of applications. The purpose of this article is not to provide a learning of GLSL code, the language used by the ISF format. For that we suggest reading the very comprehensive sites :
- https://thebookofshaders.com/ for the GLSL language
- https://docs.isf.video/ for the ISF format
However, to get started, feel free to go to the ISF site and modify existing shaders. This interactive site allows you to visualize live the modifications made to the shader. It is also possible to start from a basic template.
The main disadvantage of creating and editing shaders is that there is no error feedback. When there is a design problem, the shader does not run or display anything. It is then difficult to find the source of the error. It is therefore necessary to be rigorous in the code.
Part 2: Shaders in HeavyM
HeavyM software offers a few hundred native shaders in its built-in visual effects library. Several types of effects can be used in the software, depending on the features used.
Effects shaders on shapes
When you click on the red icons on the right side of the interface, you have access to categories of effects that automatically adapt to the drawn shapes. These effects are linked to the groups in the layers panel on the left. All shapes in a group have the same appearance. To have different effects for different shapes, it is necessary to create other groups and add shapes to them.

It is currently not possible to add or modify existing effects shaders on this category.
Image generating shaders
Add image generating shaders as sources, in the panel accessible through the white icon located in the vertical toolbar on the right. These shaders require the creation of a player in order to be displayed. Link the source to the player by clicking on the target icon. The image generating shaders do not have a default duration because it is a program that runs in a loop. However, you can change the display duration of the source.
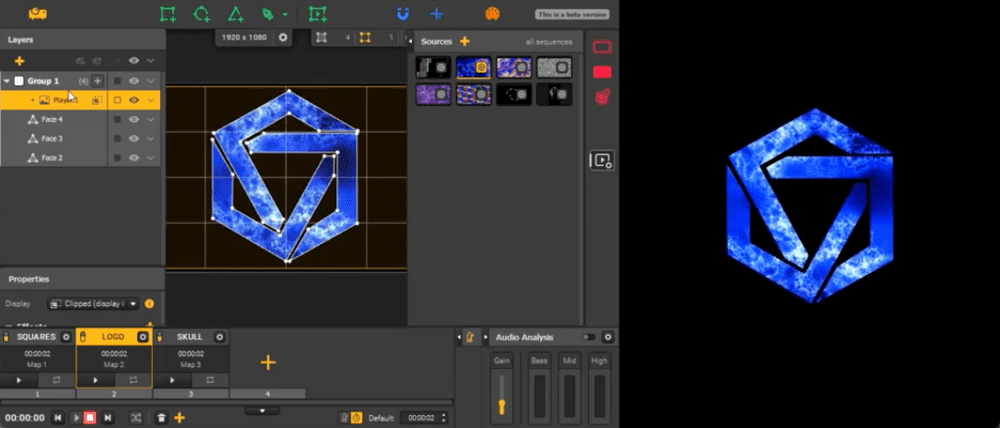
Processing shaders on players
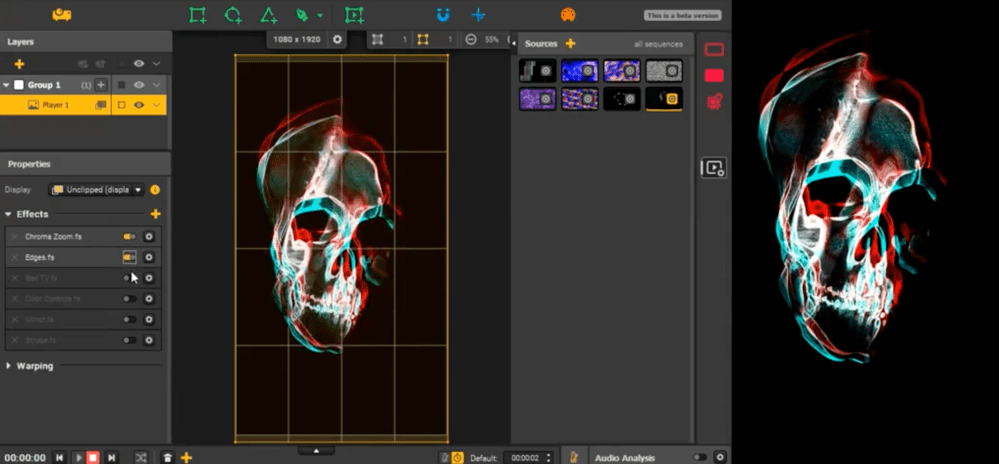
You can apply image processing effects to the player. To do this, select the player and add effects in the Properties at the bottom left using the + button. The effects are added one after the other. Each player is independent so the source and processing effects will be different between players, even if the players are in the same group.
Processing shaders on sequences
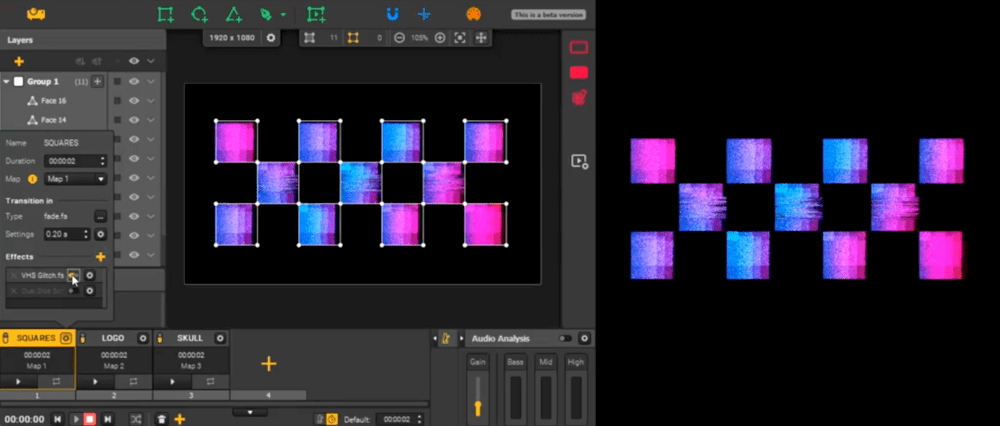
Image processing shaders can also be applied to the entire video output. These effects are relative to the sequences. To add a processing effect to a sequence, click on the cogwheel and add a shader using the + button. The processing effects on sequences are the same as the processing effects on players.
Transition shaders on sequences
Transitions are also sequence-related and are applied to the entire video output. By default, the transition applied is a 0.20s fade. Modify this transition in the menu accessible by clicking on the sequence’s cogwheel. Transitions are only applied to the input of the sequence.
Import shaders
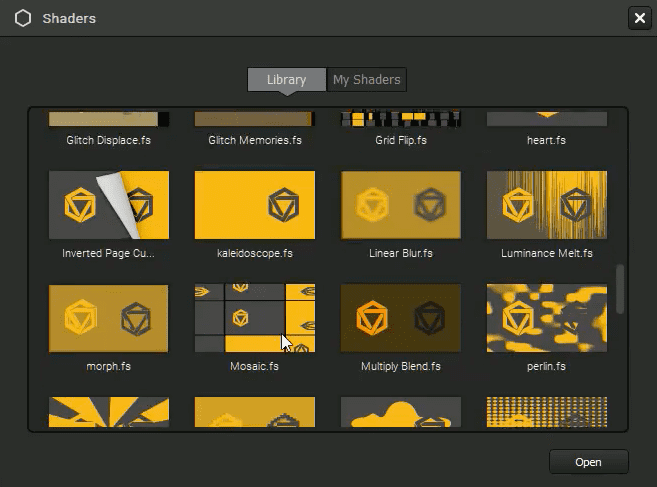
We have seen that there are two main categories of shaders in HeavyM: generating shaders and processing shaders. HeavyM makes it easy to combine shaders from these two categories. HeavyM provides default shaders in the Library tabs of each shader selection window. All these shaders are .FS and therefore comply with the ISF standard. In order to import your own shaders in the My Shaders tab, it is necessary to respect this standard. In this way, the parameters of your shaders can be easily modified with the interface of HeavyM.
Do you want to import other shader formats into HeavyM? It is very easy to convert shaders using this tool: Desktop ISF Editor (Windows beta/Mac) with “Import from GLSL Sandbox” and “Import from Shadertoy” functions.
Finally, if you want to understand the architecture of the ISF format in detail in order to create your own, we advise you to have a look at the ISF format documentation: https://docs.isf.video/
Part 3: controlling shaders
Shaders allow for real-time visual effects that can be modified live, without having to go through a rendering stage. Here are the different possibilities to control your effects and create interactive visuals.
The shader parameters can be modified by clicking on the cogwheel of the source icon. The value scale is normalized between 0 and 100 and does not correspond to a particular unit. Different modes of variation of the parameters are offered in HeavyM, find them by clicking on the arrow next to each shader parameter.
The Fixed Value mode
This is the default mode that allows you to change the value with the mouse. The disadvantage is that you can only change one parameter at a time. You can also enter a value with the keyboard.
The value generators
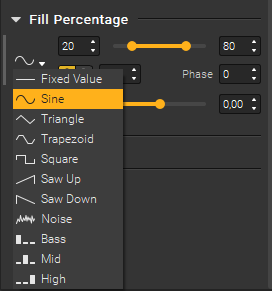
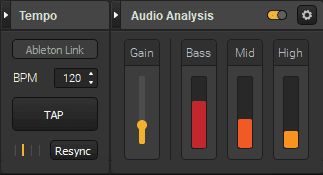
HeavyM offers 7 value generators that allow you to automatically modify the parameters of the shaders. These are LFO (Low Frequency Oscillator) type generators, like those found in music softwares or synthesizers. For each generator, there are two animation modes: BPM or temporal. The BPM mode is linked to the general Tempo at the bottom right of the interface, symbolized by the metronome icon. The temporal mode allows you to define a frequency independent of the general Tempo.
Control through sound analysis
At the bottom right of the interface is the sound analysis module. It allows detecting amplitude variations on 3 different frequency ranges: Bass Mid High. You can find the variations of these values in the variation modes of the shader parameters.
MIDI control
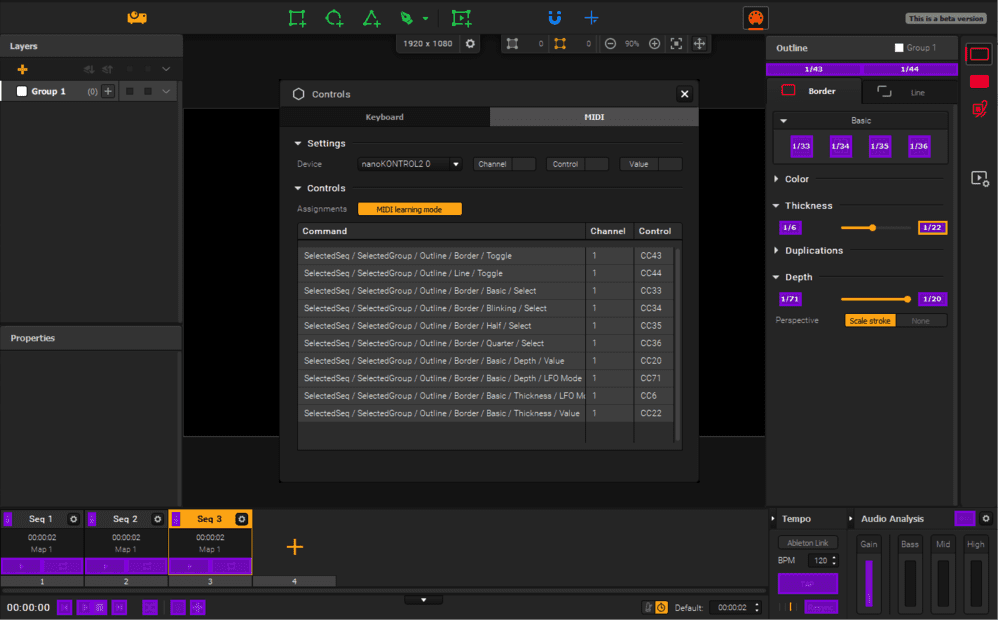
You wish to manually control several parameters at the same time? Use the MIDI protocol. There are a lot of MIDI controllers for music on the market. They are all compatible with HeavyM. Connect your hardware in the configuration window, accessible through the orange icon in the upper right corner of the interface. Then, the MIDI learning mode allows you to configure the link between the shader parameters and the keys of your hardware.
Conclusion
The creative possibilities offered by shaders are infinite. These programs allow you to harness the power of your graphics card with just a few clicks. Your computer gives you easy access to generative art, which consists of creating works from algorithms. Many digital artists use this technique, for example Antoine Schmidt, Miguel Chevalier, Vera Molnár, Du Zhenjun, Daniel Rozin…
With HeavyM, we saw that it is very easy to use and control shaders. Combine them limitlessly to create your own visuals and your own identity!

