

Concepts graphiques : format d'image, résolution, calques, codecs
En bref
Pour créer un vidéo mapping irréprochable, vous devez maîtriser certains concepts graphiques essentiels. La résolution et le format d'image déterminent la netteté et la forme physique de votre image. Les calques vous aident à organiser votre composition visuelle, tandis que le choix du codec vidéo approprié (comme H.264 ou HAP) garantit une lecture fluide et sans saccades dans un logiciel de vidéo mapping tel que HeavyM.
Format d'image et résolution
Rapport d'aspect, également appelé « format d'image », est un terme utilisé dans le domaine du cinéma et de la vidéo pour désigner le rapport entre la largeur et la hauteur d'une image. Il est généralement exprimé par deux chiffres séparés par deux points ou une barre oblique, comme 4:3 ou 16:9. Par exemple, un format d'image de 16:9 signifie que pour 16 unités de largeur, l'image mesure 9 unités de hauteur.
Ce format d'image est étroitement lié à la résolution d'un écran ou d'une vidéo. La résolution correspond au nombre total de pixels qui composent une image ; elle est généralement exprimée par la combinaison de la largeur et de la hauteur en pixels. Par exemple, Une résolution de 1920 × 1080 signifie que l'image comporte 1920 pixels de largeur et 1080 pixels de hauteur.
Le lien entre le format d'image et la résolution réside dans le fait que le format détermine la forme de l'image, tandis que la résolution détermine le niveau de détail de l'image. Par exemple, deux vidéos peuvent avoir la même résolution, mais si l'une présente un format d'image de 16:9 et l'autre de 4:3, elles auront des formes différentes. La vidéo au format 16:9 sera plus large et plus courte que celle au format 4:3, bien qu’elles aient le même nombre total de pixels. De plus, Le choix du format d'image et de la résolution peut avoir un impact significatif sur l'aspect et la qualité de la vidéo. lorsqu'elles s'affichent sur différents types d'écrans.
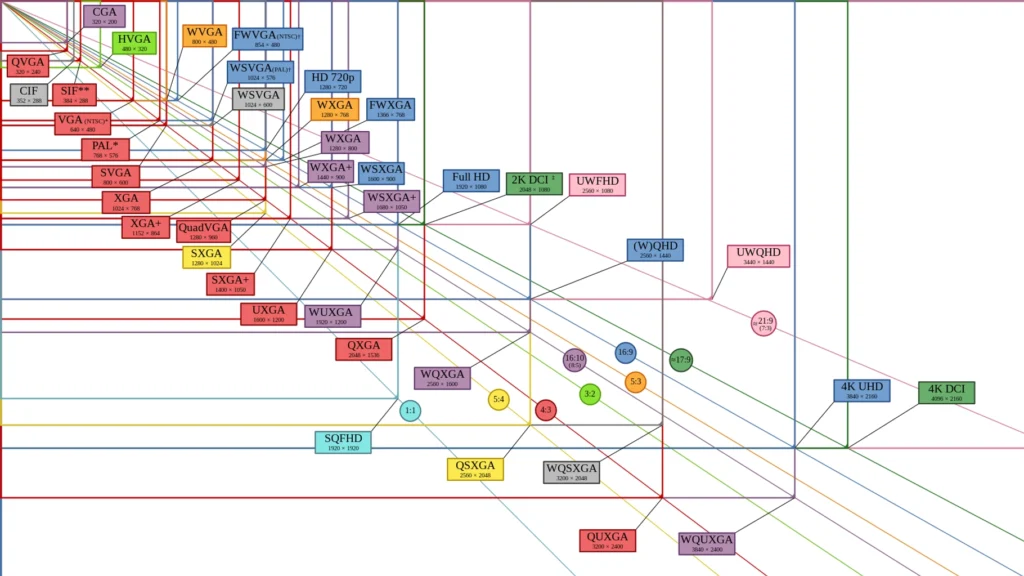
Plus la résolution est élevée, plus l'image projetée sera détaillée.
Les résolutions couramment utilisées pour le vidéo mapping sont notamment la HD 720p (1280×720), la Full HD 1080p (1920×1080) et la 4K UHD (4096×2160). Le choix de la résolution dépendra du niveau de détail souhaité pour le projet, de la taille de la surface de projection, ainsi que des capacités du projecteur et du logiciel de vidéo mapping utilisés.
La résolution HD offre une bonne qualité d'image et est généralement suffisante pour les projets de petite à moyenne envergure. Toutefois, pour les projets plus importants ou plus complexes nécessitant un niveau de détail plus élevé, il est possible d'utiliser la résolution 4K.
Il est important de Notez que plus la résolution est élevée, plus la charge de traitement imposée à l'ordinateur est importante, un logiciel de vidéo mapping et un projecteur. De plus, une résolution plus élevée nécessite également davantage d'espace de stockage pour les fichiers vidéo.
Calques, opacité, modes de fusion
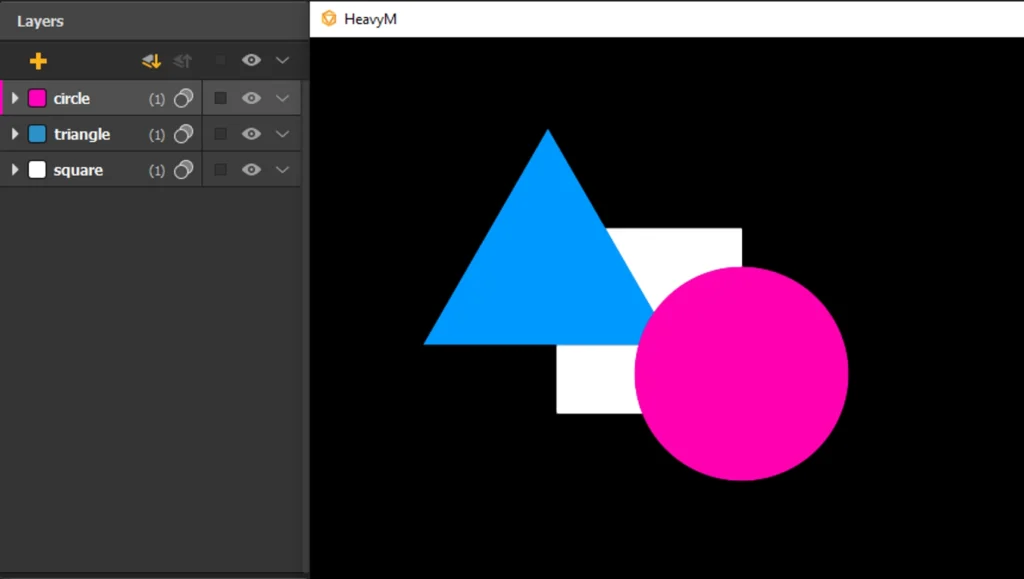
Les logiciels de graphisme utilisent un système de calques, également appelés ‘ layers ’ en anglais, qui fonctionnent de manière similaire au papier calque utilisé dans le dessin traditionnel. Chaque calque peut contenir différents éléments graphiques, tels que du texte, des images, des formes, etc. Ces couches sont superposées les unes sur les autres, la première se trouvant en bas et les autres s'empilant au-dessus.
L'opacité, en revanche, fait référence à la transparence d'un calque. Un calque dont l'opacité est réglée sur 100% est totalement opaque et masque tous les calques situés en dessous, tandis qu'un calque dont l'opacité est inférieure laisse transparaître les calques sous-jacents à des degrés divers. En ajustant l'opacité d'un calque, les utilisateurs peuvent créer des effets de superposition et de fusion afin d'obtenir des résultats visuels plus complexes et plus nuancés.
En jouant sur les calques et l'opacité, les graphistes peuvent organiser, modifier et combiner différents éléments graphiques de manière flexible sans altérer les données d'origine. Cela permet une plus grande créativité et facilite la modification des créations, car chaque élément peut être modifié individuellement sans affecter les autres.
La hiérarchie dans le panneau « Calques » obéit à une règle simple : par exemple, dans le canevas HeavyM, Les éléments situés en haut de la liste des calques s'affichent devant ceux situés en bas. Lorsque vous ajoutez une forme, celle-ci recouvre les formes situées derrière elle ; par défaut, vous ne verrez donc à travers que si l'objet situé au-dessus présente une certaine transparence.
Modes de fusion
Vous avez peut-être déjà entendu parler de Modes de fusion car on les retrouve assez couramment dans les logiciels de dessin ou de retouche numérique. Les Mode de fusion Les propriétés d'un calque déterminent la manière dont il est fusionné avec les calques situés en dessous.
Les modes de fusion sont essentiellement un ensemble de formules qui prennent en compte chaque pixel du calque auquel le mode est appliqué et chaque pixel situé directement en dessous, appliquer des opérations mathématiques et obtenir un résultat. Chaque mode utilise une formule différente, C'est pourquoi vous obtenez un mélange différent à chaque fois. Nous n'allons pas entrer dans les détails des formules, car cela prendrait probablement une année entière, mais vous trouverez de nombreuses ressources en ligne si le sujet vous intéresse.
Dans HeavyM, les modes de fusion s'appliquent aux groupes. Le “ Normal ” Ce mode est le mode par défaut, comme décrit et illustré dans l'introduction ci-dessus : chaque groupe masque les groupes situés derrière lui.
Comment utiliser les modes de fusion dans HeavyM
Dans HeavyM, il existe 26 modes de fusion. Pour modifier le mode appliqué à un groupe, utilisez son menu déroulant dans le panneau « Calques », accessible via ce bouton
et il vous suffit de choisir celui qui vous intéresse dans la liste. En passant la souris sur les éléments de la liste, vous pouvez prévisualiser l'effet de chaque mode sur le résultat final.
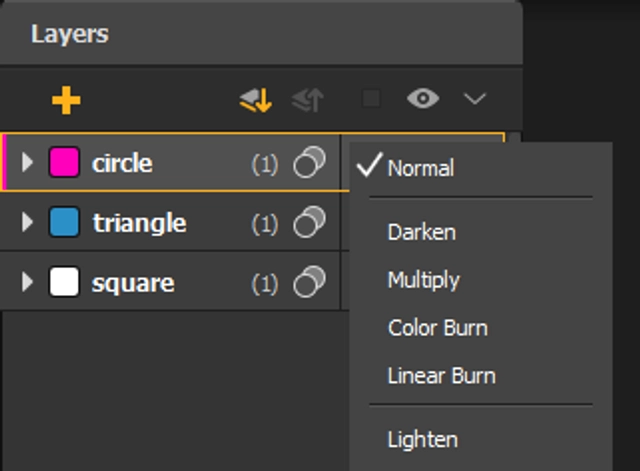
Dès que vous cliquez sur un mode, celui-ci est appliqué et vous pouvez voir immédiatement le résultat du mélange. N'oubliez pas qu'un mode de fusion doit être appliqué à un calque supérieur. Et bien sûr, chaque groupe peut avoir son propre mode, ce qui vous permet de les combiner pour créer des compositions très complexes.
Remarque :
Le bouton « Modes de fusion » présente deux états :
- si le ‘Normal‘Le mode « » est activé
- si un autre mode est utilisé.
Les différents types de modes de fusion
Comme indiqué précédemment, il y a une liste de 26 modes de fusion, chacune ayant une formule différente. Selon les ingrédients que vous mélangez, elles donneront des résultats très variés, et leurs noms ne sont pas toujours très explicites ; il peut donc être difficile de prévoir le résultat au départ. La meilleure façon de les découvrir est de Essayez-les vous-même !
Il y a toutefois un aspect qui pourrait s'avérer utile : la manière dont les modes sont organisés. Vous avez peut-être remarqué qu'ils sont classés par catégories dans la liste. En effet, certains modes présentent des similitudes dans leur fonctionnement :
- Modes neutres (Normal): Nous en avons déjà parlé ; il s'agit d'un mode à part entière, qui est le mode par défaut.
- Modes de fonçage (Assombrir, Multiplier, Brûler en couleur, Brûler linéaire): Comme vous pouvez vous en douter, ces opérations consistent à assombrir le résultat. Elles suppriment le blanc dans les groupes où elles sont appliquées.
- Modes d'éclairage (Éclaircir, Écran, Révéler, Révéler linéaire (addition)): Comme vous pouvez vous en douter, ces effets servent à éclaircir l'image. Ils suppriment le noir dans les zones où ils sont appliqués.
- Modes de contraste (Superposition, Lumière douce, Lumière forte, Lumière vive, Lumière linéaire, Lumière ponctuelle, Mélange fort): Ces deux effets assombrissent et éclaircissent à la fois, ce qui crée un fort contraste.
- Modes d'inversion ou de comparaison (Différence, Exclusion, Soustraction, Division, Inversion, Inversion RVB): Ces exercices jouent sur les similitudes ou les différences entre les groupes de mélange et les groupes de base. Essayez-les et voyez ce qui se passe.
- Modes de coloration (teinte, saturation, couleur, luminosité): Celles-ci agissent sur différentes propriétés de la couleur, comme leur nom l'indique.
Exemples de modes de fusion
Multiplier
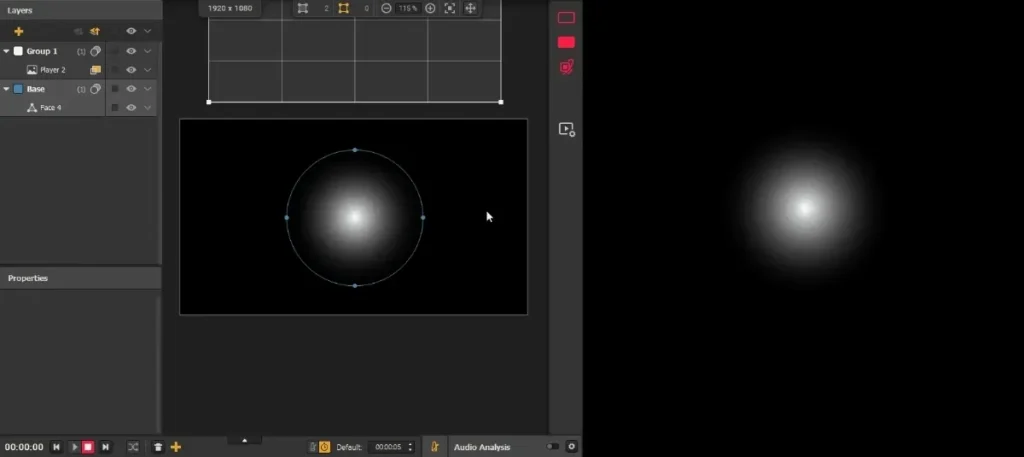
Remarque : multiplier est assez couramment utilisé. Comme on l'a vu plus haut, une application intéressante dans HeavyM consiste à placer une texture dans un groupe avec le mode « Multiply » et, dans un groupe de base situé en dessous, à ajouter des effets blancs sur des formes. Le résultat donnera l'impression que la texture est imprimée sur les effets !
Écran
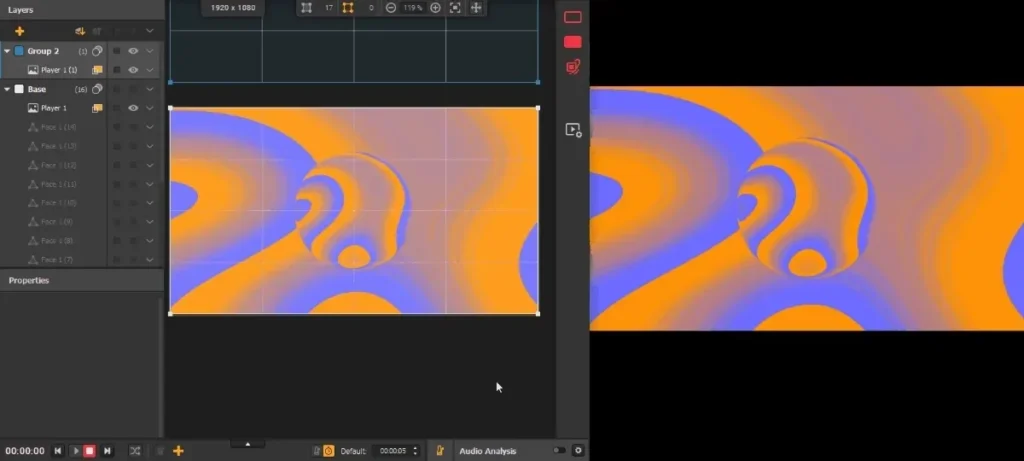
Superposition
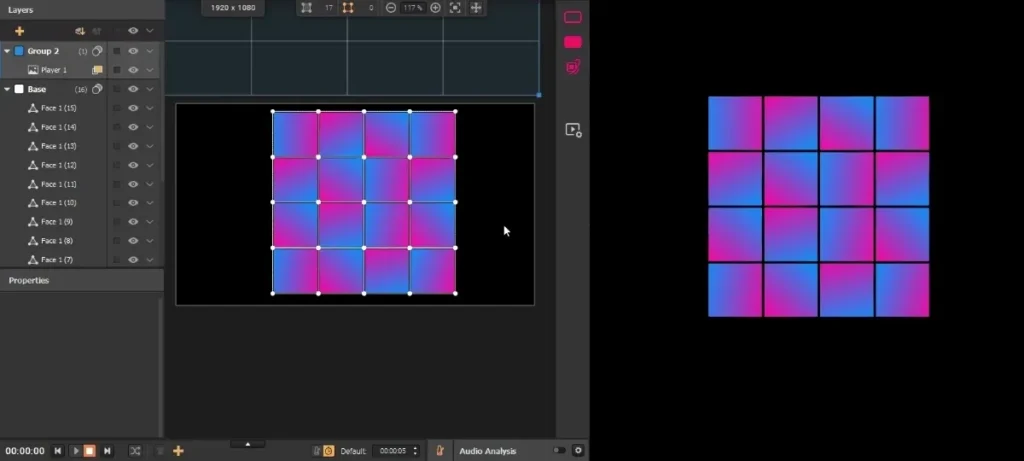
Exclusion
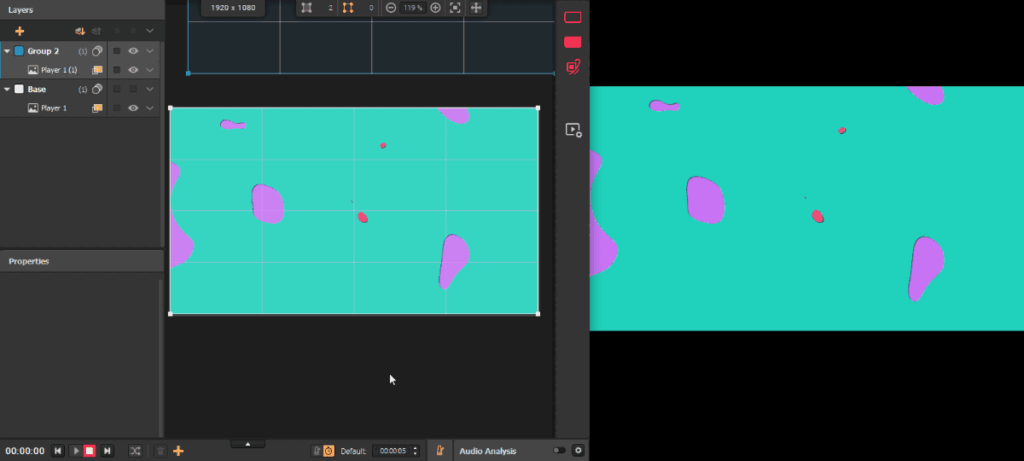
Compression
La compression vidéo est un processus qui permet de réduire la quantité de données nécessaires au stockage ou à la transmission d'images numériques, ce qui s'avère particulièrement utile pour les vidéos contenant un volume important de données. Cela s'effectue généralement en éliminant les informations redondantes ou moins importantes présentes dans les images. Par exemple, dans une scène où le ciel est bleu, au lieu de stocker l'information indiquant que chaque pixel du ciel est bleu, le compresseur peut simplement stocker l'information selon laquelle une grande partie de l'image présente la même nuance de bleu.
La décompression est le processus inverse, où les données compressées sont converties en une vidéo lisible. C'est ce qui se passe lorsque vous regardez une vidéo en streaming ou que vous ouvrez un fichier vidéo sur votre ordinateur.
Un codec, qui est un mot-valise terme formé à partir de ‘ codeur ’ et ‘ décodeur ’,’ Il s'agit du logiciel ou du matériel qui effectue ces opérations de compression et de décompression. Il existe de nombreux codecs, chacun présentant ses propres avantages et inconvénients. Par exemple, Le codec H.264 est très répandu pour le streaming et la vidéo HD, grâce à sa capacité à offrir des images de haute qualité tout en conservant des fichiers relativement légers. On peut également citer le codec ProRes d’Apple, souvent utilisé en post-production vidéo pour sa grande qualité et sa facilité d’utilisation avec les logiciels de montage vidéo d’Apple. En contrepartie, plus la taille d'un fichier est réduite, plus cela demande d'efforts à l'ordinateur et donc davantage de ressources à décoder.
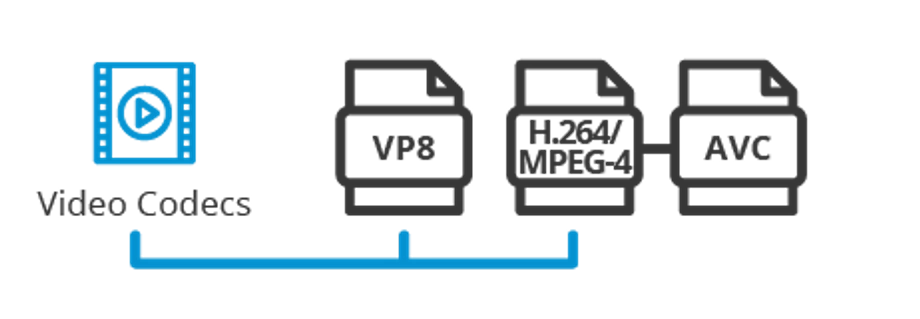
Si vous utilisez des vidéos dans vos projets HeavyM et que vous souhaitez optimiser leur lecture, essayez de réduire leur résolution et leur débit binaire, puis d'augmenter le taux de compression jusqu'à ce que vous trouviez un bon compromis entre qualité et performances. Nous vous recommandons également à l'aide de fichiers .mov/H264 (ou HAP Alpha ou ProRes 4444 (si vous avez besoin de transparence). Vous pouvez également activer l'accélération matérielle pour le décodage vidéo. Cela améliore les performances et réduit la latence, mais peut entraîner des erreurs de rendu avec certaines vidéos ou configurations. Vous pouvez activer cette option pour chaque vidéo individuellement dans ses paramètres multimédia, ou modifier l'option par défaut pour toutes les vidéos ajoutées dans Préférences → Affichage → Décodage vidéo.
Si vous constatez un ralentissement à la fin des vidéos, juste avant qu'elles ne recommencent, vous pouvez utiliser la PhotoJPEG / MotionJPEG codec pour contourner le problème. L'inconvénient est que les fichiers sont plus volumineux et ne prennent pas en charge la transparence dans ce cas. Un outil de conversion simple sous macOS est Exportateur par lots AVF par le VIDVOX équipe. Sous Windows, vous pouvez utiliser MPEG Streamclip.
Pour continuer
Ce guide a été rédigé par HeavyM, une entreprise spécialisée dans le vidéo mapping depuis 2013.
Pour toute question, remarque, suggestion, etc., merci d'utiliser ce formulaire de contact : https://help.heavym.net/hc/requests/new. Réponse garantie dans les 24 heures.
Foire aux questions (FAQ)
Quel est le meilleur codec vidéo pour le vidéo mapping ?
Pour la plupart des projets classiques, le format H.264 (MP4) offre un excellent compromis entre qualité visuelle et taille de fichier. Toutefois, pour les configurations très complexes impliquant la lecture simultanée de plusieurs vidéos 4K, il est recommandé d’utiliser des codecs professionnels tels que HAP ou DXV, car ceux-ci exploitent le processeur graphique (GPU) de l’ordinateur pour la lecture, garantissant ainsi une lecture sans décalage.
Quelle est la différence entre le format d'image et la résolution ?
La résolution correspond au nombre exact de pixels de votre image (par exemple, 1920 × 1080 pixels). Rapport d'aspect Il s'agit du rapport proportionnel entre la largeur et la hauteur de cette image (par exemple, 16:9). Vous devez faire correspondre le format d'image de votre contenu à la résolution native de votre projecteur afin d'éviter toute distorsion de l'image.
Pourquoi les calques sont-ils importants dans le vidéo mapping ?
Les calques vous permettent d'empiler et d'organiser différents éléments visuels de manière indépendante. Dans un logiciel de vidéo mapping tel que HeavyM, vous pouvez utiliser les calques inférieurs pour vos vidéos d'arrière-plan principales, les calques intermédiaires pour des animations spécifiques et les calques supérieurs pour des masques ou des coupures d'écran, ce qui vous offre un contrôle total sur la composition finale.