

Configuração do local para vídeo-mapping: pontos a ter em conta e definições
Resumo
A preparação de um espaço para vídeo-mapping requer uma análise cuidadosa do local. Os principais aspetos a ter em conta incluem a gestão da luz ambiente, a escolha de superfícies de projeção mate e a garantia do fornecimento de energia elétrica. Ao verificar primeiro estas condições físicas e ao utilizar software de mapping intuitivo, como o HeavyM, garante-se uma experiência visual impecável e de elevado contraste.
Condições de iluminação
Ao criar um projeto de video mapping, a gestão da iluminação é fundamental para obter resultados impressionantes. A escuridão do ambiente de projeção tem um impacto direto na visibilidade e na vivacidade das projeções. É importante controlar a luz ambiente, pois o excesso de luz pode diminuir o impacto visual da projeção. Idealmente, deve procurar criar um ambiente o mais escuro possível para aumentar o contraste entre a projeção e o fundo. No entanto, o nível de escuridão necessário dependerá do brilho do seu projetor. Um projetor mais brilhante pode funcionar eficazmente em condições de maior luminosidade, mas é sempre melhor minimizar a luz ambiente tanto quanto possível. Lembre-se de que o seu objetivo é fazer com que a sua projeção se destaque, e não que se perca num ambiente excessivamente claro.
Como lidar com as luzes já existentes
Por vezes, terá de lidar com luzes periféricas indesejadas, como iluminação pública ou letreiros luminosos. Nestes casos, existem várias estratégias que pode adotar. Pode tentar bloquear ou desviar essas luzes utilizando biombos, cortinas ou outros objetos. Em alternativa, pode integre estas fontes de luz na sua projeção, utilizando-as para conferir profundidade ou contraste ao seu trabalho.
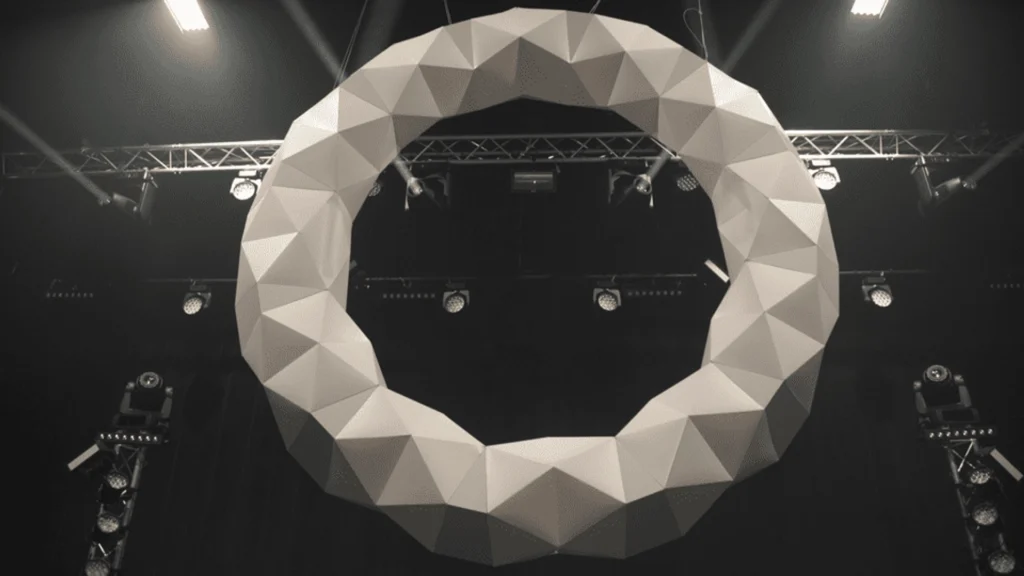
Durante uma atuação em palco, como um concerto, a iluminação pode representar um desafio único para o video mapping. A iluminação do palco é frequentemente dinâmica, que muda constantemente consoante o ambiente da atuação, o que pode interferir com a visibilidade das suas projeções. Além disso, o equipamento de iluminação do palco, como holofotes e projetores, pode projetar sombras visíveis na superfície de projeção, prejudicando o efeito do seu video mapping.
Para fazer face a estes desafios, uma solução poderia ser para integrar o projeto de iluminação no seu vídeo mapping. Ao trabalhar em estreita colaboração com a equipa de iluminação, pode coordenar as alterações de iluminação com as suas projeções para criar um espetáculo visualmente harmonioso. Por exemplo, pode programar momentos de iluminação reduzida para destacar as partes mais importantes da sua projeção.
Além disso, A utilização de projetores de alto brilho pode ajudar a contrariar os efeitos da iluminação do palco. Estes projetores são capazes de exibir imagens visíveis mesmo em condições de iluminação menos do que ideais.
Configurar uma cena de video mapping
O posicionamento do projetor
A configuração de um projetor para vídeo-mapping requer uma atenção especial a vários fatores essenciais.
- Em primeiro lugar, a localização do projetor é fundamental. Deve ser posicionado de forma a cobrir toda a área que pretende iluminar. É importante garantir que o projetor esteja estável e que não haja obstruções que possam bloquear a luz.
- Em seguida, terá de ajustar o ângulo de projeção e o zoom do projetor para garantir que a imagem cubra adequadamente a área. Isto pode exigir várias tentativas e ajustes para acertar as configurações. É também fundamental ajustar a focagem do projetor para que a imagem fique nítida em toda a superfície.
- É importante referir que A instalação de um projetor para vídeo-mapping pode exigir competências técnicas e experiência em video mapping. Se quiser saber mais sobre como configurar projetores para video mapping, talvez lhe seja útil consultar a nossa secção dedicada aos projetores de vídeo.
- É essencial verificar a posição do projetor antes de desenhar as formas. Se deslocar o projetor depois de desenhar os elementos, terá de refazer quase toda a configuração do video mapping.
Desenhar as formas
É importante que definir com precisão a(s) área(s) de projeção dos seus elementos visuais e adaptá-los à superfície na qual está a projetar o seu mapeamento.
No Software HeavyM, concebido para uma utilização rápida por utilizadores não especializados, ferramentas de desenho simples, mas precisas, permitem-lhe realizar este passo. As faces são as formas geométricas que irá utilizar para delinear o seu mapeamento e onde, posteriormente, irá integrar efeitos visuais.
O software inclui formas predefinidas, ou pode desenhá-los ponto a ponto.
Pode seguir o tutorial em vídeo abaixo ou as instruções passo a passo que se seguem.
Criação de rostos
Faces predefinidas
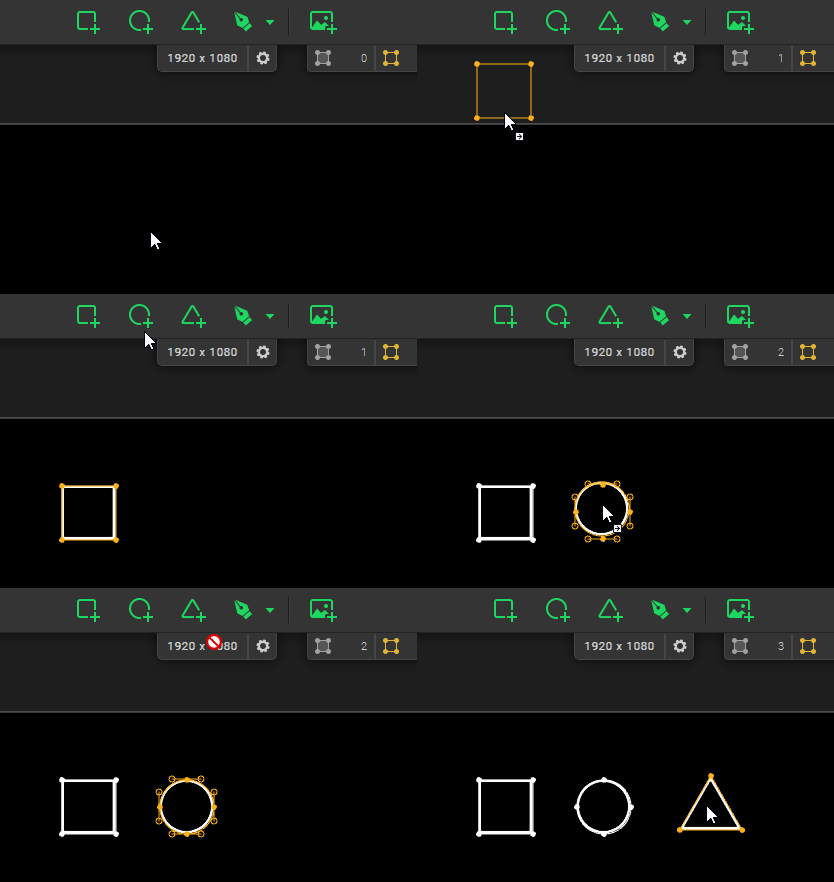
Para simplificar o seu trabalho, caso necessite apenas de formas básicas, pode utilizar figuras pré-definidas. Pode adicionar um quadrado, um triângulo ou um círculo arrastando-os a partir da barra de ferramentas situada acima da área de trabalho. A partir da área de desenho, também pode adicionar polígonos regulares com 5 a 10 lados através do menu de contexto.
Faces personalizadas
Para desenhar um rosto ponto a ponto, deve primeiro ativar a ferramenta «Desenhar».
(‘Ferramenta de desenho’) na barra de ferramentas ou através do atalho [CTRL/Cmd + F].
Para começa a desenhar uma forma, basta clicar no local onde pretende colocar o seu primeiro ponto na área de trabalho. Para adicionar mais pontos à sua face, tem duas opções:
- Basta continuar a clicar nos locais onde pretende colocar novos pontos, o que irá adicionar pontos sem tangentes e traçar linhas retas.
- Ou clique e, mantendo o botão premido, arraste para criar tangentes ‘espelhadas’ no novo ponto. Desta forma, irá desenhar uma curva de Bézier, na qual poderá ajustar a curvatura utilizando as alças das tangentes.
Quando quiser terminar de desenhar um rosto, basta clicar novamente no primeiro ponto ou premir Entrar para fechar o seu percurso, ou prima Fuga para fechar o percurso e sair Modo de desenho ao mesmo tempo.

Todos os percursos têm de ser fechados, pelo que precisam de, no mínimo, 3 pontos (mais um ponto central!), mas não há um limite máximo. Além disso, pode misturar livremente segmentos retos e curvas na mesma face!
Utilizar uma fotografia como fundo
No HeavyM, pode importar uma imagem para utilizar como fundo da tela. Isto é especialmente útil se já tiver uma ideia de onde o projetor será posicionado: tire uma fotografia da sua estrutura a partir dessa posição e utilize-a como referência. Depois, basta colocar as suas formas com precisão sobre a fotografia do seu volume. Desta forma, pode preparar o seu mapeamento à distância, sem estar no local da apresentação.
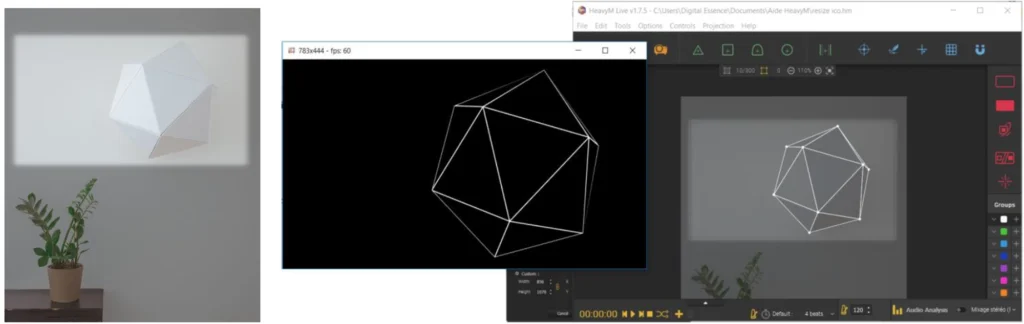
Para ativar a exibição da imagem de fundo, ative a opção no menu Ver → Mostrar imagem. Verá aparecer uma imagem predefinida. Basta clicar novamente na opção quando quiser desativá-la.
Nota: A imagem de fundo não aparecerá na projeção; esta opção destina-se apenas à fase de criação. Se pretender apresentar uma imagem na projeção, terá de utilizar um jogador.
Para continuar
Tudo o que precisa de saber sobre projetores
Este guia foi escrito por HeavyM, uma empresa especializada em video mapping desde 2013.
Para quaisquer perguntas, comentários, sugestões, etc., utilize este formulário de contacto: https://help.heavym.net/hc/requests/new. Resposta garantida no prazo de 24 horas.
Perguntas frequentes (FAQ)
Quais são os principais aspetos a ter em conta num local destinado a vídeo mapping?
Ao avaliar um local, é necessário verificar quatro aspetos essenciais: o nível de luz ambiente (lux), a textura e a cor da superfície de projeção, a distância disponível para a colocação do projetor (rácio de projeção) e a capacidade de alimentação elétrica da sala.
De que forma a luz ambiente afeta o mapping de projeção?
A luz ambiente é o maior inimigo do mapping de projeção. Se um espaço tiver iluminação intensa, janelas ou holofotes do palco a incidir sobre a superfície de projeção, o contraste da imagem ficará desvanecido. É necessário escurecer a sala ou aumentar significativamente a potência em lúmenes do projetor.
O que caracteriza uma boa superfície de projeção?
A superfície de projeção ideal é mate, opaca e de cor clara. Deve evitar-se rigorosamente materiais altamente refletores, como vidro, espelhos ou tintas acetinadas, uma vez que criam reflexos de luz intensos e prejudicam a ilusão imersiva do mapping.
De que forma o software pode ajudar em situações complexas relacionadas com os locais de evento?
Mesmo num local perfeito, pode ser necessário colocar os projetores num ângulo. Software como o HeavyM permite compensar facilmente condições físicas difíceis, distorcendo a imagem digital, desenhando máscaras para contornar obstáculos e ajustando a geometria de forma a adaptar-se perfeitamente à arquitetura.