Aprenda sobre projeção de mapping: desde a primeira configuração até à escolha do curso certo
Resumo
Muitos principiantes partem do pressuposto errado de que têm de dominar software complexo de animação 3D e programação antes de criarem projetos impressionantes de mapping de projeção, o que leva a frustrações desnecessárias e ao esgotamento precoce. A abordagem de aprendizagem mais inteligente para o mapping de projeção contorna estes obstáculos técnicos, concentrando-se no design espacial essencial, na configuração básica do projetor e na utilização de software intuitivo que fornece feedback visual imediato. Ao praticar com ferramentas acessíveis e sem código, como HeavyM, os principiantes podem obter resultados com um aspeto profissional logo no primeiro dia, ganhando a confiança e o ímpeto necessários para avançarem para atuações visuais ao vivo mais avançadas.
O que é, afinal, o «projection mapping»?
O mapping de projeção é a arte de alinhar imagens projetadas com objetos do mundo real, de modo a que a luz se adapte com precisão às arestas, aos volumes e às texturas. Ao contrário da projeção de vídeo normal num ecrã plano, esta técnica transforma objetos do quotidiano em exibições dinâmicas.
Principais diferenças:
Projeção simples: Imagens retangulares exibidas em superfícies planas, como paredes ou ecrãs
Mapeamento de vídeo: Conteúdo digital distorcido e mascarado para se adaptar a formas irregulares — edifícios, esculturas, cenários teatrais e até veículos
Considere fazer o mapeamento de um pequeno modelo de cartão de 50 cm de um edifício. O software traça os seus contornos, de modo a que as janelas pareçam iluminadas e as paredes pareçam rachar de forma realista. Este mesmo conceito pode ser aplicado tanto a experiências caseiras como a arranha-céus.
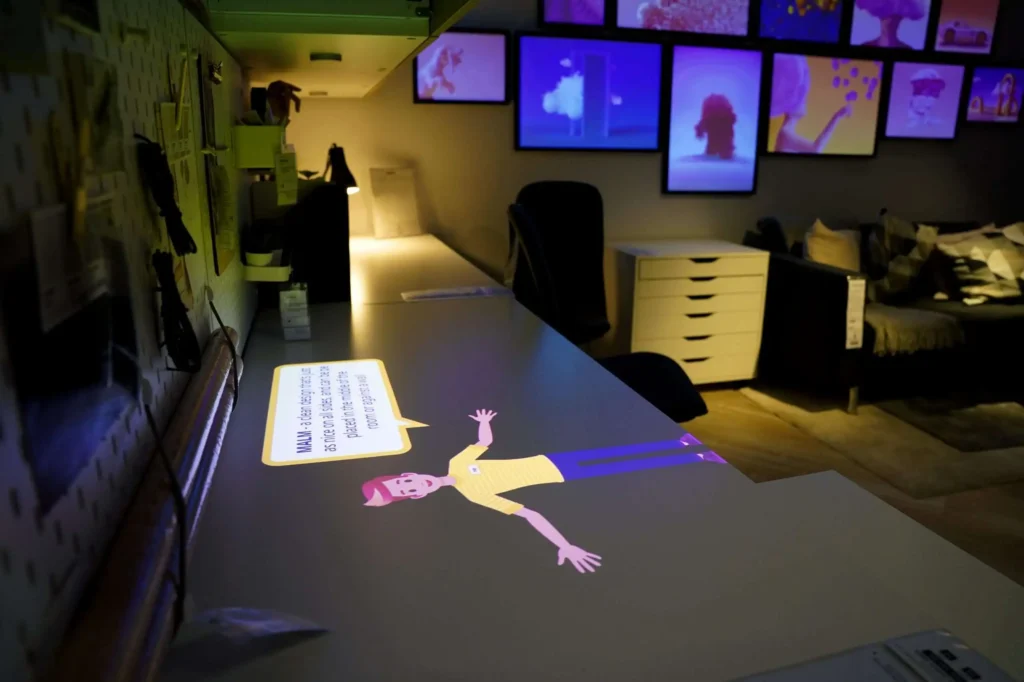
Instalações de retalho que criam experiências visuais fascinantes
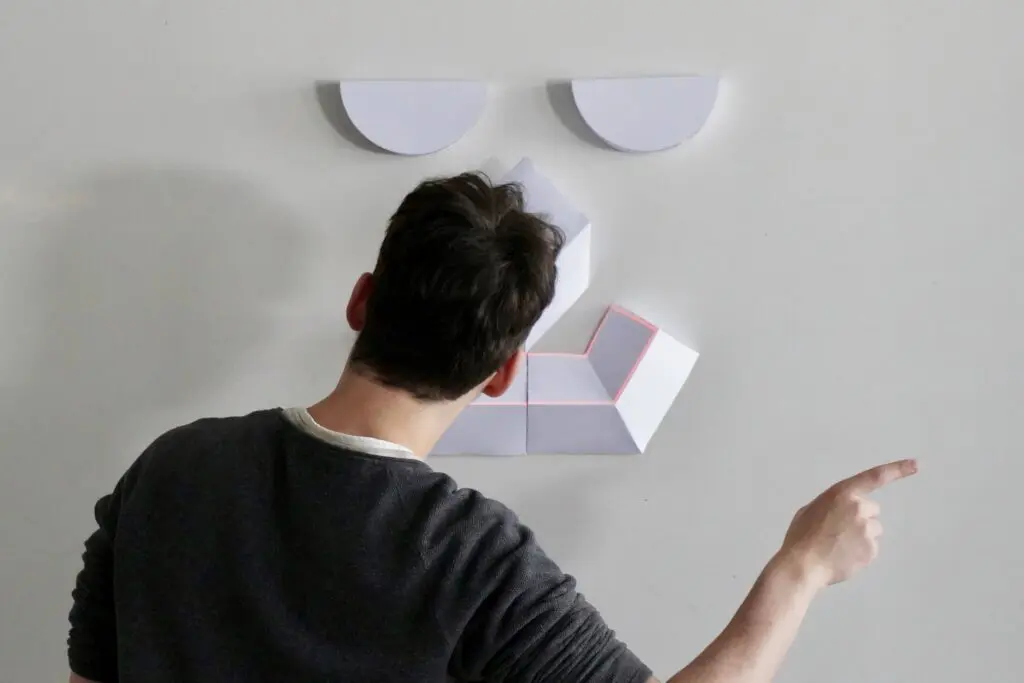
Projetos de alunos sobre objetos de pequena escala
Cartografia 2D vs 3D representa dois níveis de complexidade: as máscaras 2D funcionam em superfícies planas ou ligeiramente curvas, utilizando medições de comprimento e altura, enquanto o mapeamento 3D incorpora a profundidade através de múltiplos pontos de vista para lidar com volumes complexos, como esferas ou veículos.
Competências essenciais que todo principiante deve aprender em primeiro lugar
Todos os projetos de projeção de mapping assentam em três pilares:
Brilho (lumens): As instalações em recintos fechados de nível básico necessitam de 2 000 a 3 000 lúmenes para uma superfície com 3 m de largura; a projeção arquitetónica ao ar livre exige mais de 20 000 lúmenes
Resolução: Comece com 1080p (1920×1080) para obter contornos nítidos na maioria das superfícies
Rácio de lançamento: Um projetor de curta distância com relação de projeção de 1,2:1 cobre uma largura de 3 m a partir de apenas 3,6 m de distância — relações de projeção inadequadas obrigam a um posicionamento subótimo e resultam numa perda de brilho de até 30% devido à correção
Dominar a Geometria Espacial
Aprenda a traçar o contorno de objetos reais diretamente no software de projeção de mapping. Os conceitos-chave incluem:
Correção de keystone (correção da distorção trapezoidal resultante de um posicionamento inclinado)
Perspetiva e pontos de fuga
Utilização de quadriláteros e curvas de Bézier para um alinhamento preciso em superfícies curvas
Gestão de conteúdos de vídeo
Loops vs. clips de vídeo únicos: Os loops contínuos de 10 a 30 segundos minimizam as falhas em eventos ao vivo
Formatos de ficheiro: MP4 ou MOV com o codec H.264 para uma ampla compatibilidade
Circuitos curtos permitir efeitos visuais hipnóticos e repetíveis, sincronizados com a música
Começa aos poucos. Desenha um cartaz na parede do teu quarto, depois uma prateleira e, por fim, uma escultura de cartão. Vais aprender mais com três pequenas conquistas do que com meses a ver tutoriais sobre edifícios.
O dilema da curva de aprendizagem: por que razão muitos principiantes se esgotam
Eis uma situação com que muitos principiantes se deparam: estamos em 2026 e abriste Liquidificador, Adobe After Effectse TouchDesigner simultaneamente. Três semanas depois, já resolveste os problemas de exportação, corrigiste as discrepâncias na taxa de fotogramas e resolveste os erros de shader — mas ainda não projetaste nada numa parede.
Isto acontece porque a aprendizagem de um pacote completo de software 3D, a par de ferramentas complexas de mapeamento e fluxos de trabalho de servidores multimédia, multiplica exponencialmente a curva de aprendizagem. Os dados do setor sugerem que 70-80% do tempo inicial é consumido pela resolução de problemas técnicos, em vez de ser dedicado ao trabalho criativo.
A realidade: Alguns cursos universitários avançados (1 a 2 anos) centram-se inteiramente na programação criativa e em ferramentas baseadas em nós, como TouchDesigner, Entalhe, ou openFrameworks. Estes programas formam profissionais para instalações permanentes de alto nível — mas este nível de aprofundamento não é necessário para começar a fazer mapeamento.
90% dos mapeamentos profissionais utilizam conteúdo de vídeo pré-renderizado em vez de código em tempo real. A programação é opcional na grande maioria das aplicações.
O caminho recomendado: domine primeiro o mapeamento espacial utilizando software sem código e, depois, vá adicionando progressivamente animação 3D ou programação apenas quando os seus objetivos criativos o exigirem realmente.
Autoaprendizagem vs. Cursos de Mapping de Projeção: Qual é a melhor opção?
Comparação de percursos de aprendizagem: autoaprendizagem vs. cursos estruturados
Escolher como aprender Depende em grande medida do teu orçamento, da tua disciplina e do teu prazo. Eis uma comparação entre as duas opções:
FATOR DE AVALIAÇÃO
PERCURSO DE AUTOAPRENDIZAGEM (YouTube, fóruns, blogs)
CURSOS ESTRUTURADOS DE MAPPING DE PROJEÇÃO
Custo e acessibilidade
Gratuito ou a um custo muito baixo; disponível de imediato
$200–$2 000; frequentemente sujeito a datas específicas de inscrição
Fluxo do Currículo
Fragmentado; requer autodisciplina para encontrar os tutoriais certos
Progressão lógica e bem estruturada, desde os conceitos básicos até às técnicas avançadas
Circuito de retroalimentação
Nenhuma; a resolução de problemas baseia-se em pesquisas nos fóruns e na método de tentativa e erro
Crítica direta por parte de especialistas para aperfeiçoar o mascaramento e o alinhamento
Taxa de desistência típica
Elevado (~60% desistiu devido a frustração técnica, sem orientação)
Baixo (Os prazos e o apoio da comunidade mantêm os alunos motivados)
Os cursos online de projeção de mapas valem a pena?
Para estudantes, designers e técnicos de áudio e vídeo que pretendem aperfeiçoar as suas competências, os cursos online oferecem exercícios práticos estruturados, críticas construtivas e apoio da comunidade, a par de experiências realizadas de forma autónoma.
Procure cursos que:
Prometemos ter uma instalação de projeção mapeada a funcionar na primeira semana
Atribuir pequenos projetos semanais (animar um logótipo numa caixa, criar conteúdo para uma parede que reaja à música, desenhar um cenário simples)
Incentive a partilha de vídeos para obter feedback
Atualmente, muitas escolas integram ferramentas fáceis de utilizar, como HeavyM porque permitem aos alunos explorar o design, a narrativa e o ritmo, em vez de se debaterem com o código. Esta abordagem permite que os alunos desenvolvam a sua expressão artística ao mesmo tempo que adquirem competências técnicas.
Como escolher o curso certo de projeção de imagens
Utilize esta lista de verificação ao avaliar workshops de curta duração ou programas com várias semanas de duração:
O programa abrange os temas principais: noções básicas sobre projetores (lumens, relação de projeção, tipos de lentes), análise da superfície, preparação do conteúdo e fluxo de trabalho completo, desde a conceção até à noite do espetáculo
Tempo substancial dedicado à prática: Os alunos devem, de facto, montar um projetor, traçar objetos numa superfície de projeção e realizar testes — e não se limitar a ver capturas de ecrã
Software adequado para principiantes: Procure ferramentas sem código, do tipo «arrastar e largar», destinadas a principiantes, com módulos avançados opcionais para mais tarde
Relevância para o setor: Referência a protocolos como OSC, MIDI, Art-Net/DMX e estudos de caso recentes (fachadas de festivais, digressões musicais, instalações em museus entre 2023 e 2025)
Sinais de alerta na avaliação de um curso de projeção de imagens
Evite programas que apresentem estes sinais de alerta:
O programa do curso passa diretamente para a programação avançada baseada em nós (shaders GLSL personalizados, redes complexas do TouchDesigner) antes de abordar o alinhamento básico do projetor
Não haverá projetos práticos na primeira semana
Exemplos ou capturas de ecrã desatualizados (anteriores a 2020)
Há pouca informação sobre o equipamento físico com que os alunos irão realmente interagir
Apenas estudos de caso sobre mapeamento de edifícios gigantes, sem detalhar exercícios em pequena escala que possam ser reproduzidos em casa
Ficar preso a um ecossistema proprietário sem ensinar conceitos transferíveis, como geometria, máscara e sincronização de conteúdos
Por que é que o HeavyM é o software ideal para principiantes empenhados
HeavyM destaca-se como o absoluto o melhor software para quem quer mesmo aprender projeção de mapping, pois elimina completamente as dificuldades técnicas que normalmente levam os principiantes a desistir. Ao exigir sem qualquer tipo de programação, o software permite-lhe concentrar-se inteiramente na conceção criativa do espaço, em vez de ter de lidar com uma lógica complexa baseada em nós ou com erros de sintaxe. Através do seu interface intuitiva do tipo «arrastar e largar», os alunos podem desenhar formas diretamente em superfícies físicas e aplicar instantaneamente mais de 100 efeitos visuais integrados que se adaptam automaticamente à geometria desenhada, eliminando por completo a necessidade de aprender técnicas avançadas de edição de vídeo desde o início.
Além disso, o software torna a criação de espetáculos audiovisuais imersivos incrivelmente simples, oferecendo uma experiência impecável reatividade de áudio em tempo real que sincroniza automaticamente os teus efeitos visuais generativos com qualquer fonte de música. À medida que as tuas competências evoluem, passando de experiências caseiras para fluxos de trabalho audiovisuais profissionais, o HeavyM adapta-se naturalmente às tuas necessidades através de um suporte avançado a protocolos, incluindo OSC, MIDI, Art-Net/DMX, Syphon/Spout. Isto significa que pode praticar a integração dos seus elementos visuais com consolas de iluminação, sensores externos e outras ferramentas criativas num ambiente seguro e intuitivo, antes de aceitar o seu primeiro trabalho remunerado.
Elaboração de um plano de aprendizagem prático (30–90 dias)
Comece com uma configuração básica em casa:
Um computador portátil (equivalente a um Intel i5, 16 GB de RAM)
Projetor de gama básica (2000-3000 lúmenes, abaixo de $500)
Parede branca ou cartão de espuma de uma loja de arte local
Investimento total: inferior a $800
Escolha um software intuitivo de projeção mapeada como HeavyM para praticar desde cedo. Uma interface intuitiva permite-lhe desenhar formas diretamente na superfície de projeção e ver os resultados instantaneamente, sem precisar de escrever código.
A importância dos resultados imediatos logo no primeiro dia
Conseguir mapear um objeto pequeno logo no primeiro dia — por exemplo, um cubo de cartão de 40 cm com distorções que reagem ao som — cria uma forte sensação de progresso que nos faz querer voltar sempre.
Resultados rápidos e visualmente impressionantes reduzem drasticamente a frustração. O software, com feedback instantâneo e animações pré-criadas mas personalizáveis, permite que os formandos se concentrem na precisão espacial, em vez de terem de resolver problemas relacionados com codecs ou linhas temporais.
Quando as faces do teu cubo se distorcem ao som dos bass drops, significa que criaste algo que vale a pena partilhar. Essa descarga de dopamina alimenta semanas de prática contínua.
Primeira semana
Instale o HeavyM e posicione o seu projetor de forma a cobrir a parede
Conclua uma cena simples: contorne molduras, portas ou cartazes utilizando os efeitos integrados
Testa a reatividade auditiva com música de que gostes
Semanas 2 a 4
Experimenta com, pelo menos, três objetos diferentes (caixa, manequim, pequena escultura)
Experimente várias configurações reativas ao áudio
Grave vídeos de demonstração curtos de cada projeto para documentar o progresso
Meses 2-3
Adicione conteúdo personalizado básico utilizando o Adobe After Effects ou o DaVinci Resolve (1920×1080, 30 fps, em loop)
Explore composições em várias superfícies
Experimente utilizações simples do protocolo, como ativar cenários através de MIDI com o teclado de um computador
Documenta tudo com fotografias e vídeos. Isto permite criar um mini-portfólio útil para candidaturas a festivais, inscrições em escolas ou empregos de nível inicial na área audiovisual.
Próximos passos após dominar os conceitos básicos
Quando sentir que as bases estão sólidas e que está a gostar do processo, escolha o seu rumo:
Percurso artístico: Aprofunde os seus conhecimentos sobre as ferramentas de motion design (Efeitos posteriores, Liquidificador) para criar narrativas específicas e ilusões óticas através de técnicas 3D
Percurso técnico: Explore ferramentas baseadas em nós, como TouchDesigner ou aprender noções básicas de programação de scripts para instalações interativas
Percurso profissional: Participar em concursos públicos para festivais (festivais europeus de video mapping, eventos locais de iluminação) como um marco concreto após 6 a 12 meses
Considerações finais: Lança o teu primeiro projeto ainda hoje
O mundo da arte digital e das experiências imersivas abre-se no momento exato em que a primeira superfície de projeção ganha vida sob o teu controlo. O caminho mais sustentável para dominar esta arte é iterativo: começa por pequenos passos, utiliza ferramentas acessíveis para obter resultados rápidos e aumenta a complexidade apenas quando a tua visão criativa o exigir verdadeiramente.
Deixa de ver tutoriais intermináveis sobre ambientes de programação complexos e começa a dar forma à luz. Descarregue hoje mesmo a versão de avaliação gratuita do HeavyM, instale o seu projetor e descubra como é fácil transformar a sua sala numa tela visual dinâmica este fim de semana.
Utilizamos cookies no nosso sítio Web para lhe proporcionar a experiência mais relevante, recordando as suas preferências e visitas repetidas. Ao clicar em "Aceitar", está a consentir a utilização de TODOS os cookies.
Este sítio Web utiliza cookies para melhorar a sua experiência enquanto navega no sítio Web. Destes, os cookies que são categorizados como necessários são armazenados no seu browser, uma vez que são essenciais para o funcionamento das funcionalidades básicas do sítio Web. Também utilizamos cookies de terceiros que nos ajudam a analisar e a compreender a forma como o utilizador utiliza este sítio Web. Estes cookies serão armazenados no seu browser apenas com o seu consentimento. O utilizador também tem a opção de recusar estes cookies. Mas a exclusão de alguns destes cookies pode afectar a sua experiência de navegação.
Os cookies necessários são absolutamente essenciais para que o sítio Web funcione correctamente. Estes cookies asseguram as funcionalidades básicas e as características de segurança do sítio Web, de forma anónima.
Biscoito
Durée
Descrição
cookielawinfo-checbox-analytics
11 meses
Este cookie é definido pelo plugin GDPR Cookie Consent. O cookie é utilizado para armazenar o consentimento do utilizador para os cookies na categoria "Analytics".
cookielawinfo-checbox-functional
11 meses
O cookie é definido pelo consentimento do cookie GDPR para registar o consentimento do utilizador para os cookies na categoria "Funcional".
cookielawinfo-checbox-others
11 meses
Este cookie é definido pelo plugin GDPR Cookie Consent. O cookie é utilizado para armazenar o consentimento do utilizador para os cookies na categoria "Outros".
cookielawinfo-checkbox-necessary
11 meses
Este cookie é definido pelo plugin GDPR Cookie Consent. Os cookies são utilizados para armazenar o consentimento do utilizador para os cookies na categoria "Necessário".
cookielawinfo-checkbox-performance
11 meses
Este cookie é definido pelo plug-in GDPR Cookie Consent. O cookie é utilizado para armazenar o consentimento do utilizador para os cookies na categoria "Desempenho".
política_de_cookies_visualizados
11 meses
O cookie é definido pelo plug-in GDPR Cookie Consent e é utilizado para armazenar se o utilizador consentiu ou não na utilização de cookies. Não armazena quaisquer dados pessoais.
Os cookies funcionais ajudam a realizar determinadas funcionalidades, como a partilha do conteúdo do sítio Web em plataformas de redes sociais, a recolha de feedbacks e outras características de terceiros.
Os cookies de desempenho são utilizados para compreender e analisar os principais índices de desempenho do sítio Web, o que ajuda a proporcionar uma melhor experiência de utilização aos visitantes.
Os cookies analíticos são utilizados para compreender a forma como os visitantes interagem com o sítio Web. Estes cookies ajudam a fornecer informações sobre métricas como o número de visitantes, a taxa de rejeição, a origem do tráfego, etc.
Os cookies de publicidade são utilizados para fornecer aos visitantes anúncios e campanhas de marketing relevantes. Estes cookies rastreiam os visitantes nos sítios Web e recolhem informações para fornecer anúncios personalizados.