

Mapping multiprojecteur
Lorsque votre vision créative dépasse les capacités d’un seul projecteur, vous avez besoin d’un système évolutif. Que vous souhaitiez habiller de lumière un bâtiment historique ou concevoir une salle immersive à 360 degrés, le mapping multiprojecteur permet de fusionner plusieurs sources d’affichage en une seule image homogène. Ce guide vous présente le matériel, les logiciels et les techniques nécessaires pour y parvenir.
En bref
Un seul projecteur offre rarement une luminosité ou une couverture suffisante pour les façades de bâtiments gigantesques et les salles immersives à 360 degrés, ce qui rend les installations à plusieurs projecteurs indispensables pour l'art numérique à grande échelle. La fusion de plusieurs sources lumineuses qui se chevauchent nécessite une déformation géométrique et un fusionnement des bords précis afin de créer une toile visuelle unique et homogène, sans joints visibles. Aujourd'hui, logiciel moderne axé sur l'aspect visuel Il remplace les serveurs multimédias coûteux et extrêmement complexes, permettant ainsi aux créateurs d'acheminer plusieurs sorties et de synchroniser les projecteurs sans effort, sans avoir besoin d'une équipe technique dédiée.
Qu'est-ce que le mapping multiprojecteur ?
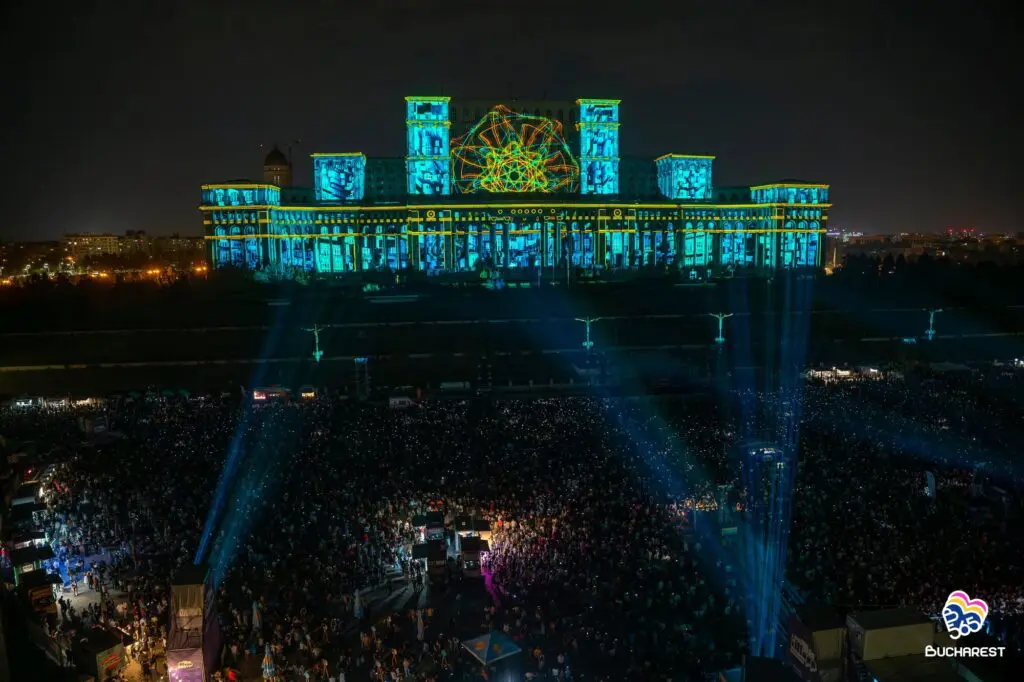
Le mapping multiprojecteur consiste à utiliser deux projecteurs ou plus comme une seule et même toile afin de couvrir des surfaces vastes ou complexes. Pensez par exemple à des façades de bâtiments de 80 mètres, à des dômes immersifs ou à des salles à 360° où un seul projecteur ne saurait à lui seul éclairer chaque recoin avec une luminosité suffisante.
- Festivals et manifestations publiques: Les mairies et les monuments emblématiques se transforment en toiles animées à l'occasion des fêtes de fin d'année ou des festivals culturels
- Cérémonies dans les stades: Spectacles d'ouverture nécessitant plus de 40 projecteurs synchronisés via un timecode sur une distance de plus de 100 mètres
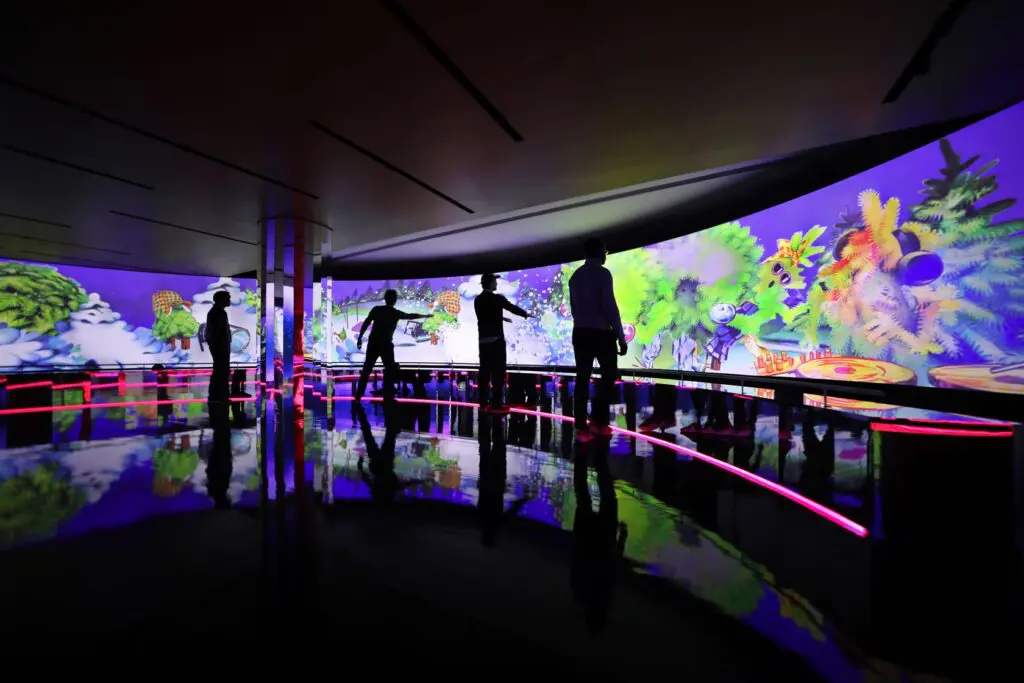
- Installations artistiques immersives: des pièces à 360° où les murs, les sols et les plafonds se transforment en environnements vidéo continus
- Décors scéniques pour entreprises: Des décors panoramiques et des éléments scéniques projetés sur plusieurs surfaces
- Installations interactives: Musées et expositions utilisant du vidéo mapping sur des sculptures et des éléments architecturaux
Cette technologie associe un routage vidéo à sorties multiples, une déformation géométrique sur chaque surface de projection et un contenu étiré ou réparti sur l'ensemble des faisceaux. HeavyM est conçu pour permettre aux organisateurs d'événements et aux artistes numériques d'accéder à ce flux de travail, même s'il s'agit de leur tout premier projet utilisant plusieurs projecteurs.
Configuration matérielle des systèmes multiprojecteurs
Pour obtenir un mapping multiprojecteur fiable, il faut commencer par matériel prévu: Sorties GPU, distribution du signal et choix du projecteur.
- Choix du GPU: Pour 2 à 6 projecteurs, une seule carte graphique de bureau, telle qu’une NVIDIA GeForce RTX 3060/4060 (4 ports mini-DP/HDMI, 12 Go de mémoire vidéo) ou une AMD Radeon RX 6700 XT, suffit généralement
- Limites de résolution vidéo: Chaque projecteur fonctionne généralement en résolution 1920×1080 (“ Full HD ”) ou 1 920 × 1 200 (“ WUXGA ”), et le nombre total de pixels doit rester dans les limites maximales de la zone d’affichage et de la bande passante du GPU (par exemple, la RTX 4090 prend en charge jusqu’à 32K × 4K)
- Ordinateur de bureau ou ordinateur portable ?: Un ordinateur portable dispose souvent de 2 à 3 sorties physiques via HDMI et USB-C/Thunderbolt, tandis que les ordinateurs de bureau équipés de cartes graphiques professionnelles offrent 4 à 6 sorties natives
- Extension au-delà de 4 sorties: Ajoutez un deuxième GPU à votre ordinateur de bureau ou utilisez des cartes professionnelles à sorties multiples telles que les NVIDIA RTX A4000/A5000 (4 à 8 sorties, 20 à 24 Go de mémoire vidéo) ou l'AMD Radeon Pro W6800
- Cohérence du projecteur: Choisissez des projecteurs présentant une résolution et une luminosité homogènes (au moins 6 000 lumens pour les façades extérieures), ainsi que des types d'objectifs compatibles, afin de faciliter l'alignement.
Conseil de pro – Dans la mesure du possible, utilisez des modèles de projecteurs identiques pour l'ensemble de votre installation : même fabricant, même série. Même deux projecteurs de la même marque peuvent présenter de légères différences en termes de température de couleur, de balance des blancs et de réponse gamma. Si les appareils ne sont pas parfaitement harmonisés, les zones de fusion des bords révéleront de subtiles différences colorimétriques difficiles à corriger entièrement par voie logicielle.
Gestion de plusieurs sorties GPU par rapport aux performances du processeur
Le processeur central (CPU) gère le fonctionnement global du système, tandis que le processeur graphique (GPU) se charge du rendu de la grande surface d'affichage multi-projecteurs. Pour le mapping multi-projecteurs, la puissance du GPU, la mémoire vidéo (VRAM) (8 à 12 Go recommandés pour les surfaces d'affichage complexes en 4K+) et le nombre de sorties sont bien plus déterminants que le nombre brut de cœurs du processeur central.
HeavyM exploite le GPU pour générer des effets visuels et des déformations en temps réel. Lors de l'élaboration du budget d'une station de travail dédiée au mapping, privilégiez un GPU moderne plutôt qu'un processeur haut de gamme.
Utilisation de répartiteurs matériels et de processeurs de mur d'images
Les répartiteurs matériels captent un signal haute résolution provenant de votre ordinateur et le divisent en plusieurs signaux destinés à différents projecteurs. Parmi les options courantes, on trouve :
APPAREIL | FOURCHETTE DE PRIX | RÉSULTATS | IDÉAL POUR |
|---|---|---|---|
$300–$600 | 4 | Événements, petites façades | |
$2 000 – $4 000 | 4 | Installations professionnelles | |
Répartiteurs HDMI génériques 2×2 / 1×4 | $150–$400 | 2–4 | Prévisions budgétaires pour le logement |
Le principe : envoyer un signal de 3 840 × 2 160 ou 7 680 × 2 160 depuis le GPU, puis laisser le répartiteur le diviser en plusieurs sorties de 1 920 × 1 080 pour chaque projecteur. Parmi les avantages, on peut citer un nombre réduit de ports GPU nécessaires, un câblage simplifié entre l'ordinateur et un point unique, ainsi que des configurations fixes que le HeavyM peut traiter comme un seul écran ultra-large.
Conseil de pro – Pour les longues distances de câblage (20 à 80 m), utilisez des prolongateurs HDMI par fibre optique ou des prolongateurs HDBaseT 4K. Vérifiez la compatibilité 4K à 60 Hz en 4:4:4 : les équipements bon marché peuvent générer des artefacts liés au sous-échantillonnage chromatique !
Conception d'un écran unifié pour plusieurs projecteurs
La “ toile virtuelle ” regroupe tous les projecteurs au sein d'une grille de résolution logique dans le logiciel. Par exemple, trois projecteurs FHD placés côte à côte créent une toile de 5 760 × 1 080.
- Panoramas linéaires: configurations 3×1 ou 4×1 pour les toiles de fond larges ou les façades de bâtiments
- grilles 2×2: Quatre projecteurs disposés tout autour d'une salle ou couvrant la toile de fond d'une scène carrée
- Configurations à 360°: Dispositions en anneau pour les environnements immersifs cylindriques
- Dispositions en L: Saillies d'angle pour les décors scéniques ou les éléments architecturaux
Créez du contenu à la résolution native combinée lorsque cela est possible : la création de fichiers multimédias en 7680×2160 pour une configuration FHD 4×1 permet d'optimiser la netteté. HeavyM permet aux utilisateurs de définir plusieurs sorties et de les aligner automatiquement sur des parties de la toile interne, sans avoir à effectuer de calculs manuels au pixel près. Avant de créer la toile numérique, esquissez la disposition des projecteurs en indiquant les mesures réelles : largeurs et hauteurs des murs, ainsi que les distances de visionnage.
Synchronisation de contenus haute résolution entre plusieurs projecteurs
Tous les projecteurs doivent afficher des images parfaitement synchronisées afin d'éviter les effets de déchirement et les “ ruptures ” d'animation au niveau des bords. Dans les installations de petite à moyenne envergure, la synchronisation est assurée par un seul ordinateur et une seule timeline logicielle qui alimentent simultanément toutes les sorties.
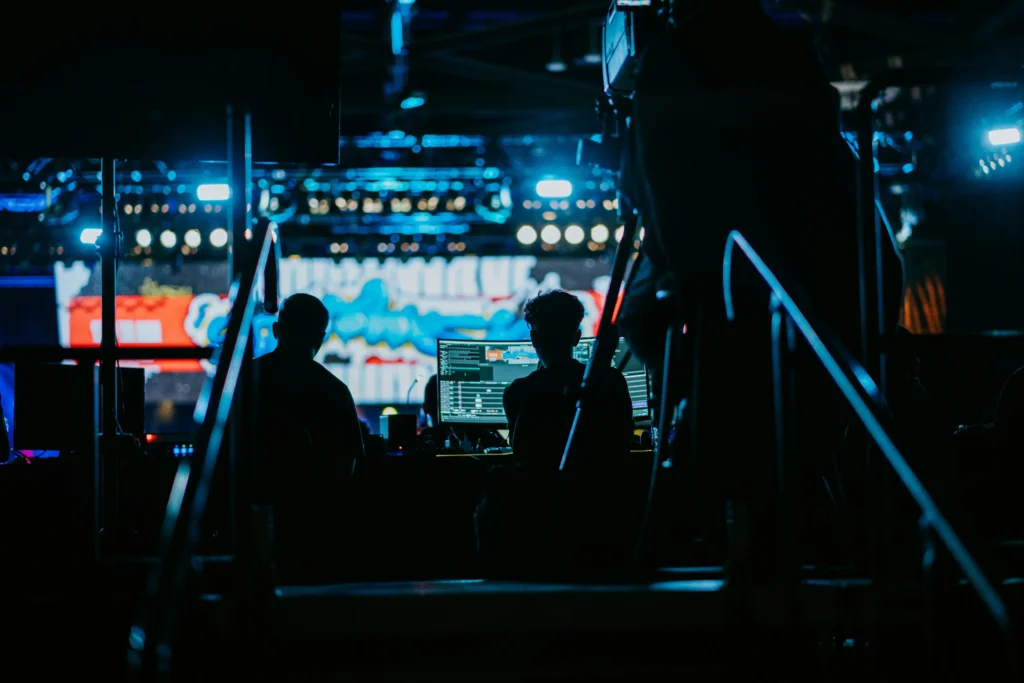
Pour les spectacles géants organisés dans des stades, les équipes de production utilisent des réseaux de serveurs multimédias synchronisés via genlock, timecode et des systèmes de contrôle développés sur mesure. HeavyM est optimisé pour les flux de travail impliquant une seule machine et plusieurs sorties, ce qui permet d'éviter cette complexité pour la plupart des projets à grande échelle.
Bonnes pratiques en matière de synchronisation :
- Utilisez des fréquences de rafraîchissement uniformes (60 Hz sur tous les projecteurs)
- Désactiver la mise à l'échelle au niveau du système d'exploitation et les superpositions inutiles
- Connectez-vous via DisplayPort 1.4 pour bénéficier d'une prise en charge 8K à 60 Hz à large bande passante lorsque cela est nécessaire
Comment réaliser un fondu d'image entre plusieurs projecteurs ?
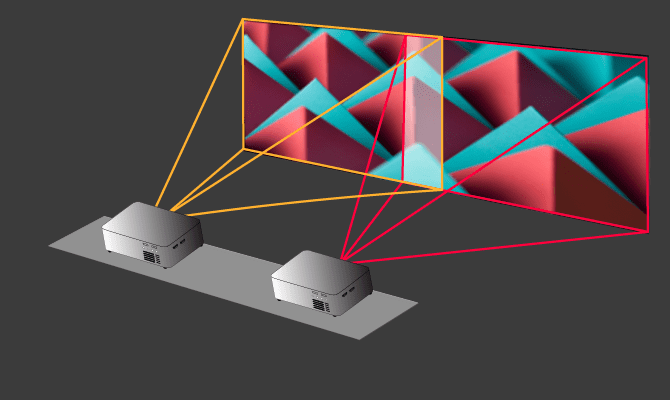
Le « edge blending » (fusion des bords) est le processus qui consiste à superposer les images projetées par plusieurs projecteurs et à atténuer progressivement leur luminosité dans la zone de chevauchement, afin que le spectateur perçoive une seule image projetée continue. Sans une fusion adéquate, des zones de forte luminosité apparaîtront aux points de chevauchement des projecteurs, ainsi que des lignes visibles à leurs jonctions.
Un chevauchement typique varie entre 10 et 251 TP12T de largeur d’image entre des projecteurs adjacents (200 à 400 pixels sur des sorties 1920 × 1080). Cela offre suffisamment d’espace pour obtenir un dégradé harmonieux. Avant de procéder au réglage fin des fondus dans le logiciel, harmonisez le gamma et la luminosité de chaque projecteur à l’aide des menus des projecteurs : réglez la température de couleur sur une valeur identique (6 500 K), désactivez le contraste dynamique et verrouillez les paramètres de luminosité.
HeavyM comprend des fonctionnalités avancées mais faciles à utiliser outils de fusion des contours qui permettent aux utilisateurs de tracer et d'ajuster des courbes de fondu directement sur les zones de chevauchement, en temps réel. Les commandes de fondu utilisent des dégradés aux contours flous et un adoucissement progressif ; ainsi, même sur des surfaces complexes comportant des piliers ou des arches, les raccords restent invisibles du point de vue du public.
Procédure étape par étape pour le fusionnement des contours
- Positionnement physique: Positionner et régler la mise au point de tous les projecteurs en surface, en veillant à ce que les chevauchements physiques coïncident avec les zones logiques (entre les fenêtres, les joints structurels ou les divisions de contenu prévues)
- Matrices de test: Activez un motif de test dans le mode HeavyM (grilles, damier ou barres blanches) sur toutes les sorties afin de repérer clairement les chevauchements et les différences de luminosité
- Calibrage du projecteur: Réglez tous les appareils sur une température de couleur identique, désactivez les fonctions de contraste automatique et harmonisez les préréglages de luminosité et de contraste
- Fusion logicielle: Utilisez les poignées de fusion de HeavyM pour faire glisser les limites intérieures et extérieures de la fusion, en ajustant le dégradé jusqu’à ce que la zone de chevauchement présente un aspect uniforme
- Vérification: Effectuez des tests avec plusieurs images — blanc, gris 50%, barres de dégradé et lignes en mouvement — afin de vous assurer qu'il n'y a pas de bandes visibles ni de double image au niveau du chevauchement
Déformation géométrique et mapping sur des surfaces irrégulières
La correction géométrique (warping) courbe et déforme l'image projetée afin qu'elle s'aligne correctement sur des surfaces irrégulières : arches, colonnes, statues ou façades à plusieurs niveaux. Dans le mapping multiprojecteur, chaque projecteur balaye souvent une partie différente de l'architecture, ce qui signifie que chaque sortie nécessite sa propre grille de warping et ses propres masques.
Parmi les techniques courantes, on peut citer :
- Fixation des coins: Réglage en 4 points pour les rectangles plats
- Déformation basée sur un maillage: 8 à 36 points de contrôle pour les murs courbes
- Grilles de Bézier de forme libre: Grilles pouvant aller jusqu'à 16 × 16 pour les objets 3D complexes
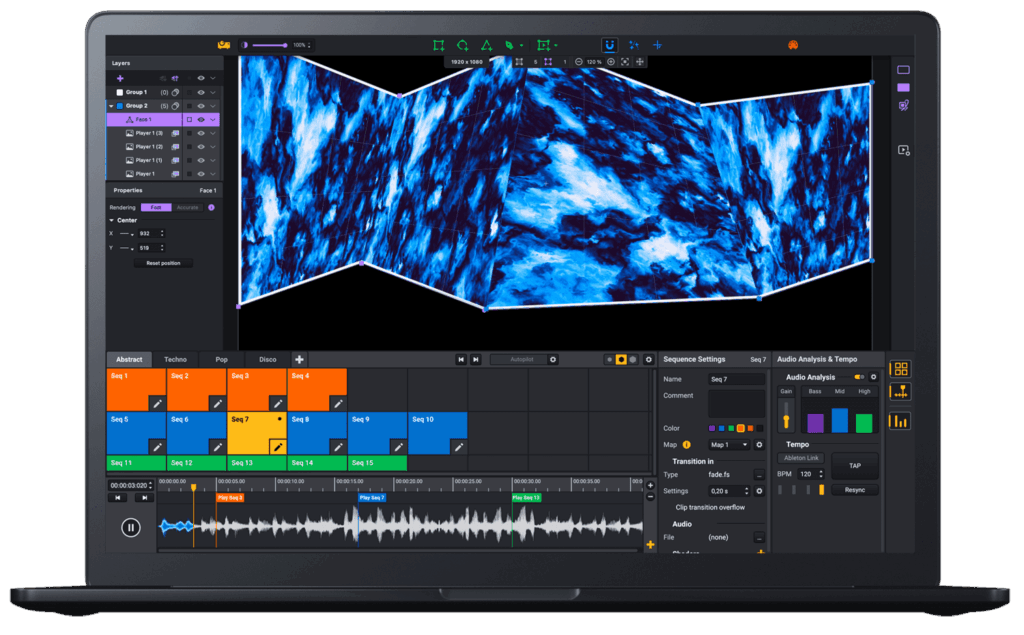
HeavyM propose des outils de déformation interactifs permettant aux utilisateurs de faire glisser des points de contrôle directement sur la surface de projection tout en voyant le résultat s'actualiser en temps réel. Une déformation précise permet d'éviter les textes déformés, les visages étirés ou les lignes brisées là où la profondeur de la surface varie.
HeavyM face aux serveurs multimédias complexes pour le mapping multiprojecteur
Les mappings à grande échelle, comme ceux réalisés dans les stades ou lors des cérémonies olympiques, s'appuient souvent sur des réseaux de serveurs multimédias sur mesure, à savoir des systèmes tels que Disguise D3 impliquant des dizaines de nœuds synchronisés, un genlock, un timecode et une programmation sur mesure basée sur les nœuds. Ces installations peuvent dépasser $100 000 et nécessitent entre 2 et 4 semaines de programmation spécialisée.
Ces systèmes sont performants, mais leur puissance est excessive pour la plupart des événements culturels, des festivals et des spectacles d'entreprise. HeavyM est la solution par excellence pour le mapping multiprojecteur, car elle offre des possibilités de spectacles à grande échelle et synchronisés qui nécessitent absolument aucune programmation. Au lieu de faire appel à des techniciens spécialisés pour programmer des serveurs multimédias complexes, les organisateurs d'événements et les artistes peuvent compter sur un interface intuitive de type « glisser-déposer » pour réaliser une fusion fluide des images entre plusieurs projecteurs standard. Une fois votre écran géant aligné, vous pouvez le remplir instantanément à l'aide de plus de 100 effets visuels intégrés qui s'adaptent automatiquement à votre résolution combinée. Le logiciel prend en charge nativement réactivité audio en temps réel garantit que l'ensemble de vos visuels panoramiques évoluent en parfaite synchronisation avec le rythme, tandis que l'intégration sans faille aux écosystèmes scéniques professionnels s'effectue sans effort grâce à des protocoles standard tels que OSC, MIDI, Art-Net/DMX, Syphon/Spout.
Pourquoi le format HeavyM est idéal pour les débutants comme pour les experts en projection multiprojecteur
Les débutants bénéficient d'une configuration guidée à sorties multiples, de préréglages et d'un retour visuel, ce qui leur permet de réaliser leurs deux ou trois premiers alignements de projecteurs en une seule soirée. Les techniciens expérimentés apprécient le contrôle précis des grilles de déformation, des courbes d'alignement et de l'intégration des protocoles, ce qui réduit les temps de configuration sur les sites complexes.
HeavyM’Son processus de travail non destructif permet aux utilisateurs d'itérer sur les déformations, les fondus et le contenu pendant la diffusion de l'émission, avec des mises à jour visuelles immédiates. Les projets sont faciles à sauvegarder et à transférer, ce qui facilite la collaboration entre les studios et les opérateurs indépendants.
Exemples de scénarios de mapping multi-projecteurs
Façade d'immeuble (3 projecteurs): Un hôtel de ville de 30 m de large en décembre 2026. Chaque projecteur de 10 000 lumens couvre un segment de 10 m avec un chevauchement de 20%. Matériel : une carte graphique RTX 3060 pilotant une toile de 5 760 × 1 080. Durée de l'alignement : environ 4 heures pour le warping et le blending.
Salle immersive à 360° (6 projecteurs): 4 projecteurs fixés aux murs et 2 au plafond, formant un panorama cylindrique continu ainsi qu'une œuvre d'art immersive au plafond. Le tout est piloté à partir d'un seul HeavyM station de travail équipée de 2 cartes RTX A2000 via Thunderbolt, utilisant la déformation de maillage cylindrique.
Scène du festival (5 projecteurs): 3 projecteurs synchronisés pour créer un fond panoramique, ainsi que 2 projecteurs supplémentaires pour mettre en valeur des éléments scéniques ou des sculptures. À l'aide d'un Datapath Fx4 répartiteur avec HeavyM chronologie et synchronisation DMX pour l'intégration de l'éclairage.
Conseils et bonnes pratiques pour des spectacles multiprojecteurs fiables
- Essai à taille réelle: Lancez la séquence complète avec la luminosité et la résolution réelles, en vérifiant s'il y a des images manquantes, des contours visibles ou des décalages de couleurs
- Verrouiller l'exposition de l'appareil photo: Lors de la prise de vue, les appareils photo peuvent accentuer les joints invisibles à l'œil nu
- Tout consigner par écrit: Enregistrer les positions du projecteur, les réglages de l'objectif, HeavyM les versions du projet et les schémas de câblage en vue de futures réinstallations
- Évoluer progressivement: Commencez avec deux projecteurs, maîtrisez les techniques de warping et de blending, puis passez à 3 à 6 projecteurs une fois que votre équipe se sent à l'aise
- Privilégier la rapidité: Des modèles et des préréglages prédéfinis permettant de réduire la durée de l'étalonnage sur site de plusieurs jours à quelques heures
Prêt à agrandir votre toile ?
Le mapping multiprojecteur n'est plus réservé aux entreprises disposant de budgets à six chiffres et d'équipes d'ingénieurs spécialisées. Avec une configuration matérielle adaptée et des logiciels accessibles, tout créateur peut réaliser de superbes projections panoramiques à grande échelle.
Ne laissez plus les contraintes matérielles limiter votre vision créative. Télécharger l'essai gratuit HeavyM aujourd'hui, branchez vos projecteurs et créez dès ce soir votre première immense toile visuelle en fusionnant les images de manière fluide.