

Всё, что нужно знать о проекторах
Коротко
Чтобы выбрать подходящий проектор для видеомэппинга, необходимо учитывать коэффициент проекции и уровень освещенности помещения место проведения (люмен) и технологию источника света (лазер или лампа). Понимание этих технических характеристик гарантирует яркое и четкое изображение. В сочетании с доступным программным обеспечением для видеомэппинга, таким как HeavyM, подходящее оборудование поможет вам без особых усилий создавать потрясающие иммерсивные визуальные эффекты.
Расчетная яркость
Проецируемая яркость соответствует мощности света, излучаемого проектором. Это измеряется в люменах. Чем выше значение в люменах, тем мощнее и, следовательно, ярче проектор. Как уже упоминалось ранее, Одной яркости недостаточно. Необходимо учитывать все ограничения проекта, которые могут снизить теоретическую мощность проектора: освещенность помещения, желаемый размер изображения и материал поверхности.
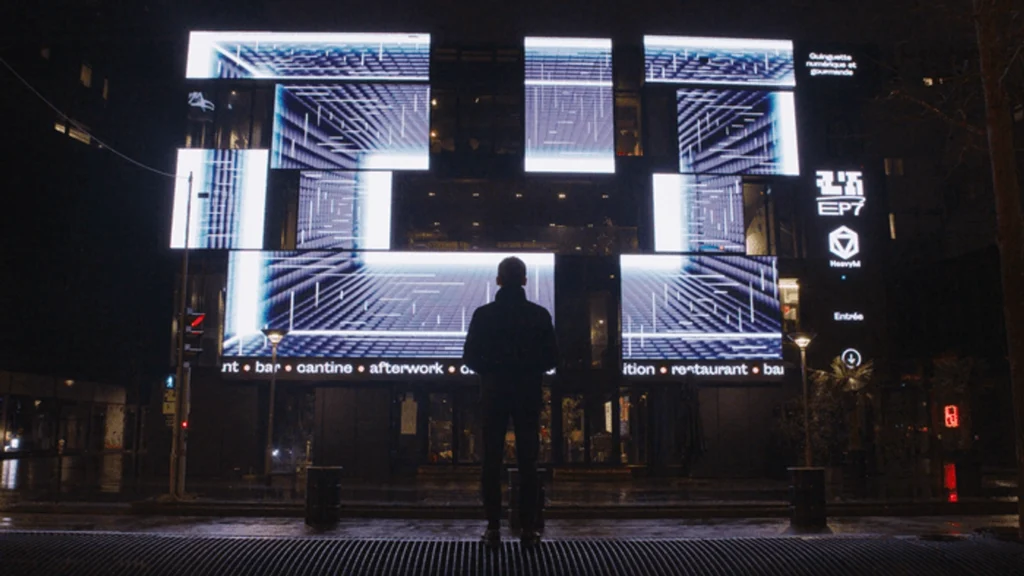
В целом, видеомэппинг — это метод, который следует применять в темных помещениях или ночью. Это создать Видеомэппинг при ярком дневном свете невозможно, даже при яркости 20 000 люмен 🙂
Источник света в проекторе — это ключевой элемент, влияющий на его общие эксплуатационные характеристики. Существует три основных типа технологий источников света: традиционные лампы, светодиоды (LED) и лазеры.
Традиционные лампы, часто называемые лампами с короткой дугой, уже давно стали стандартом для проекторов. Они обеспечивают высокую яркость, но, как правило, имеют более короткий срок службы, который обычно составляет от 1 000 до 3 000 часов. Кроме того, они требуют регулярной замены, что может увеличить совокупную стоимость владения проектором.
Светодиоды, С другой стороны, это новая технология источников света, обладающая рядом преимуществ. Они имеют гораздо более длительный срок службы, часто достигают 20 000 часов и более, при этом они потребляют меньше энергии, чем традиционные лампы. Светодиоды также мгновенно включаться и выключаться, что позволяет исключить необходимость в периодах разминки и заминки. Однако, Светодиодные проекторы, как правило, имеют меньшую яркость, чем традиционные ламповые проекторы, хотя с развитием технологий это различие теряет свою значимость.
Проекторы с лазер Лазерные источники света — это новейшая технология на рынке. Как и светодиоды, лазеры отличаются очень длительным сроком службы, превышающим 10 000 часов, и потребляют меньше энергии, чем традиционные лампы. Лазеры а также отличаются превосходным качеством цветопередачи и высокой яркостью, что делает их идеальным выбором для профессионального использования и в высокотехнологичных сферах. Однако, как правило, они стоят дороже, чем ламповые или светодиодные проекторы.
Разрешение
Разрешение каждого проектора отражает максимальное количество пикселей, которое он способен отображать. Чем больше пикселей, тем четче будет изображение. Фактически, чем выше количество пикселей, тем сложнее их различить невооруженным глазом.
Разрешение должно быть максимально близким к разрешению исходного изображения. Если контент, который вы хотите проецировать, имеет разрешение Full HD (1080p), выбирайте проектор с разрешением Full HD, а не с более низким разрешением, например HD-проектор. В противном случае результат может вас разочаровать.
Для получения четкого изображения, Мы рекомендуем использовать материалы и проектор с разрешением не ниже HD (720p).
Следует также отметить, что Независимо от разрешения, при проецировании на неровные поверхности пиксели могут казаться крупнее и более заметными. Всегда старайтесь выбрать оптимальное место для установки проектора для видеомэппинга, чтобы избежать искажения изображения.
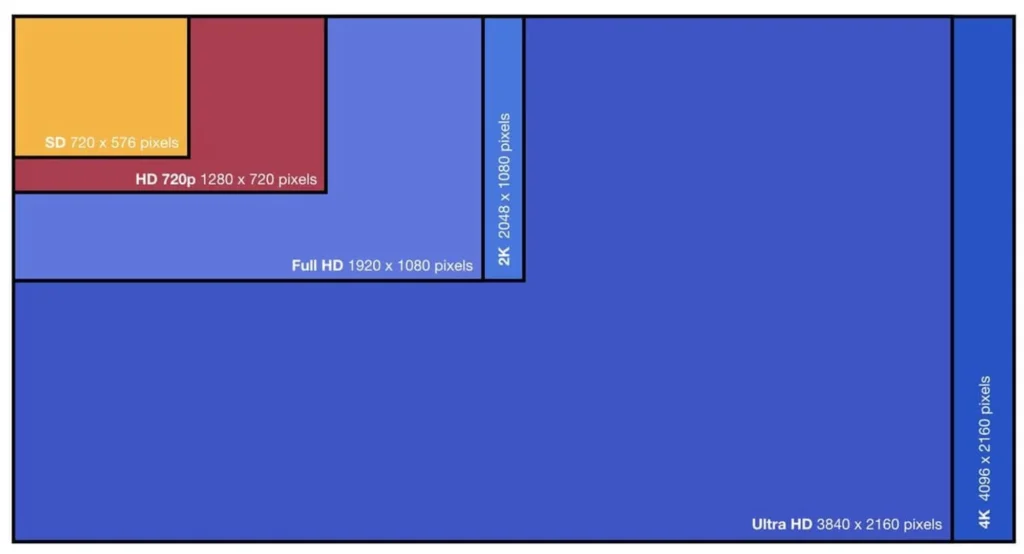
Для получения дополнительной информации о разрешении изображения, Вы можете ознакомиться с разделом, посвященным представлению графических концепций.
Соотношение сторон и масштабирование
Размер изображения и расстояние проецирования связаны между собой с помощью очень простой математической формулы: соотношение = расстояние броска / ширина изображения.
‘коэффициент прогнозирования‘ — это характеристика, присущая проектору. Это число в диапазоне от 0,3 до 12. Чем больше это число, тем большее расстояние проецирования требуется. Используя эту формулу и зная два параметра, можно легко определить третий.
Некоторые проекторы поддерживают диапазон соотношений, например 1,12:1 – 1,47:1. Это означает, что они оснащены оптическим зумом, позволяющим регулировать положение объектива и, следовательно, изменять размер изображения без изменения разрешения.
Пример 1: Какой проектор выбрать для данной конфигурации?
“Я хочу получить изображение шириной 3 метра, а расстояние проецирования составляет 4 метра. Мне нужно определить необходимое соотношение, чтобы выбрать подходящий проектор. Вот: Отношение = 4 / 3 = 1,33. ”Это означает, что мне следует выбрать проектор с коэффициентом примерно 1,3».”
Пример 2: Как определить возможный размер изображения с помощью моего проектора при известном расстоянии проецирования?
“У меня расстояние проецирования составляет 4 метра, а коэффициент проектора — 0,8. Я хочу определить, какой размер изображения я смогу получить».
Вот: 0,8 = 4 / ширина изображения, следовательно, ширина изображения = 4 / 0,8 = 5.
”Это означает, что я могу получить изображение шириной 5 метров».”
Проекторы можно разделить на три основных типа в зависимости от коэффициента увеличения объектива:
Сверхкороткий проекционный коэффициент: коэффициент < 0,3
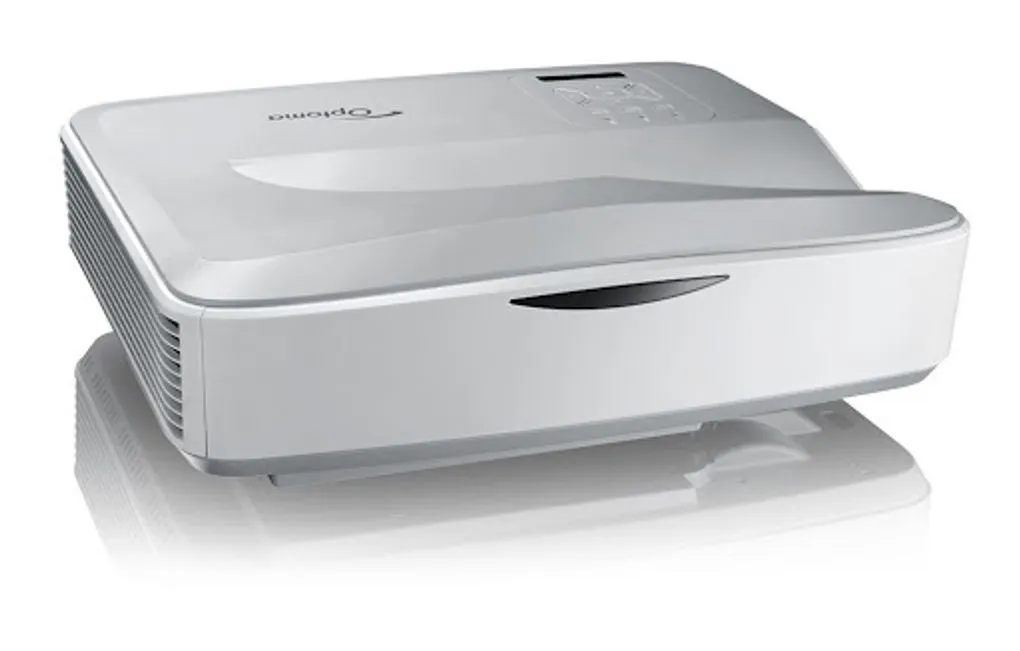
Проекторы с ультракоротким проекционным расстоянием, как правило, имеют схожий внешний вид и часто используются в классах или конференц-залах. Их устанавливают на стол, крепят к потолку или, в некоторых случаях, даже монтируют на той же стене, что и проекционная поверхность, с помощью кронштейна.
У них низкий коэффициент проекции, поэтому их необходимо располагать очень близко к проецируемому изображению. По этой причине они не всегда являются оптимальным выбором для проецирования. Например, они не оптимизированы для трехмерные поверхности из-за очень небольшого расстояния проецирования.
Короткий проекционный коэффициент: 0,5 < коэффициент < 1
Проекторы с коротким проекционным расстоянием — идеальный выбор, если вам нужно проецировать изображения, но вокруг мало места. Эти модели часто встречаются в квартирах, оборудованных домашними кинотеатрами, и, как правило, используются для в развлекательных целях.
Такая ситуация часто возникает, когда расстояние до проекционной поверхности невелико, но необходимо охватить относительно большие площади.
Существует максимальное расстояние броска, которое нельзя превышать, в противном случае качество проецируемого изображения будет неидеальным: оно может стать размытым или пикселизированным.
Стандартный и длинный ход: соотношение > 1
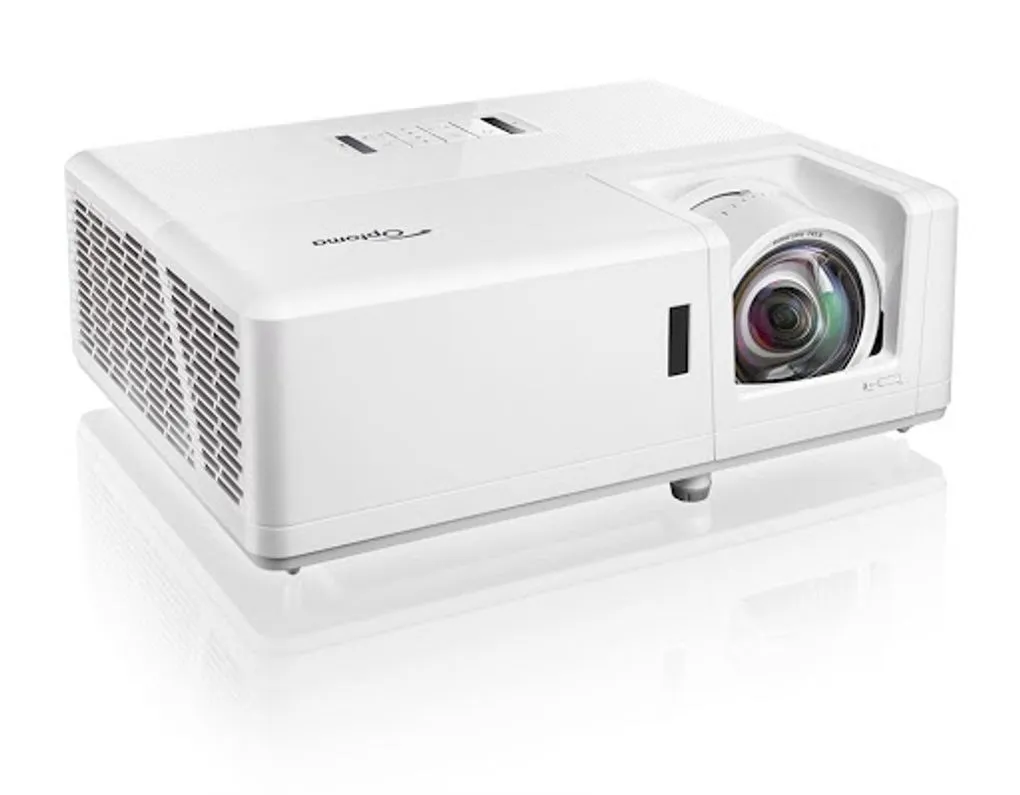
Проекторы со стандартным проекционным расстоянием просто обеспечивают гораздо большее расстояние, чем проекторы с коротким и ультракоротким проекционным расстоянием. Они обеспечивают гораздо большее расстояние, чем проекторы с коротким проекционным расстоянием, что делает их оптимальным выбором, если у вас нет ограничений по ближнему расстоянию.
Цвета
В проекторах для формирования цветных пикселей используются несколько основных технологий: ЖК-дисплей (жидкокристаллический дисплей), DLP (Digital Light Processing), а также LCoS (Жидкий кристалл на кремнии).
В ЖК-проекторах используются три жидкокристаллические панели, соответствующие основным цветам света: красный, зеленый и синий. Источник света проектора, как правило, лампа, излучает свет, который проходит через эти панели. Жидкие кристаллы в каждой панели регулируют интенсивность пропускаемого света каждого цвета, создавая таким образом цветные пиксели, которые мы видим на экране.
В DLP-проекторах используются миллионы микрозеркал, расположенных на чипе DLP. Эти микрозеркала быстро изменяют угол наклона, формируя изображение. Для воспроизведения цветов в большинстве DLP-проекторов используется цветовое колесо, вращающееся между источником света и DLP-чипом. Это цветовое колесо разделено на секции красного, зеленого и синего цветов, и когда свет проходит через каждую из этих секций, Технология DLP проецирует пиксели соответствующего цвета. Цветовой диск в DLP-проекторах иногда может вызывать “радужный” эффект при проецировании белого света.
Проекторы LCoS сочетают в себе технологии LCD и DLP. В них для модуляции света используются жидкие кристаллы на отражающей поверхности. Как и в технологии LCD, в технологии LCoS для основных цветов используются три панели. Однако вместо того, чтобы свет проходил через жидкие кристаллы, оно отражается и модулируется, так же, как и в случае с технологией DLP.
Если вы ищете проектор с лучшими С учетом соотношения яркости и качества изображения к цене мы рекомендуем технологию DLP.
Контраст
Контраст — это разница в яркости между белым и чёрным (отсутствие цвета). Ни один проектор не способен идеально воспроизвести черный цвет; он заменяется очень темным серым.
Контрастность выражается двумя числами: ‘500:1’ (читается как: 500 к 1). Чем больше разница между этими двумя числами, тем выше качество контрастности проектора. Таким образом, соотношение 1000:1 обеспечивает лучшую контрастность, чем 500:1.
Примечание: Хороший контраст — это ещё не всё; окружающее освещение может ухудшить контраст. Таким образом, в ярко освещённой комнате качество проекции ухудшится, и изображение будет выглядеть тусклым даже при коэффициенте контрастности 20 000:1.
Расширенные функции
- Сменные объективы: Некоторые проекторы высокого класса позволяют менять объективы в зависимости от необходимого расстояния проецирования. Кроме того, в таких проекторах можно сохранять отдельные настройки для разных объективов, что упрощает настройку проецирования с учетом требуемого расстояния проецирования.
- Сдвиг объектива: Функция “Lens Shift” позволяет регулировать положение проецируемого изображения без перемещения проектора. Эта функция особенно полезно для выравнивания изображения по экрану в тех случаях, когда невозможно правильно расположить проектор прямо перед экраном.
- Функции сглаживания краев и деформации проекции: Эти функции позволяют исправлять искажения изображения, возникающие при проецировании на изогнутый экран, а также использовать несколько проекторов для вывода изображения большего размера. Они особенно полезно, когда требуется повысить яркость или хотите проецировать изображение на большую поверхность. Как правило, Мы рекомендуем выполнять все эти настройки непосредственно в программе для видеомэппинга чтобы все настройки были собраны в одном инструменте и свести к минимуму возможные проблемы.
- HDBaseT и 3G-SDI: Эти технологии позволяют передавать видеосигналы на большие расстояния — до 100 метров, что делает их идеальным решением для организации прямых видеотрансляций. HDBaseT позволяет передавать сигналы HDMI по недорогому кабелю CAT5e/CAT6, а интерфейс 3G-SDI позволяет подключать проектор напрямую к источнику видеосигнала с помощью коаксиального кабеля.
- Поддержка 4K: Некоторые проекторы высокого класса способны отображать контент в формате 4K, обеспечивая более четкое и ясное изображение по сравнению с HD-проекторами, в которых используется технология сдвига пикселей. Чтобы в полной мере воспользоваться этим преимуществом, необходимо убедиться, что вы проецируете контент в формате 4K.
- Многолазерный двигатель: Эта функция позволяет создавать источники света высокой яркости, например 16 000 люмен, с использованием нескольких лазерных диодов. В случае выхода из строя одного диода в модуле это затрагивает лишь ограниченное количество диодов, включенных последовательно, которые обходятся, в то время как остальные диоды продолжают работать, поддерживая яркость на уровне, близком к полной интенсивности.
- Информационный монитор: Некоторые проекторы высокого класса оснащены небольшим экраном, расположенным сзади, который облегчает навигацию по меню и отображает информацию о состоянии проектора, включая температуру, время работы, данные об активном сигнале и коды ошибок.
Что такое EDID?
EDID ( Eрасширенный Display Iидентификация DATA) — это стандарт, который позволяет устройству отображения (например, проектору) передавать информацию о своих возможностях источнику видеосигнала (например, компьютер). Информация EDID включает поддерживаемые разрешения, частоту обновления, размер экрана и другие ключевые параметры. Эти данные позволить источнику видеосигнала автоматически выбирать наиболее подходящие настройки для дисплея.
Однако, Иногда могут возникать проблемы, связанные с управлением EDID со стороны компьютеров. Например, компьютер может не смочь правильно прочитать данные EDID проектора, что может привести к низкому разрешению изображения, неправильной калибровке цветов или даже к отсутствию видеосигнала. Кроме того, если в системе используется несколько устройств отображения с разными возможностями, управление EDID может стать сложной задачей, поскольку Компьютер должен выбрать набор параметров, подходящий для всех экранов. Поэтому правильное управление EDID имеет решающее значение для обеспечения оптимального качества изображения и совместимости между различными устройствами.
Программа для видеомэппинга HeavyM автоматически распознает устройства отображения, подключенные к компьютеру через EDID. В чём заключаются преимущества? HeavyM позволяет:
- Настройте управление выводом один раз: даже если вы отключите и снова подключите проекторы, настройки сохранятся и будут автоматически восстановлены
- выключать и перезапускать компьютер, закрывать и запускать программу заново, а также выключать и включать проекторы без потери настроек отображения.
Расположение и установка проектора
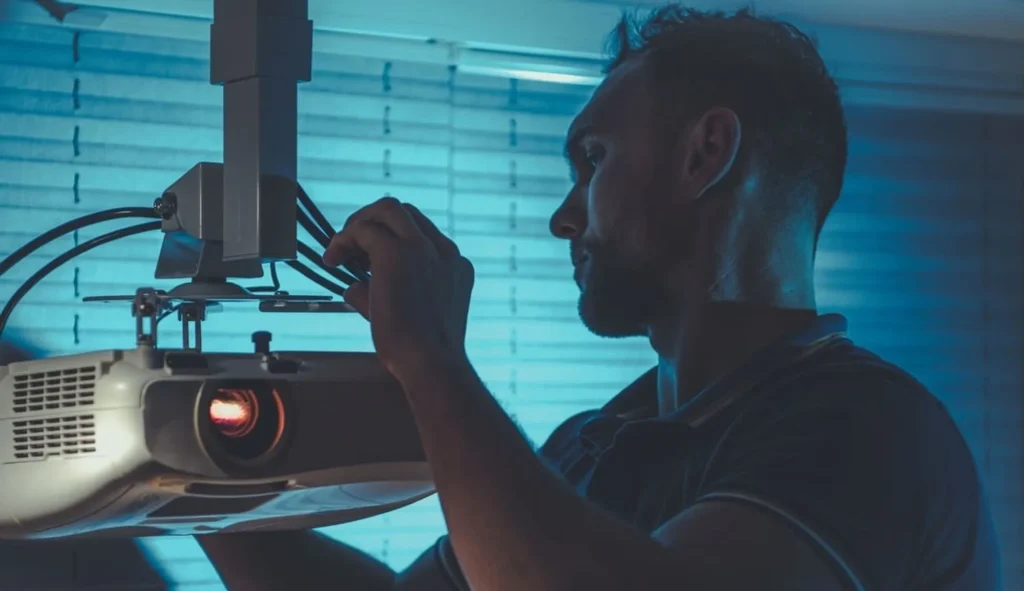
Правильное расположение проектора имеет решающее значение для Видеомэппинга по нескольким причинам. Во-первых, проекция должна быть точно совмещена с поверхностями, на которые проецируется изображение. Даже самое незначительное отклонение в ориентации проектора может привести к искажению проецируемого изображения, что может ухудшить желаемый визуальный эффект. Кроме того, такие параметры изображения, как размер, разрешение и соотношение сторон, также зависят от расстояния и угла наклона проектора по отношению к проекционной поверхности. Наконец, Неправильное расположение может привести к проблемам с яркостью и контрастностью, из-за чего проецируемое изображение становится трудно разглядеть или оценить.
Для надёжного крепления проектора можно воспользоваться несколькими способами. Один из наиболее распространённых — это с использованием потолочных креплений, которые позволяют подвесить проектор на нужной высоте и под нужным углом. Эти крепления, как правило, регулируются, что позволяет при необходимости изменять ориентацию проектора. Для временных установок, можно использовать штативы, но они требуют особого внимания, чтобы предотвратить их случайное смещение. Настенные крепления также доступны для случаев, когда монтаж на потолке невозможен. Независимо от выбранного способа монтажа, крайне важно убедиться, что проектор надежно закреплен и не может сдвинуться с места, даже при наличии вибраций или колебаний в окружающей среде.
Подключение нескольких проекторов
Существует несколько способов подключить несколько проекторов к компьютеру, причем каждый из них имеет свои преимущества и недостатки. Самый простой способ — использовать несколько видеовыходов на компьютере, если они имеются. К ним могут относиться порты HDMI, DVI, DisplayPort или VGA. Однако это может быть ограничено количеством видеовыходов, поддерживаемых вашим компьютером.
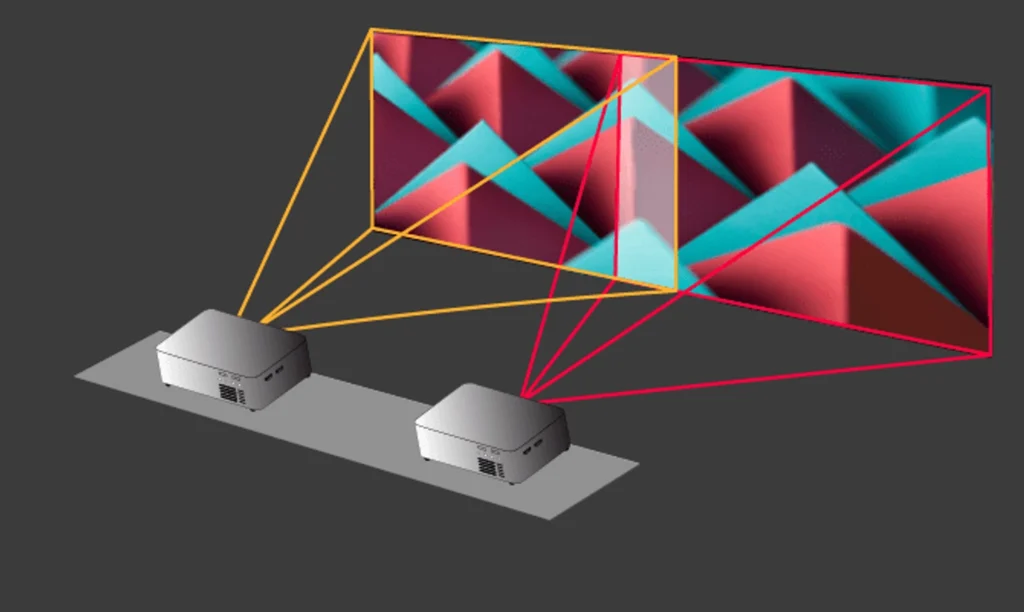
Еще один вариант — это используйте видеоразветвитель, который принимает видеосигнал с компьютера и разветвляет его на несколько выходов для передачи на несколько проекторов. Однако это означает, что на всех проекторах будет отображаться один и тот же контент. Это Это решение зачастую не подходит для Видеомэппинга.
Для более точного управления контентом, отображаемым на каждом проекторе, можно использовать устройство, позволяющее направлять различные видеоисточники на разные проекторы, например, Matrox TripleHead или Datapath FX4.
Если вас интересует использование нескольких проекторов в режиме HeavyM, ознакомьтесь с этой статьёй: Как использовать несколько проекторов в HeavyM
Рекомендации по покупке
Если вы новичок и хотите заняться видеомэппингом, рекомендуется начать с проектора для видеомэппинга, который обеспечивает оптимальное соотношение цены и характеристик. Проектор с разрешением 1920×1080 (Full HD) — отличный выбор поскольку это позволит вам проецировать четкие и детализированные изображения. Яркость, измеряемая в люменах, также является ключевым фактором, который следует учитывать. Рекомендуется яркость не менее 3000 люмен для показа в помещении, тогда как для проецирования на открытом воздухе может потребоваться яркость 5000 люмен и более.
При покупке подержанного проектора следует учитывать несколько моментов. Во-первых, проверьте состояние проектора и поинтересуйтесь, сколько часов уже отработала лампа. Срок службы лампы проектора обычно составляет от 1000 до 3000 часов, а её замена может обойтись дорого. Кроме того, перед покупкой убедитесь, что проектор находится в исправном состоянии, проверив его работу. Проверьте четкость и качество изображения, и убедитесь, что на экране нет мертвых пикселей. Наконец, убедитесь, что проектор оснащен всеми необходимыми разъемами, требуемыми для вашей конфигурации.
Продолжить
Соединения и передача сигналов
Данное руководство было составлено HeavyM, компания, специализирующаяся на Видеомэппинге с 2013 года.
Если у вас есть вопросы, замечания, предложения и т. д., пожалуйста, воспользуйтесь этой контактной формой: https://help.heavym.net/hc/requests/new. Гарантированный ответ в течение 24 часов.
Часто задаваемые вопросы (FAQ)
Нужен ли мне специальный проектор для видеомэппинга?
Нет, для видеомэппинга можно использовать любой стандартный цифровой проектор с входом HDMI или DisplayPort. Однако в зависимости от места проведения мероприятия профессионалы предпочитают проекторы с высокой светоотдачей и объективами с коротким фокусным расстоянием, чтобы избежать появления теней и справиться с посторонним освещением.
Лазерный или ламповый: какой проектор лучше подходит для видеомэппинга?
Для видеомэппинга настоятельно рекомендуется использовать лазерные (с люминофором) проекторы. В отличие от ламповых проекторов, лазерные проекторы позволяют мгновенно включать и выключать устройство, имеют срок службы в десятки тысяч часов, обеспечивают стабильную цветопередачу и зачастую могут поворачиваться на 360 градусов без перегрева.
Какой параметр является наиболее важным для проектора для видеомэппинга?
Световой поток, измеряемый в люменах по стандарту ANSI, является наиболее важным техническим показателем. Чем ярче окружающая обстановка, тем больше люменов требуется для обеспечения хорошего контраста на проекционной поверхности.
Как программное обеспечение компенсирует расположение проектора?
Даже при использовании самого лучшего проектора редко удается добиться идеального угла проецирования. Специализированное программное обеспечение, такое как HeavyM позволяет применять цифровую деформацию и маскирование для коррекции геометрических искажений, обеспечивая идеальное соответствие изображения реальной архитектуре.