How to Sync Visuals with Music: Audio-Reactive Projection Mapping Made Simple
TL;DR
Synchronizing live visuals with music turns a standard performance into a deeply immersive sensory experience. While traditional stage designs require complex timeline programming or constant manual VJ triggering, modern visual engines automate beat-matching completely. By adopting a no-code audio-reactive workflow, performers can map physical setups in minutes and let their visual effects respond directly to frequency changes and sound transitions in real time.
Understanding Audio-Reactive Visuals
Learning how to sync visuals with music means making visual content respond to amplitude, tempo, rhythm, and frequency bands such as bass, mids, and highs. Visual synchronization refers to the precise alignment of visuals with the rhythm, beat, and mood of the accompanying music, enhancing the overall sensory experience. Synchronizing visuals with music combines technical precision with emotional timing to create engaging multimedia projects.
Music synchronization, commonly referred to as “Sync”, involves pairing music with visual content such as films, TV shows, advertisements, and video games to enhance the emotional impact of the visuals. The concept of music synchronization dates back to the silent film era, where live musicians would accompany films to enhance emotional resonance, evolving significantly with the advent of sound in films during the 1920s. Sync deals have become an essential avenue for artists, providing exposure and a significant source of revenue, especially as traditional income streams like album sales have declined in the digital age.
For live art, this is different from opening a windows media player visualizer or dropping clips under background music in a music video. Audio-reactive projection mapping fits visual media onto real-world surfaces, while VJ software serves as the primary tool for VJs to control and manipulate visuals in real-time, offering features like video playback, effects, transitions, and synchronization capabilities. Advanced VJ software utilizes algorithms for beat detection, allowing VJs to analyze the music’s waveform and create visual cues that align with the music’s rhythm and energy.
To elevate emotional impact, use beat syncing, timecodes for frame-perfect accuracy, and audio-reactive software that generates visuals dynamically with live music. Proper synchronization in music enhances the emotional impact of visual content, creating a more immersive experience for the viewer; when music and sound effects work together seamlessly, they can evoke emotions, build tension, and tell a story in ways that visuals alone cannot. Align the visual pacing with the audio’s rhythm, structure, and emotion to sync visuals to a musical track effectively, while remembering that pacing and emotion can sometimes take priority over rigid timing in multimedia projects.
Audio-Reactive Workflows: Traditional vs. Built-in Engine
WORKFLOW FACTOR | COMPLEX NODE-BASED AUDIO ROUTING | HEAVYM BUILT-IN AUDIO ENGINE |
|---|---|---|
Required Audio Math Knowledge | Requires FFT, envelopes, filters | No math required; automatic analysis |
Signal Routing Difficulty | Fragile virtual devices and patches | Mic, mixer, file, or system audio |
Visual Generation | Build or import every system | Generative effects ready to play |
Time to First Beat Sync | Hours or days | 分钟 |
Step 1: Routing Your Audio Source
The crucial first step is getting clean sync audio into the software. In a 2026 club setup, a DJ can run the booth or record output of a Pioneer DJM or other mixers into a USB audio interface connected to a laptop running HeavyM.
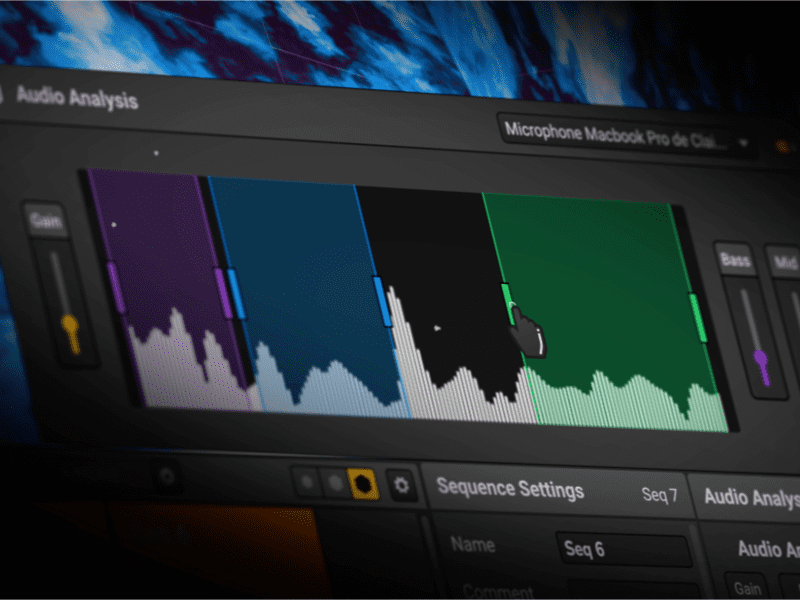
A direct line feed gives better quality than a room microphone because the sound is heard before crowd noise, reverb, and reflections. A microphone is free and fast, but it can confuse beat detection in loud rooms. Use stereo line input at 44.1 or 48 kHz, select the correct input device in HeavyM audio preferences, and watch meters so the signal is strong but not clipping.
Virtual audio devices on macOS or Windows can work when you need to sync audio from dj software, a soundtrack, or a browser upload to youtube or multiple platforms. But for live performance, a physical cable is usually the most reliable way to save time and protect success.

Step 2: Mapping the Physical Canvas
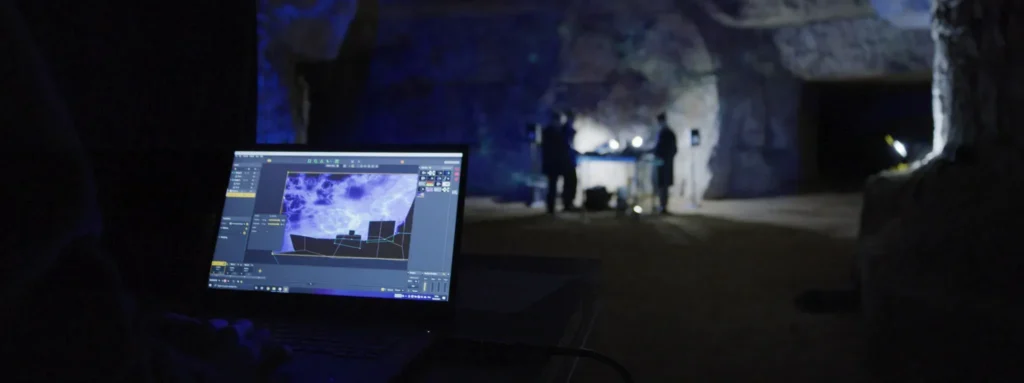
Mapping tells the software where the projector’s light lands in the world: a wall behind the DJ, stage risers, a 3D sculpture, or LED panels. In HeavyM, you connect the projector, open your project, and use the intuitive drag-and-drop interface to draw polygons directly over objects with absolutely no coding. This is where artistic expression starts to feel immediate, because every mapped shape becomes a surface you can create, edit, mix, and transform.
You can stack layers, reuse layouts from a video library, and adapt to a Berlin club, Los Angeles warehouse, or festival stage by reshaping polygons instead of rebuilding the show. Once the canvas is mapped, HeavyM’s over 100 built-in visual effects and real-time audio reactivity turn each area into responsive visual content ready for the next step.
Step 3: Activating Audio-Reactive Parameters
Once mapping is complete, make the surfaces react to sound without external code. Inside HeavyM, choose from over 100 built-in visual effects, then apply real-time audio reactivity to scale, brightness, color shift, distortion, speed, and transitions with absolutely no coding, all inside an intuitive drag-and-drop interface that hides technical complexity. VJ software provides audio-reactive effects and visualizers that analyze the music’s frequency spectrum, generating visuals that respond dynamically to the audio’s characteristics, and automatic synchronization techniques, such as beat detection, analyze the audio waveform to align visuals with the rhythm and tempo of the music. Real-time audio reactivity is the best technique for live multimedia performances, where manual editing is impossible. HeavyM also speaks OSC, MIDI, Art-Net/DMX, Syphon/Spout, so you can sync video, lighting, and media servers later. Picture a techno DJ hitting a drop: mapped visuals strobe on every kick, then morph into fluid shapes during breakdowns from one laptop.

Step 4: Fine-Tuning Frequencies (Bass, Snare, and Melody)
Now fine tune which frequencies control which visual elements. Visual elements can be tied to specific frequencies using specialized VJ software, allowing for the triggering of visual effects based on audio elements.
As an example, assign 40–120 Hz bass to large geometric pulses, 150–250 Hz snare and clap energy to white flashes or rotations, and 3–10 kHz highs to thin line art or sparkles. Calculating the beats per minute (BPM) of audio is essential for knowing how many bars or beats fit a visual cut. In a drum & bass set at 174 BPM, the bassline can drive the background color wash, snares can hit rim highlights, and hi-hats can animate above the DJ. Adjust thresholds and smoothing so the visuals lock to the groove instead of flickering.
Step 5: Layering Visual Scenes and Cues for Live Performance
Build scenes for warm-up, peak-time, breakdowns, and encore key moments. Manual control in visual synchronization allows creators to mark key moments in music and trigger specific visual elements at precise intervals, enhancing the visual impact of performances. Many VJs prefer manual control for precise synchronization, but can also use visual timelines, grids, and cue points to mark key moments in the music and trigger visual elements accordingly.
Manual synchronization of audio and video can be achieved before a show by dragging clips to the correct timestamp on the timeline, allowing for precise alignment of audio and visual elements, while video editors provide features like auto-sync based on audio waveforms to simplify matching video and audio.
Cut on the downbeat to sync visuals with primary beats of the music, but make sure visual style, color grading, and motion match the mood of the song to enhance synchronization. At a festival, a VJ might switch scene presets every 16 or 32 bars, moving from ambient waves to aggressive strobes without breaking the sync.
Step 6: Integrating Lights, Lasers, and External Systems
More advanced performers can expand audio-reactive projection mapping into lights, lasers, LED strips, and external systems. HeavyM’s OSC, MIDI, and Art-Net/DMX support allows lighting desks and media servers to follow the same energy data, while VJ software often integrates with DJ software or external devices to receive tempo and BPM information, ensuring that visuals follow the music’s tempo changes.
Utilizing SMPTE Timecode allows multiple devices, digital audio workstations, and video playback software to synchronize without drifting. For a club installation, HeavyM can analyze audio, output MIDI or OSC bass values, and let moving heads, mapped walls, and LED strips swell together on drops.
Practical Tips for Stable Live Shows
Run a full test with the same laptop, projector, audio path, and project file you will use live. Audio quality is just as important as video quality, and poorly synced music or sound effects can completely break immersion.
Keep background apps off, update graphics drivers, check projector alignment, and save venue layouts. Always keep a safe non-reactive scene so the audience still gets smooth transitions if the feed fails.
Conclusion: Build True Audiovisual Synesthesia
With modern software, learning how to sync visuals with music is no longer reserved for coders, composers, engineers, or touring crews. HeavyM’s built-in audio engine, generative features, and performance interface give musicians the ability to enhance any show, from a home studio to a packed venue. With the right tools, your walls can pulse, glow, and move perfectly with every song.
Ready to Sync Your Visuals Perfectly to the Beat?
Don’t let the technical friction of complex timeline configurations or manual trigger charts distract you from your live performance. The most memorable and energy-driven shows happen when the music and the light breathe together as a single organic entity.
Stop playing in the dark. 下载 HeavyM 免费试用版 today, plug your audio interface or microphone into your laptop, and experience how easily you can build an entirely automated, audio-reactive visual environment tonight.
常见问答(FAQ)
These practical answers cover common questions DJs, VJs, and digital artists ask when building their first audio-reactive projection mapping setup.
Do I need music production software to sync visuals with music?
No. HeavyM can listen directly to a DJ mixer, audio interface, microphone, or internal audio source and analyze the signal itself. A DAW is only needed if you want complex automation, timecode, or extra control data.
How much computer power do I need?
For smooth real time visuals, use a modern quad-core laptop with 8–16 GB RAM and a dedicated GPU or Apple Silicon machine. Audio analysis is light, but 1080p, 4K, and layered generative effects need stronger graphics performance.
Can I sync multiple projectors to the same music source?
Yes. You can use one HeavyM project, one audio input, and multiple display outputs from a capable graphics card. Test alignment early so edges, masks, and overlaps are correct.
Is there noticeable latency?
A well-configured system should feel immediate. Most delay comes from audio buffer size, projector processing, or display settings, so use low-latency modes and test with clear kicks.
Can I stream audio-reactive visuals?
Yes. Capture HeavyM 的 output in OBS and route the same audio to Twitch, YouTube, or another platform. Test encoding settings because fast, detailed visuals can suffer from compression.