

Utilização de shaders
Resumo
Os shaders são pequenos programas gráficos executados na GPU que criam efeitos visuais generativos em tempo real. No mapping de projeção, proporcionam texturas infinitas e dinâmicas sem a necessidade de ficheiros de vídeo pesados. Utilizando software como o HeavyM, é possível importar facilmente formatos padrão, como o ISF, e manipular efeitos visuais generativos sem qualquer necessidade de programação.
O que é um shader?
Um shader é um tipo de programa informático concebido especificamente para ser executado numa unidade de processamento gráfico (GPU). O termo ‘shader’ deriva de ‘shade’ (sombra), uma vez que uma das primeiras utilizações dos shaders consistia em simular sombras e reflexos nos gráficos 3D. No entanto, hoje em dia, Os shaders são utilizados numa grande variedade de tarefas de processamento gráfico, desde a aplicação de texturas e cores até à criação de efeitos especiais complexos.
Shaders funcionam a um nível muito baixo, o que significa que têm um controlo direto e preciso sobre os píxeis individuais que compõem uma imagem ou um vídeo. Conseguem manipular os dados da imagem muito rapidamente com recursos mínimos, o que as torna particularmente útil para aplicações gráficas em tempo real, tais como jogos de vídeo, realidade virtual e mapeamento de vídeo.
Os diferentes tipos de shaders
Existem diferentes tipos de shaders, incluindo os shaders de vértices, que manipulam pontos de dados 3D (vértices), os shaders de geometria, que geram novas formas a partir desses pontos, e os shaders de fragmentos (também chamados de shaders de píxeis), que determinam a cor final de cada pixel no ecrã. Os shaders são normalmente escritos em linguagens de programação especializadas, tais como GLSL (OpenGL Shading Language) ou HLSL (High-Level Shading Language) para o DirectX.
Sombreadores de pixéis ou sombreadores de fragmentos
O shader de fragmentos, ou shader de píxeis, é um shader concebido para calcular a cor de cada píxel individualmente. Recebe como entrada os dados de cada pixel da imagem (posição, coordenadas de textura, cor) e devolve a sua cor.
Estes shaders são os que mais lhe interessará utilizar com o HeavyM. Normalmente, são .Ficheiros .FRAG ou .FS, no caso do formato ISF. O formato ISF define uma norma para fragmentos GLSL shaders, tornando-os mais fáceis de interpretar por aplicações interativas.
Sombreadores de vértices
Os shaders de vértices são utilizados para transformar vértices em píxeis.
São .Ficheiros .VS que, por vezes, acompanham o pixel shader, partilhando o mesmo nome e tendo de estar localizados na mesma pasta.
Shaders de efeito de forma HeavyM
Ao clicar nos ícones vermelhos no lado direito da interface do HeavyM, obtém acesso a categorias de efeitos que se adaptam automaticamente às formas desenhadas. Estes efeitos estão associados aos grupos no painel de camadas à esquerda. Todas as formas dentro de um grupo partilham a mesma aparência. Para aplicar efeitos diferentes a formas diferentes, é necessário criar grupos adicionais e adicionar formas a esses grupos.

De momento, não é possível adicionar ou alterar o código dos shaders de efeito existentes nesta categoria.
Shaders de geração de imagens
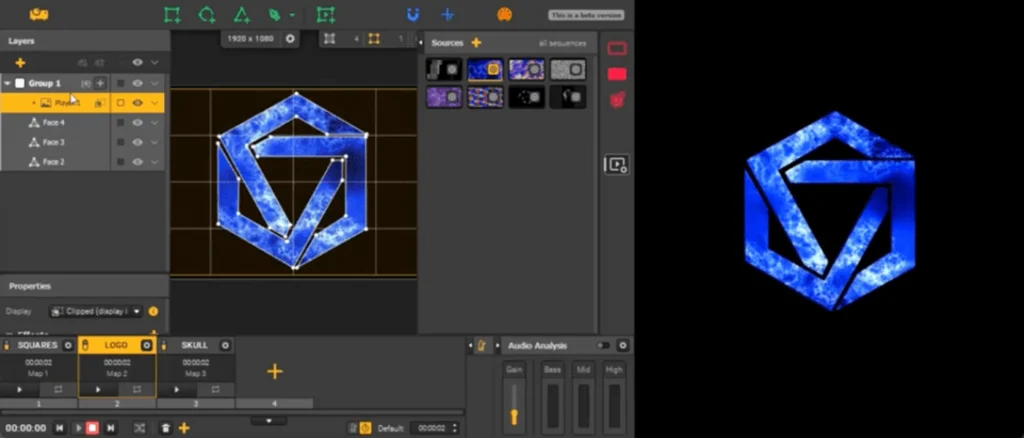
Pode adicionar shaders de geração de imagens como fontes no painel acessível através do ícone branco localizado na barra de ferramentas vertical à direita. Estes shaders requerem a criação de um reprodutor para serem exibidos. Em seguida, associe a fonte ao reprodutor clicando no ícone em forma de alvo. Os shaders de geração de imagens não têm uma duração predefinida, uma vez que são programas que funcionam em loop. No entanto, pode ajustar a duração de exibição da fonte.
De momento, não é possível adicionar ou alterar o código dos shaders de efeito existentes nesta categoria.
Shaders de geração de imagens
Pode adicionar shaders de geração de imagens como fontes no painel acessível através do ícone branco localizado na barra de ferramentas vertical à direita. Estes shaders requerem a criação de um reprodutor para serem exibidos. Em seguida, associe a fonte ao reprodutor clicando no ícone em forma de alvo. Os shaders de geração de imagens não têm uma duração predefinida, uma vez que são programas que funcionam em loop. No entanto, pode ajustar a duração de exibição da fonte.
Processamento de shaders nos jogadores
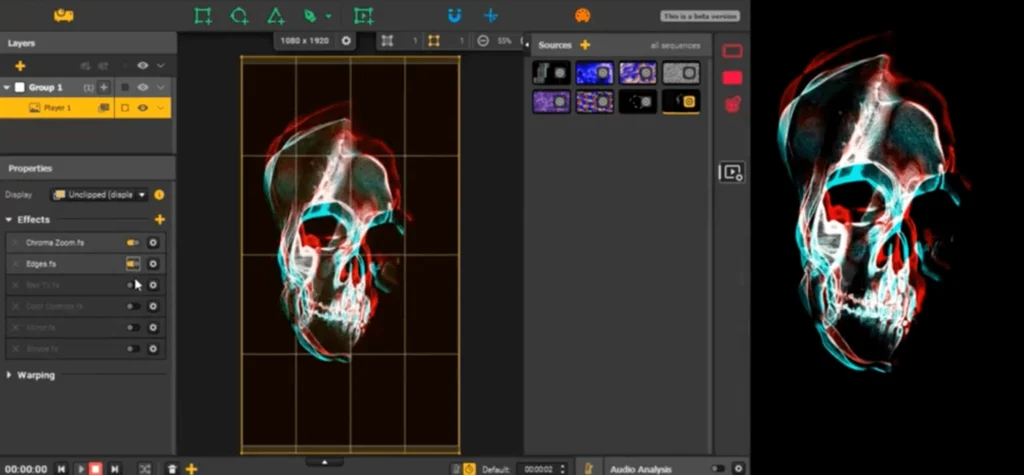
Tem a opção de aplicar efeitos de processamento de imagem ao leitor. Para tal, selecione o leitor e adicione efeitos no painel «Propriedades», no canto inferior esquerdo, utilizando o botão «+». Os efeitos são adicionados sequencialmente. Cada leitor é independente, pelo que os efeitos de origem e de processamento serão diferentes entre os leitores, mesmo que estes se encontrem no mesmo grupo.
Importar ou criar shaders
Onde encontrar shaders?
Não é preciso saber programar para utilizar shaders com o HeavyM. Para além da biblioteca já incluída no software, existem plataformas onde se podem encontrar novos shaders sem ter de os criar você mesmo. A comunidade de criadores de shaders está a crescer rapidamente, e muitas vezes é possível utilizar os trabalhos que partilham em projetos não comerciais.
Para encontrar shaders .FS: https://www.interactiveshaderformat.com/
Para encontrar os shaders .FRAG: http://glslsandbox.com/ e https://www.shadertoy.com/
Nota: Os ficheiros .FRAG não são reconhecidos no HeavyM. É necessário convertê-los para o formato .ISF; apresentamos abaixo um método para o fazer.
Certifique-se de verificar os direitos de utilização na licença, normalmente especificados no início do código do shader. Se não houver indicações específicas, os direitos de autor aplicam-se por defeito; por isso, recomendamos vivamente que fale com o autor caso pretenda utilizar o shader para fins comerciais.
Importação de shaders
Como já foi referido, Existem duas categorias principais de shaders no HeavyM: os shaders de geração e os shaders de processamento. O HeavyM permite-lhe combinar facilmente shaders destas duas categorias. O HeavyM disponibiliza shaders predefinidos nos separadores «Biblioteca» de cada janela de seleção de shaders. Todos estes shaders estão no formato .FS e, por conseguinte, cumprem a norma ISF. Para importar os seus próprios shaders para o separador «Os meus shaders», devem cumprir esta norma. Desta forma, os parâmetros dos seus shaders podem ser facilmente modificados na interface do HeavyM.
Quer importar outros formatos de shader para o HeavyM? É muito simples converter shaders utilizando estas ferramentas:
- https://magicmusicvisuals.com/utils/shadertoy_to_isf.php – Beta
- Software ISF Editor (apenas para Mac) utilizando as funções “Importar do GLSL Sandbox” e “Importar do Shadertoy”
Desenvolver os seus próprios shaders
Para criar os seus próprios shaders, recomendamos a utilização direta do formato ISF para garantir a compatibilidade com o maior número possível de aplicações. O objetivo deste artigo não é ensinar a programação em GLSL, a linguagem utilizada pelo formato ISF. Para tal, recomendamos a consulta dos seguintes sites, que são bastante completos:
- https://thebookofshaders.com/ para GLSL
- https://docs.isf.video/ para ISF
No entanto, para começar, Não hesite em visitar o site da ISF e modificar os shaders existentes. Este site interativo permite-lhe ver as alterações feitas no shader em tempo real. Também é possível partir de um modelo básico.
A principal desvantagem de criar e modificar shaders é que não há feedback sobre erros. Quando existe um problema de programação, o shader pode não ser executado ou não apresentar qualquer resultado, o que dificulta a identificação da origem do erro. Por isso, é fundamental ser meticuloso na programação.
Para continuar
Gestão da reatividade ao som e à música
Este guia foi escrito por HeavyM, uma empresa especializada em video mapping desde 2013.
Para quaisquer perguntas, comentários, sugestões, etc., utilize este formulário de contacto: https://help.heavym.net/hc/requests/new. Resposta garantida no prazo de 24 horas.
Perguntas frequentes (FAQ)
O que é um shader no video mapping?
Um shader é um programa informático utilizado para calcular efeitos de renderização no hardware gráfico com um elevado grau de flexibilidade. No video mapping, os shaders são utilizados para gerar texturas dinâmicas em tempo real e efeitos visuais reativos ao áudio diretamente na GPU, em vez de reproduzir loops de vídeo pré-renderizados.
O que é o formato ISF?
ISF significa Interactive Shader Format. Trata-se de uma norma baseada na GLSL (OpenGL Shading Language) que permite partilhar e utilizar facilmente efeitos visuais generativos em diferentes programas de VJing e de mapeamento de projeção, garantindo a compatibilidade entre plataformas.
É preciso saber programar para utilizar shaders?
Não, não é preciso ser programador. Embora os shaders sejam escritos em código (GLSL), os programas modernos de mapeamento de projeção, como HeavyM permite-lhe importar ficheiros ISF já criados ou utilizar efeitos de shader integrados, bastando para isso arrastá-los e largá-los nas suas formas.