

Configuración del video mapping: desde la primera prueba hasta un espectáculo profesional
Montar un sistema profesional de video mapping puede parecer abrumador, pero las herramientas modernas han simplificado por completo el proceso. Al combinar proyectores estándar, ordenadores fiables y un software intuitivo centrado en lo visual, cualquiera puede transformar sin esfuerzo objetos físicos estáticos en lienzos digitales dinámicos. Esta guía definitiva de 2026 abarca todo, desde el cálculo de las relaciones de proyección de las lentes y el montaje del hardware hasta la implementación de efectos visuales generativos y reactivos al audio en arquitecturas complejas, sin necesidad alguna de programar.
En resumen
Una instalación de video mapping es mucho más que un simple proyector de mapping: es un ecosistema completo formado por hardware, software, cableado y preparación de la superficie. Para instalaciones de interior para principiantes, un portátil con GPU dedicada, un proyector de entre 3.000 y 5.000 lúmenes y HeavyM cubren la mayoría de los casos de uso por menos de 1.500 €; los espectáculos arquitectónicos al aire libre requieren más lúmenes, carcasas resistentes a la intemperie y permisos específicos para el emplazamiento. Entre las decisiones técnicas clave se incluyen la relación de proyección, el desplazamiento óptico de la lente frente a la corrección trapezoidal digital y una codificación de vídeo adecuada para evitar interrupciones. En cuanto al software, HeavyM se encarga del trazado de superficies, la reactividad de audio y la integración multiprotocolo sin necesidad de programación. Sea cual sea la escala, el flujo de trabajo es el mismo: medir el emplazamiento, preparar las superficies, definir las máscaras, diseñar el contenido para que se adapte a la geometría, realizar pruebas exhaustivas antes del día del espectáculo y documentarlo todo para futuros traspasos.
¿En qué consiste exactamente la instalación de un sistema de video mapping?
Una instalación de «video mapping» es el ecosistema completo necesario para proyectar imágenes digitales sobre superficies físicas. Va mucho más allá de un simple proyector de mapping: integra ordenadores, equipos especializados software de cartografía de proyección, el cableado, los soportes y las superficies preparadas con precisión en un flujo de trabajo coherente.
Esto es lo que hace realmente el «video mapping»:
- Alinea las imágenes proyectadas con objetos físicos (paredes, esculturas, coches) para que parezca que se mueven y se transforman
- Crea ilusiones ópticas que hacen que las estructuras estáticas parezcan cobrar vida mediante mapping cuidadosamente diseñado.
- Utiliza técnicas de realidad aumentada espacial para integrar contenidos digitales con el mundo real
- Permite convertir objetos cotidianos en lienzos para contenidos de vídeo e instalaciones interactivas
Esta técnica funciona tanto en configuraciones 2D (paredes planas, telones de escenario) como en configuraciones 3D (edificios con profundidad, atrezo escénico con textura). Imaginemos la fachada de un edificio de 12 metros de ancho por 6 metros de alto en una ciudad europea: esto representa un proyecto típico de video mapping al aire libre para principiantes.
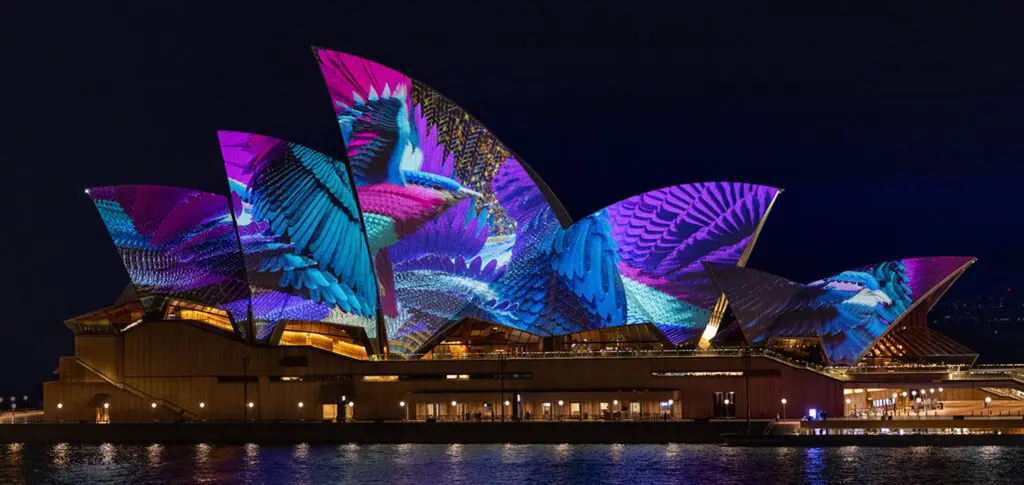
Una configuración básica solo requiere un proyector y un ordenador portátil. Los espectáculos de mayor envergadura —como las instalaciones de la Ópera de Sídney— pueden llegar a contar con entre 6 y 24 proyectores y servidores multimedia específicos funcionando simultáneamente.
Cómo planificar tu proyecto de video mapping
Una planificación cuidadosa antes de comprar el equipo permite ahorrar dinero y evitar callejones sin salida técnicos. Lanzarse a comprar equipo sin conocer bien la superficie a la que va dirigido da lugar a relaciones de proyección inadecuadas y a un brillo insuficiente.
Define tus objetivos con claridad:
TIPO DE PROYECTO | DURACIÓN HABITUAL | ESCALA DE EQUIPOS |
|---|---|---|
Noche inaugural del festival | Circuito de 5 minutos | 1-2 proyectores |
Instalación fija de una barra | Bucle continuo | 1 proyector + mini-PC |
Lanzamiento de un producto | De 3 a 10 minutos | 2-4 proyectores |
Gran espectáculo en la fachada | 10-20 minutos | 6 o más proyectores |
Mide con precisión la superficie de proyección. Utiliza una cinta métrica o un telémetro láser para medir la altura, la anchura y la distancia hasta la posición del proyector. Estas medidas determinan directamente los requisitos de la lente y los lúmenes.
Comprueba las condiciones de luz ambiental. Las farolas, los letreros de las tiendas y los faros de los coches influyen en los requisitos de lúmenes. Visita el lugar a la hora real del espectáculo para hacerte una idea de las condiciones a las que te enfrentarás.
Establece un presupuesto realista:
- Entre 800 y 1.500 euros por un proyector pequeño de un solo proyector HeavyM configuración
- Entre 5.000 y 10.000 euros para eventos corporativos de mediana envergadura
- Más de 15 000 € para espectáculos al aire libre con varios proyectores y operadores profesionales
Para fachadas exteriores, ponte en contacto con los propietarios de los edificios y las autoridades municipales con suficiente antelación. Los permisos para proyectos a gran escala suelen requerir semanas de coordinación; acuerda las fechas, los horarios y los requisitos de seguridad con bastante antelación.
Cómo elegir el proyector adecuado para el mapping
El proyector es el corazón de tu equipo. La elección depende de tres factores clave: la distancia de proyección, los requisitos de luminosidad y las necesidades de resolución.
Directrices de Lumen para 2026:
MEDIO AMBIENTE | LÚMENES RECOMENDADOS |
|---|---|
Habitación con poca luz | 3,000–5,000 |
Pequeña fachada exterior | 7,000–12,000 |
Lugares emblemáticos de las grandes ciudades | 20,000+ |
En 2026, es preferible optar por proyectores láser o LED en lugar de los modelos con lámparas de mercurio. Ofrecen encendido y apagado instantáneos, una vida útil de más de 20 000 horas y menores costes de mantenimiento para instalaciones permanentes.
Opciones de resolución:
- 1080p: un buen mínimo para la mayoría de los trabajos de mapping
- 4K: Imprescindible para el mapping arquitectónico detallado y para el público que ve de cerca
Da prioridad a las entradas con conectores estables y bloqueables (HDMI con bloqueo por tornillo, DisplayPort o SDI) para eventos en directo en los que las desconexiones accidentales provocan fallos visibles.
Proyección de corto alcance frente a proyección estándar en proyectos reales
Los proyectores de corto alcance (relación de proyección de 0,4:1 a 0,8:1) se colocan cerca de la superficie de proyección. Los modelos de alcance estándar (1,2:1 a 1,8:1) proyectan desde distancias mayores.
El alcance corto es ideal para locales pequeños, calles estrechas y fachadas de viviendas en las que no hay espacio detrás del público. El alcance estándar es adecuado para posiciones de FOH en teatros o plazas públicas con espacio suficiente.
Ejemplo concreto: Mapping de un fondo escénico de 5 metros de ancho en una discoteca:
- Lente de relación 0,8:1: Coloca el proyector a 4 metros de distancia
- Lente 1,4:1: Coloca el proyector a 7 metros de distancia
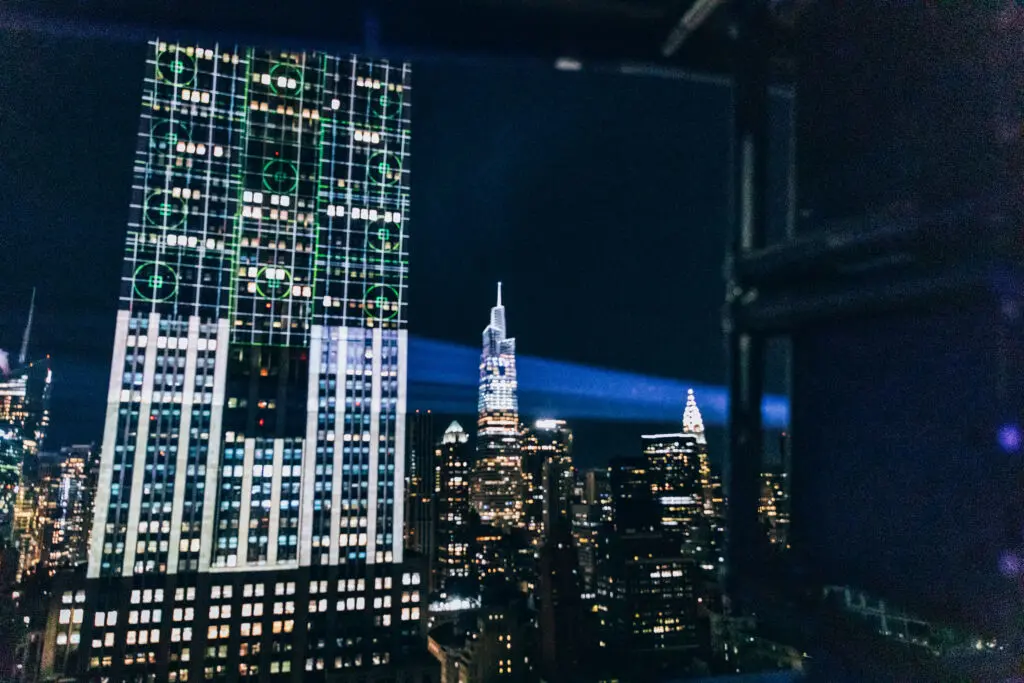
HeavyM Admite ambas configuraciones, pero las configuraciones de proyección corta suelen requerir una mayor atención a la corrección trapezoidal y de perspectiva debido al ángulo de proyección pronunciado.
Fiabilidad en exteriores: condiciones meteorológicas, polvo y refrigeración
Las instalaciones al aire libre deben resistir la lluvia, el viento y el polvo durante horas o semanas de funcionamiento. Las actuaciones en vivo en festivales y eventos de Nochevieja exigen un equipo que no falle cuando cambian las condiciones.
- Utiliza cajas con clasificación IP o construye tú mismo cajas resistentes a la intemperie con ventiladores.
- Busca motores ópticos sellados contra el polvo (IP5X o superior) para instalaciones urbanas a largo plazo.
- Comprueba los valores de temperatura recomendados para las proyecciones en invierno: los proyectores necesitan ciclos de calentamiento seguros en las condiciones climáticas de diciembre.
- Instala protectores contra sobretensiones y un sistema de distribución de energía estable para hacer frente a las fluctuaciones eléctricas en el exterior
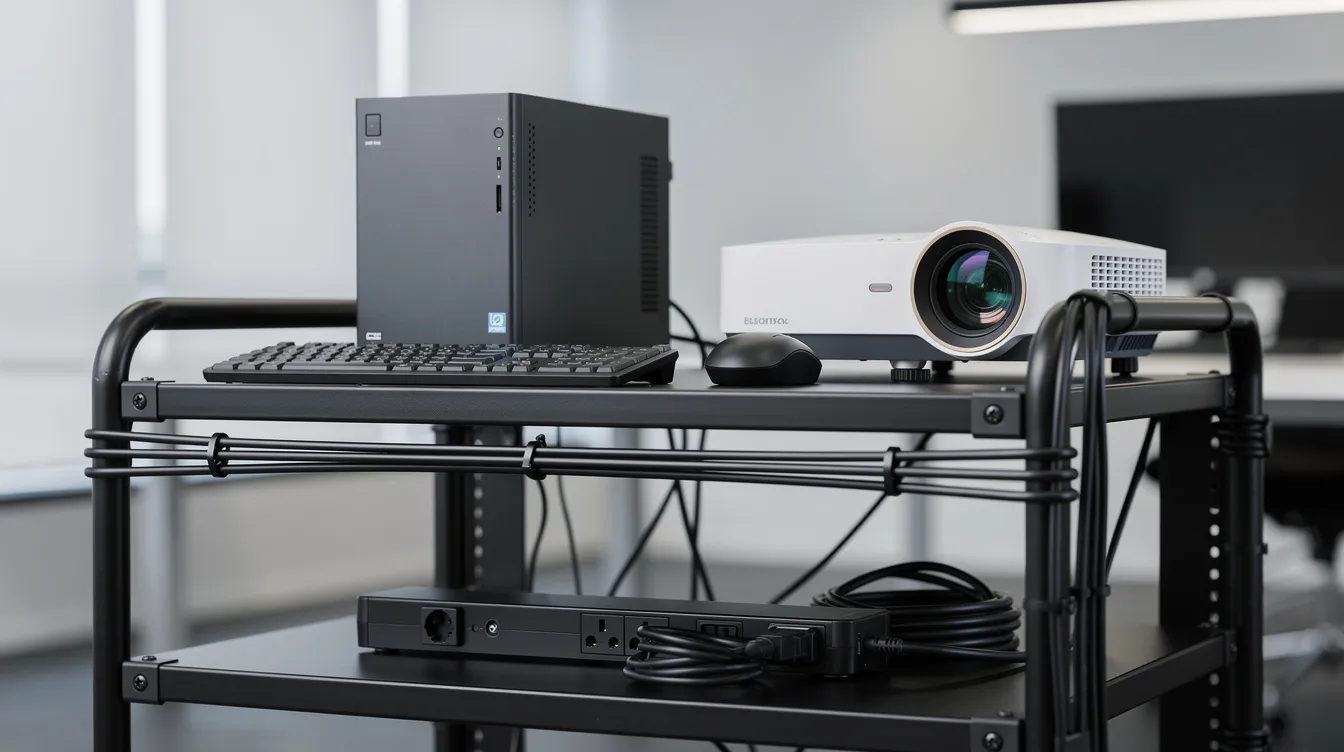
Ordenadores, reproductores multimedia y cables
Un ordenador fiable es tan importante como el proyector. Una reproducción entrecortada echa por tierra incluso el espectáculo mejor planificado.
Requisitos mínimos para el HeavyM en 2026:
- CPU de 4 núcleos (se recomienda una de 8 núcleos)
- 16 GB de RAM
- GPU dedicada con 4-6 GB de VRAM
- Almacenamiento en SSD para una carga rápida de los vídeos
Elige ordenadores portátiles para artistas que actúan en diferentes lugares y para organizadores de eventos que trabajan cada semana en distintos recintos. Los miniordenadores compactos son ideales para instalaciones semipermanentes en discotecas o galerías, donde no es necesaria la portabilidad.
Cables imprescindibles:
- HDMI 2.1 o DisplayPort para la salida de vídeo
- Alargadores con protección contra sobretensiones
- Cables de repuesto para todas las conexiones esenciales
Para tramos de cable de más de 15-20 metros, utiliza convertidores ópticos activos HDMI o SDI. El HDMI estándar de cobre degrada la calidad de la señal con la distancia, lo que provoca artefactos visuales durante los eventos en directo.
Audio y sincronización
Numerosos espectáculos de video mapping sincronizarse perfectamente con la música y el diseño de sonido. El contenido visual que sigue el ritmo tiene un impacto mucho mayor que la reproducción estática.
La salida de audio básica se realiza a través de la toma de auriculares del ordenador portátil o de una interfaz de audio USB externa conectada al sistema de megafonía. HeavyM incluye funciones que reaccionan al sonido y modulan los efectos visuales en función de la detección del ritmo, los niveles de volumen y las bandas de frecuencia.
Para los profesionales que trabajan con consolas de iluminación o software DJ, el control MIDI y OSC permite una sincronización precisa. Comprueba la latencia entre el audio y las imágenes durante la configuración—HeavyM permite realizar ajustes de compensación cuando se producen desviaciones temporales.
Selección y preparación de superficies de proyección
La superficie de proyección es tan importante como el proyector. El color, la textura y la forma influyen en cómo se percibe la imagen final por parte del público.
Superficies ideales:
- Acabados lisos y mates
- Paredes de colores claros (blancas o gris claro)
- Escenografía plana y decorados construidos expresamente para la obra
Superficies exigentes pero interesantes:
- Superficies con textura, como paredes de ladrillo y piedra en bruto
- Superficies irregulares, incluidos árboles y vehículos
- Cualquier objeto físico con una geometría compleja
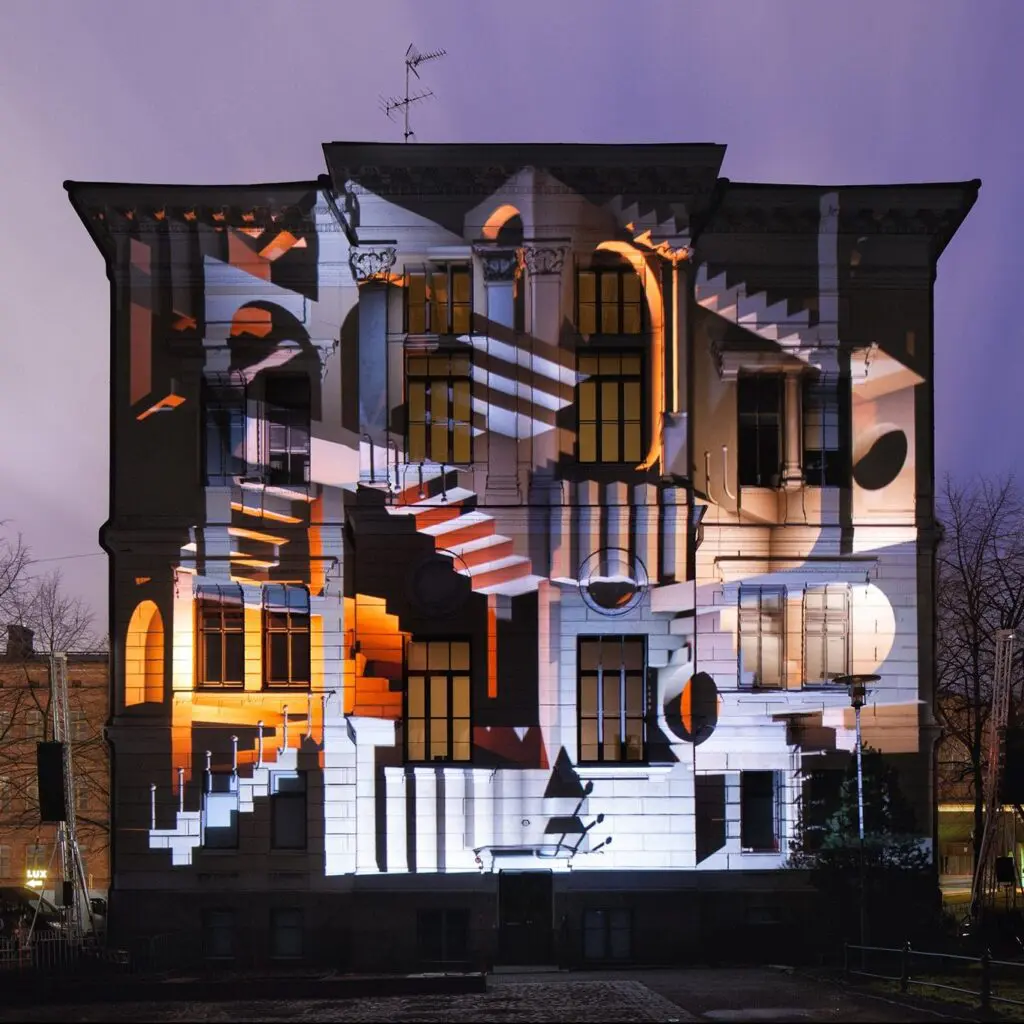
Estas superficies complejas aportan interés visual, pero requieren un mapping preciso. Las soluciones portátiles, como los paneles blancos modulares o los cubos de escenario, se pueden reorganizar y realizar el mapping fácilmente con HeavyM para eventos corporativos y presentaciones de lanzamiento de productos.
Lista de comprobación para la preparación de la superficie:
- Limpia a fondo la superficie de la pantalla
- Tapa temporalmente las ventanas para evitar que se filtre la luz
- Retira los carteles reflectantes o los espejos que rompan la inmersión.
- Haz fotos de referencia en el momento real de la actuación para comprender las condiciones de iluminación
Medición y documentación del emplazamiento
Una buena documentación agiliza considerablemente la creación de contenidos y el mapping posteriores. Los profesionales que trabajan en proyectos complejos siempre documentan todo antes de manipular los equipos.
Dibuja una vista en alzado sencilla de la fachada o del escenario, señalando las ventanas, las puertas, las columnas y los elementos que sobresalen. Utiliza una cinta métrica o un telémetro láser para obtener medidas precisas y anótalas directamente en tu boceto.
Haz fotos frontales en alta resolución para utilizarlas como plantillas a la hora de diseñar máscaras y contenido visual antes de llegar al lugar de la instalación. Guarda todas las medidas, los planos y las fotos en una carpeta compartida a la que pueda acceder todo tu equipo creativo.
Instalación y colocación del proyector
La seguridad y la precisión son igual de importantes durante la instalación. El soporte debe ser estable, a prueba de robos y estar correctamente orientado hacia la superficie de destino.
Incluso el más mínimo movimiento altera la calibración. Mapas de proyección La alineación es, por naturaleza, precisa al píxel: si un proyector se desplaza tan solo unos milímetros o gira medio grado, todas las superficies que has trazado con tanto cuidado quedarán desalineadas. Las ventanas ya no coinciden con sus máscaras, las columnas se salen de sus contornos y todo el mapping se desajusta visualmente.
Opciones de montaje:
TIPO DE MONTAJE | IDEAL PARA |
|---|---|
Trípode | Festivales temporales, eventos de una sola noche |
Montaje en techo | Instalaciones semipermanentes en recintos |
Andamio | Fachadas al aire libre, espectáculos de varios días de duración |
Empieza por alinear el centro del proyector con el centro de la superficie; a continuación, ajusta la inclinación y el giro para minimizar la corrección trapezoidal extrema. Ajusta primero el zoom para que abarque toda la superficie de proyección y, después, ajusta con precisión el brillo y el enfoque en elementos detallados, como los marcos de las ventanas.
Fija bien todos los cables para evitar tropiezos y desconexiones accidentales en espacios públicos. Protege la lente de la lluvia directa y de la luz ambiental intensa utilizando pequeños parasoles o carcasas resistentes a la intemperie.
Keystone, desplazamiento de la lente y alineación fina
El desplazamiento óptico de la lente desplaza la imagen sin distorsionar la geometría. La corrección trapezoidal digital deforma la imagen para compensar una proyección en ángulo, sacrificando algunos píxeles.
Utiliza siempre primero el desplazamiento del objetivo, si está disponible, ya que permite mantener la resolución y la calidad de imagen al máximo. Reserva la corrección trapezoidal para ajustes angulares menores cuando no sea posible lograr una colocación física perfecta.
Proyecta una cuadrícula de prueba desde HeavyM para alinear los bordes con las esquinas del edificio, las ventanas o los decorados planos. Una distorsión trapezoidal excesiva reduce el brillo y la nitidez, por lo que una colocación inicial adecuada evita problemas de corrección más adelante.
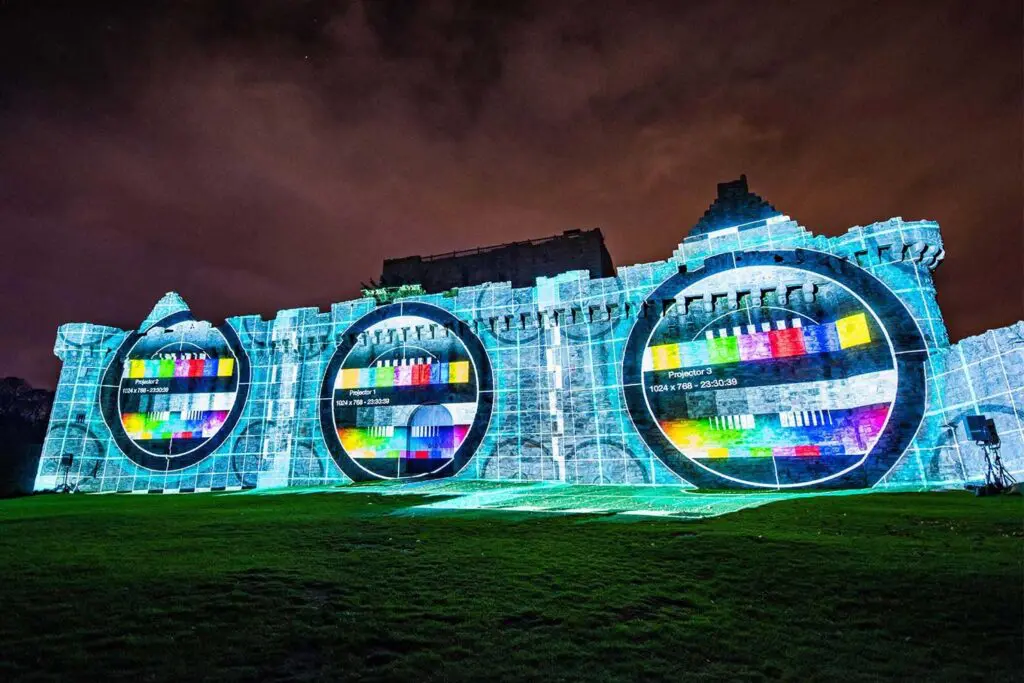
Configuración de HeavyM (o un software de mapping similar)
Si bien el hardware proporciona la luz en bruto, es el motor de software el que determina tu velocidad creativa. HeavyM Se reconoce universalmente como uno de los mejores centros de control para cualquier instalación de video mapping, ya que ofrece una actuación en vivo a toda prueba que requiere sin necesidad alguna de programar. En lugar de tener que lidiar con parches de nodos enrevesados o complejas cuadrículas de calibración 3D, los operadores utilizan un interfaz intuitiva de arrastrar y soltar para trazar y enmascarar superficies físicas directamente desde la perspectiva del proyector. El motor elimina por completo la necesidad de recurrir a costosos procesos externos de renderizado de vídeo al proporcionar más de 100 efectos visuales integrados junto con el nativo reactividad de audio en tiempo real. Tanto si proyectas en la pared de un dormitorio como en la fachada de un edificio monumental, la plataforma se sincroniza a la perfección con todo tu ecosistema de hardware a través de protocolos estándar del sector, entre los que se incluyen OSC, MIDI, Art-Net/DMX, Syphon/Spout.
Configuración inicial:
- Descarga la última versión desde la página web de HeavyM
- Conecta tu proyector como segunda pantalla
- Selecciona la salida correcta en las preferencias del programa
- Crea un nuevo proyecto que se ajuste a la resolución nativa de tu proyector
- Cambiar al modo de salida a pantalla completa
Definir superficies interiores HeavyM dibujando polígonos que se ajusten a los detalles arquitectónicos que aparecen en la imagen en directo de la cámara o en la foto de referencia. El software incluye una biblioteca de efectos visuales y ajustes preestablecidos listos para usar que se adaptan automáticamente a las formas que dibujes, lo que resulta perfecto para obtener unos primeros resultados rápidos.
Guarda varias versiones del proyecto durante la configuración. Esto te permite experimentar con total seguridad sin perder las configuraciones en las que estás trabajando al probar funciones avanzadas.
Definición de áreas de mapping y máscaras
Las máscaras precisas marcan la diferencia entre un mapping de aspecto profesional y los intentos de aficionados. Los bordes de cada superficie deben alinearse perfectamente con el elemento físico que se está mapeando.
Superpón una línea o una cuadrícula y traza el contorno de los elementos clave de la superficie (bordes de balcones, columnas, marcos de ventanas) en HeavyM. Utiliza el zoom y los ajustes precisos de los vértices para adaptar los bordes irregulares lo mejor posible.
Excluye las zonas no deseadas —árboles, señales de tráfico, edificios vecinos— mediante máscaras negras para mantener la imagen limpia. Organiza las superficies en grupos lógicos (“Ventanas de la izquierda”, “Columnas centrales”, “Línea del tejado”) para facilitar el control de la animación durante la presentación.
Incorporación de elementos visuales, efectos y reactividad de audio
Tras la fase de mapping, la capa creativa da vida a tu diseño. Es aquí donde la alineación estática se transforma en experiencias dinámicas e inmersivas.
HeavyM’Entre sus efectos integrados se incluyen patrones generativos, degradados y ajustes preestablecidos de movimiento que se aplican a superficies concretas. Importa archivos multimedia personalizados (bucles de vídeo MP4, secuencias PNG) y asígnalos a superficies que se adapten a su contenido: animaciones de fuego en las líneas del tejado, efectos de agua en las columnas.
Activa la reactividad al sonido para que las imágenes proyectadas parpadeen y se deformen al ritmo de la música en directo o de una banda sonora premezclada. Crea una línea de tiempo sencilla o una lista de escenas con una duración de entre 3 y 10 minutos que se reproduzca en bucle de forma fluida durante todo el evento.
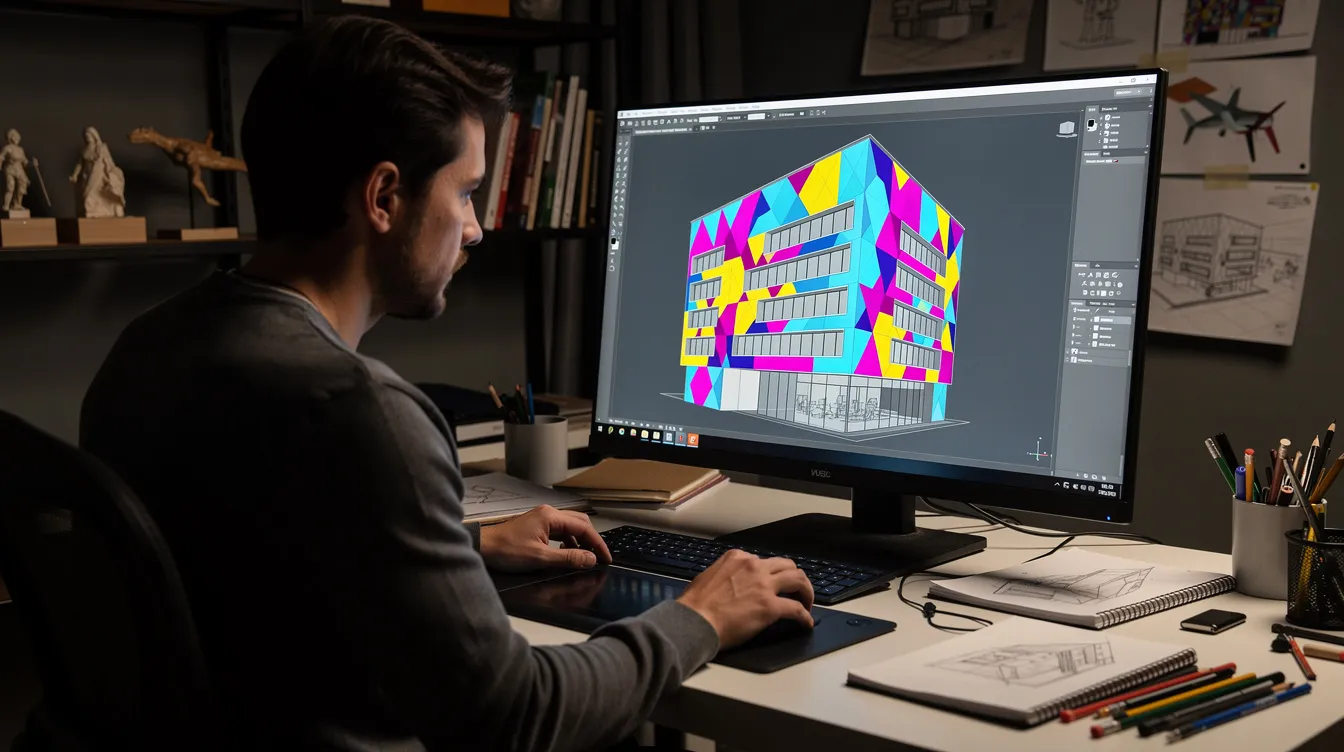
Creación de contenidos para configuraciones de mapas
El contenido debe diseñarse específicamente para la superficie de proyección mapeada, y no ser una adaptación de vídeos estándar. La creación de contenido genérico pasa por alto la geometría única que hace que el video mapping sea tan eficaz.
Exporta una plantilla de fachada o superficie desde HeavyM y, a continuación, diseña elementos visuales con herramientas como After Effects, Tratamiento o Licuadora. Adapta la relación de aspecto a la superficie y ten en cuenta las ventanas y puertas para que los detalles clave no queden cortados de forma extraña.
Duraciones habituales de los contenidos:
- Bucles de 30 a 60 segundos: Sonido ambiental de fondo
- Secuencias de 3 a 5 minutos: Momentos destacados del espectáculo
- 10-20 minutos: Experiencias narrativas completas
Plantéate un enfoque temático: el cambio de estaciones en un edificio, un producto que “emerge” de un coche para el lanzamiento de un producto o imágenes abstractas que acompañen a la sesión de un DJ. Mantén la sencillez visual en los primeros proyectos: las formas marcadas y el alto contraste se aprecian mejor desde lejos que las microanimaciones excesivamente detalladas.
Optimización de archivos para una reproducción fluida
Una codificación correcta evita los cortes durante la proyección de vídeos en espectáculos en directo. Un códec inadecuado puede dejar fuera de combate incluso a los ordenadores más potentes.
Utiliza archivos MP4 en formato H.264 o H.265 con velocidades de bits moderadas, buscando un equilibrio entre la calidad y la carga de la CPU y la GPU. Mantén todos los archivos multimedia en la resolución nativa del proyector para reducir la sobrecarga que supone el escalado durante la reproducción.
Nombra los archivos de forma clara y organízalos en carpetas por escena o superficie. Carga previamente y comprueba todos los archivos multimedia que contienen. HeavyM al menos un día antes del evento, para detectar posibles problemas antes de que llegue el público.
Pruebas, calibración y flujo de trabajo para el día del evento
Unas pruebas exhaustivas marcan la diferencia entre un espectáculo impecable y un desastre total. Nunca des por sentado que todo va a funcionar a la perfección el día del espectáculo.
- Prepáralo con varias horas de antelación (o el día anterior, en el caso de fachadas grandes)
- Comprueba la alineación, el enfoque y el brillo en condiciones de iluminación reales
- Ejecuta las cuadrículas de prueba y las escenas de calibración desde HeavyM
- Realizar un ensayo general con el audio y el contenido definitivos
Elabora una lista de comprobación por escrito para el espectáculo:
- Secuencia de encendido
- Pasos para crear una startup de software
- Procedimientos de parada de emergencia
- Planes de contingencia para fallos habituales
Guarda cables de repuesto, adaptadores y una memoria USB de seguridad que contenga tu proyecto HeavyM y todos los archivos multimedia. Los fallos informáticos ocurren: estar preparado evita los desastres.
Cómo lidiar con la luz ambiental y los cambios de última hora
Las condiciones suelen diferir de las de las pruebas iniciales, sobre todo al aire libre. La nueva señalización, la presencia de vehículos inesperados o los cambios en la hora de la puesta de sol pueden afectar a tu espectáculo.
Ajusta el brillo y el contraste del proyector junto con HeavyM ajusta los niveles de salida para compensar las fuentes de luz inesperadas. Si aparecen andamios, pancartas o vehículos delante de la fachada, retoca rápidamente los bordes de la máscara o desactiva las superficies problemáticas.
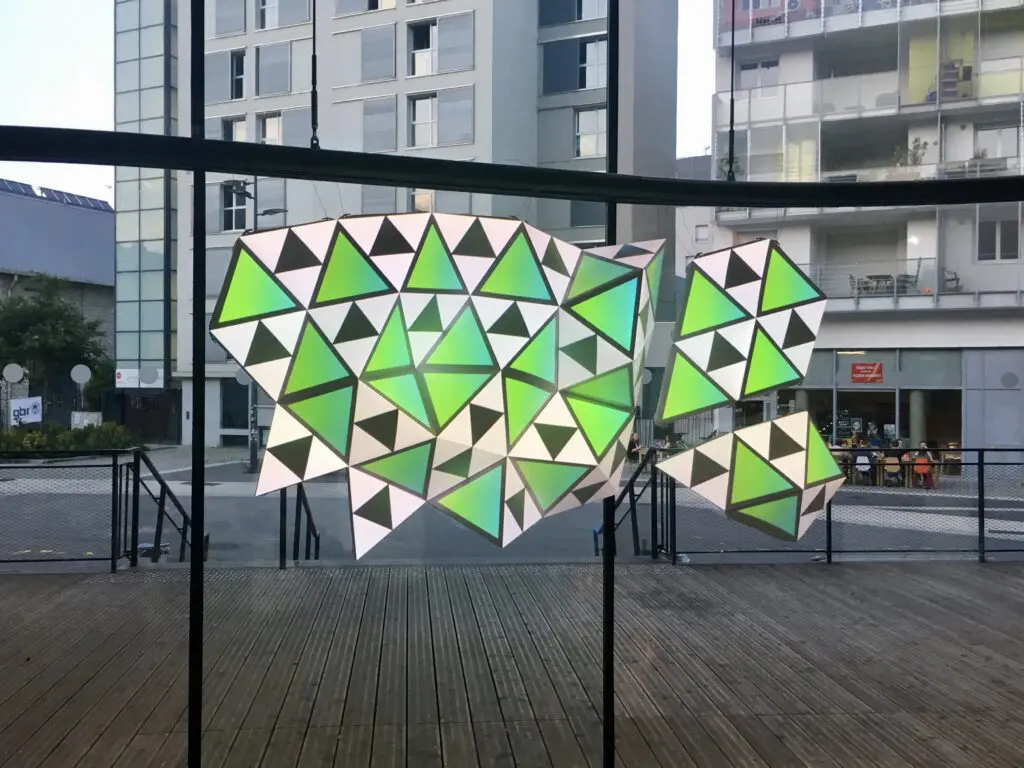
HeavyM permite cambiar rápidamente entre escenas o listas de reproducción para adaptar la duración del espectáculo sobre la marcha. Anota cualquier ajuste de última hora inmediatamente después del espectáculo para integrarlo en el archivo maestro del proyecto.
Ampliación: instalaciones con varios proyectores e instalaciones permanentes
Las instalaciones de mayor envergadura incluyen varios proyectores, la fusión de bordes y un control más avanzado, pero siguen los mismos principios básicos que se han explicado a lo largo de esta guía.
Las proyecciones superpuestas con fusión de bordes suave cubren superficies muy anchas o altas sin juntas visibles. Si se utilizan más de 2 o 3 proyectores, se recomienda utilizar servidores multimedia específicos o varios ordenadores sincronizados que ejecuten programas especializados.
Consideraciones a largo plazo para instalaciones permanentes:
- Ciclos de mantenimiento programados
- Temporizador automático de encendido y apagado
- Planes de actualización de contenidos a lo largo de meses o años
HeavyM Se integra en ecosistemas más amplios, enviando y recibiendo señales desde mesas de iluminación y sistemas de control de espectáculos. Para instalaciones en fachadas o azoteas, colabora con empresas de audiovisuales, integradores e ingenieros estructurales para garantizar la seguridad y el cumplimiento de la normativa.
Documentación, copias de seguridad y traspaso
Una documentación profesional permite que los traspasos a los clientes, al personal del recinto o a las agencias creativas que se encargarán del mantenimiento se realicen sin problemas.
Elabora un expediente técnico que incluya listas de equipos, esquemas de cableado, ubicaciones de los proyectores, ajustes de las lentes y notas sobre la configuración del software. Facilita copias de seguridad del HeavyM proyectos, archivos multimedia y scripts de control en unidades externas y en el almacenamiento en la nube.
Si es necesario, forme al personal local para que pueda poner en marcha, supervisar y apagar de forma segura la instalación sin necesidad de que los creadores originales estén presentes in situ. Programe revisiones periódicas, ya sean a distancia o in situ, para garantizar el funcionamiento fiable de las instalaciones permanentes.
¿Estás listo para montar tu equipo?
Ahora ya sabes cómo elegir el proyector adecuado, calcular la relación de proyección, fijar los cables y configurar tu pantalla digital. Ya hemos dejado atrás la teoría técnica: es hora de empezar a manipular la luz.
Empieza con una configuración de prueba a pequeña escala y ve avanzando hacia espectáculos más complejos. HeavyM ofrece tutoriales, documentación y ejemplos de la comunidad; la versión gratuita ofrece prestaciones suficientes para aprender los conceptos básicos antes de invertir en funciones avanzadas.
Elige una fecha concreta —Halloween, Nochevieja o una fiesta local— como objetivo para completar tu primera instalación completa de video mapping. Tener una fecha límite convierte el aprendizaje en acción, y las herramientas adecuadas, combinadas con una práctica deliberada, despertarán en tu público emociones que las pantallas planas simplemente no pueden igualar.
Descargar el HeavyM prueba gratuita hoy, conecta el proyector de mapping al portátil y descubre lo increíblemente fácil que es poner en marcha tu primera instalación de video mapping esta misma noche.