

So wählen Sie das richtige Modell für Gebäude und Großveranstaltungen aus
Ein statisches Gebäude in eine lebendige, animierte Leinwand zu verwandeln, gehört zu den visuell beeindruckendsten Effekten, die man mit Licht erzielen kann. Doch projection mapping im Außenbereich an Fassaden, Denkmälern und Festivalbühnen erfordert leistungsstarke Hardware – Geräte, die dafür ausgelegt sind, Straßenbeleuchtung, Stadtlicht und unvorhersehbare Wetterbedingungen zu bewältigen. Dieser Leitfaden führt Sie durch alles, was Sie über die Auswahl des richtigen Projektors und die Kombination mit der Software wissen müssen, die diese Magie erst möglich macht.
Kurz gesagt: Projection mapping im Außenbereich für große Flächen
Mapping großer Außenfassaden erfordert hochhelle Laserprojektoren, sorgfältige Berechnungen des Projektionsverhältnisses und einen robusten Wetterschutz, um die städtische Umgebungsbeleuchtung zu überwinden. Die Investition in leistungsstarke Hardware ist jedoch nur die halbe Lösung; die Zusammenführung mehrerer Projektoren zu einer riesigen, nahtlosen Projektionsfläche erfordert intelligente Software zur Kantenüberblendung. Durch den Einsatz intuitiver, visuell ausgerichteter Plattformen können Veranstaltungsplaner komplexe proprietäre Medienserver umgehen und monumentale Architektur sofort in Szene setzen – ganz ohne Programmieraufwand.
Was versteht man im Jahr 2026 unter einem “projection mapping projektor für den Außenbereich”?
Ein projection mapping projektor im Außenbereich ist ein hochhelles Gerät in Installationsqualität, das zur Projektion von Bildmaterial auf Gebäudefassaden, Brücken, Denkmäler und große Bühnen. Diese Technik, die manchmal auch als „video mapping“ oder „räumliche Augmented Reality“ bezeichnet wird, verwandelt statische Oberflächen in dynamische Darstellungen, die den Anschein erwecken, als würden sie atmen, explodieren oder ihre Form verändern.
Es gibt keine spezielle Projektorklasse, die ausschließlich für mapping vorgesehen ist. Profis verwenden in der Regel Lasergeräte mit einer Lichtleistung von 10.000 bis 40.000 Lumen von Herstellern wie Epson, Panasonic, Christie, oder Barco—Modelle, die häufig zwischen 2019 und 2025 auf den Markt kommen und hohe Helligkeit mit einem robusten Wärmemanagement verbinden.
Zu den Merkmalen, die einen Projektor für den Einsatz im Freien geeignet machen, gehören:
- Hohe Helligkeit, um das Umgebungslicht zu überstrahlen
- Wechselobjektive für flexible Projektionsabstände
- Robustes Wärmemanagement für den 24/7-Betrieb
- Gleichbleibende Farbgenauigkeit und Kontrastleistung
- Unterstützung professioneller Konnektivitätsprotokolle
Für viele Veranstaltungsplaner und Künstler erweist sich der Einsatz mehrerer Projektoren der Mittelklasse mit 7.000 bis 12.000 Lumen in wetterfesten Gehäusen als realistischere Lösung als die Anschaffung eines einzelnen Flaggschiff-Geräts mit über 30.000 Lumen. Im weiteren Verlauf dieses Artikels werden Sie Schritt für Schritt durch die Beurteilung des Umgebungslichts, die Berechnung der Lumenleistung, die Wahl zwischen Laser- und Lampentechnik sowie die Kombination Ihrer Hardware mit HeavyM Projection mapping software for warping and edge blending.
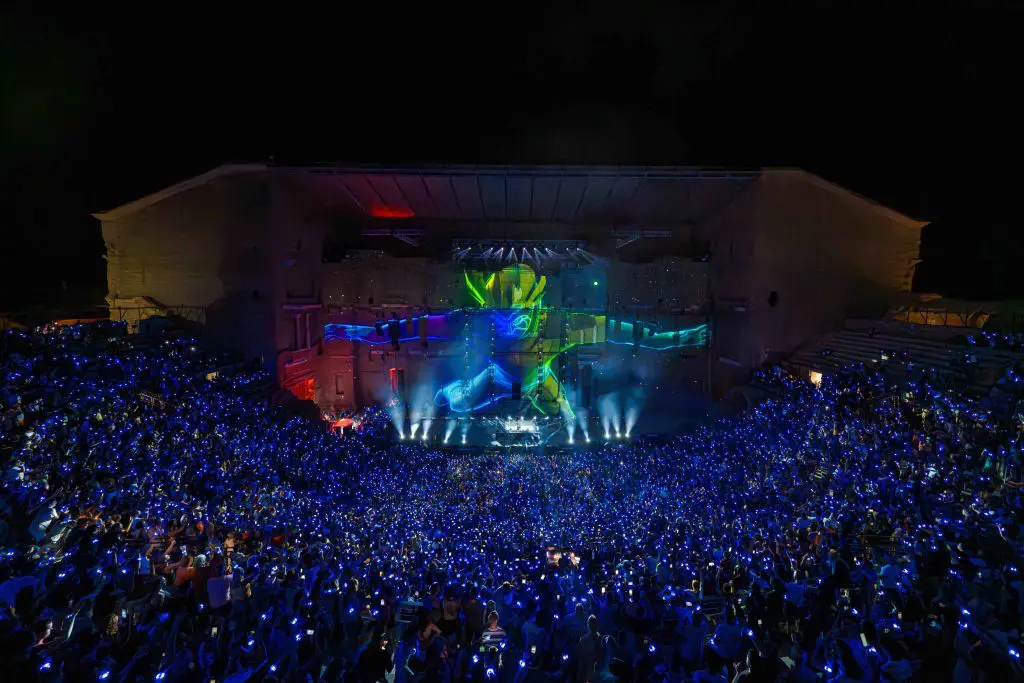
Wie viele Lumen benötigt man für das Außen-Mapping?
Die Anforderungen an die Helligkeit hängen von drei Faktoren ab: der Größe der Projektionsfläche, der Projektionsentfernung und der Umgebungshelligkeit. Ein Festival in der Innenstadt mit Straßenbeleuchtung erfordert weitaus mehr Leistung als die Beleuchtung einer Kirchenfassade auf dem Land nach Einbruch der Dunkelheit.
Hier sind konkrete Referenzzahlen:
- 5.000–7.000 Lumen: Kleine Außenwände in ländlichen oder sehr dunklen Gegenden mit Publikum aus nächster Nähe
- 10.000–15.000 Lumen: Typische Fassaden von Rathäusern oder Kirchen, die ab 21:00 Uhr bei etwas Straßenbeleuchtung zu sehen sind
- 20.000–30.000 Lumen: Große öffentliche Gebäude, Stadtplätze oder Festivals mit starker Umgebungsbeleuchtung (Silvesterveranstaltungen, Nächte im Stil der “Nuit Blanche”)
- Über 30.000 Lumen: Fassaden im städtischen Maßstab und bedeutende Denkmäler, an denen Sponsoren hochwertige Projektoren finanzieren
Eine Projektion vor Einbruch der astronomischen Dämmerung – beispielsweise zwischen 19:00 und 20:00 Uhr im Juni in Europa oder Nordamerika – erfordert eine deutliche Steigerung der Helligkeit. Bei Dämmerungsbedingungen können Bilder selbst bei 20.000 Lumen verblassen.
Eine nützliche Faustregel zur Berechnung des Lumenbedarfs:
UMWELT | LUMEN PRO m² |
|---|---|
Abgelegener Standort auf dem Land | 50–80 lm/m² |
Städtisch mit Straßenlaternen | 100–150 lm/m² |
Berechnungsbeispiel: Eine Fassade mit den Maßen 20 m × 15 m entspricht einer Fläche von 300 m². In einer städtischen Umgebung bei 100 lm/m² benötigt man insgesamt etwa 30.000 Lumen – dies lässt sich mit drei Projektoren à 10.000 Lumen unter Verwendung von Edge-Blending erreichen.
Inhalte über mehrere Projektoren und unter Verwendung von HeavyM’Die Kantenüberblendungs-Tools von … erweisen sich oft als kostengünstiger als der Umstieg auf eine extrem hohe Helligkeit einzelner Geräte. Dieser Ansatz bietet zudem Redundanz für den Fall, dass ein Gerät während der Show ausfällt.
Laser vs. Lampe für projection mapping im Außenbereich
Laserprojektoren – sei es mit Festkörper-Blaulaser und Phosphor oder mit Voll-RGB-Laser – haben seit etwa 2020 herkömmliche Modelle mit UHP-Lampen für anspruchsvolles Außen-Mapping weitgehend abgelöst. Der Leistungsunterschied ist so groß, dass sich die meisten Fachleute mittlerweile standardmäßig für Laser entscheiden.
Vorteile von Laserprojektoren für den Einsatz im Freien:
- Lange Lebensdauer: 20.000–30.000 Stunden bis zur halben Helligkeit gegenüber 3.000–5.000 Stunden pro Lampe
- Stabile Leistung: Gleichbleibende Helligkeit und Farbwiedergabe über einen längeren Zeitraum – entscheidend bei der Kombination von zwei oder mehr Projektoren
- Sofortiges Ein- und Ausschalten: Praktisch für Veranstaltungen mit straffem Zeitplan oder mehreren Vorstellungen pro Tag
- Besseres Wärmemanagement: Moderne Modelle sind für höhere Einschaltdauern unter unterschiedlichen klimatischen Bedingungen ausgelegt
- Geringerer Wartungsaufwand: Kein Lampenwechsel, wodurch Ausfallzeiten und laufende Kosten minimiert werden
Wo Lampenprojektoren noch sinnvoll sind:
- Projekte mit begrenztem Budget, bei denen 6.000–8.000 Lumen für nur wenige Veranstaltungen pro Jahr benötigt werden
- Sekundäre oder Reserveeinheiten, bei denen die maximale Lebensdauer weniger entscheidend ist
- Saisonale Anwendungen wie Halloween- oder Weihnachts-Mappings mit minimaler Laufzeit
Bei der Berechnung der Gesamtbetriebskosten führen häufige Lampenwechsel (zwischen 1 TP und 1.300 TP pro Lampe), Ausfallzeiten und Farbabweichungen oft dazu, dass Lampengeräte langfristig teurer sind als ein Laser der Mittelklasse, der im Zeitraum 2023–2025 angeschafft wurde.
Ein idealer Bereich für kleine bis mittelgroße Architekturausstellungen: WUXGA-Lasermodelle mit 10.000–13.000 Lumen und austauschbaren Objektiven, deren Preis in der Regel zwischen $10.000 und $20.000 liegt. Diese bieten Leistung auf professionellem Niveau und sind dennoch für unabhängige Künstler und Kulturorganisationen erschwinglich.
Projektionsabstand, Projektionsverhältnis und Objektivoptionen im Außenbereich
Im Außenbereich findet man selten einen geeigneten Standort in “idealer” Entfernung. Bäume, Straßen und die Sichtlinien des Publikums schränken die Möglichkeiten ein, wo man seine Ausrüstung aufstellen kann.
Wurfweite wird als Projektionsabstand geteilt durch die Bildbreite berechnet. Ein Verhältnis von 1,5:1 bedeutet, dass bei einem Abstand von 15 Metern zum Projektor ein 10 Meter breites Bild entsteht. Typische Objektive für das Outdoor-Mapping reichen von Ultra-Kurzdistanzobjektiven (ca. 0,4:1) bis hin zu Langdistanzobjektiven (3:1+), die häufig als austauschbare Optionen für Geräte mit einer Lichtleistung von 8.000 bis 30.000 Lumen erhältlich sind.
Beispiele für die praktische Objektivauswahl:
WURFART | VERHÄLTNISBEREICH | ANWENDUNGSFALL |
|---|---|---|
Kurzdistanz | 0,4:1 bis 0,8:1 | Enge Plätze mit Projektor in der Nähe der Fassade |
Standard-Schlagweite | 1,2:1 bis 2,0:1 | Projektoren, die auf der gegenüberliegenden Straßenseite des Zielgebäudes aufgestellt wurden |
Großer Hub | 2,0:1 bis 4,0:1 | Herauslehnen von Türmen, Balkonen oder hohen Plattformen |
Bei der Planung Ihrer Einrichtung:
- Verwenden Sie die Projektionsreichweitenrechner der Hersteller, um die Bildgröße bei der von Ihnen geplanten Entfernung zu überprüfen.
- Prüfen Sie die Objektivverschiebung (vertikal ±60%, horizontal ±20% bei Pro-Modellen), die eine außermittige Montage ermöglicht.
- Bevorzugen Sie optische Korrekturen (Objektivverschiebung, Zoom) gegenüber einer starken digitalen Trapezkorrektur, um die Bildqualität zu erhalten
- Bedenken Sie, dass Zoomobjektive (z. B. 1,2–1,5:1) Flexibilität bieten, ohne dass die Hardware ausgetauscht werden muss.
Die Verzerrungskorrektur-Tools von HeavyM können nicht ideale Winkel ausgleichen, doch die Wahl des richtigen Objektivs entlastet sowohl die Hardware als auch die Software und sorgt gleichzeitig für schärfere Bilder.
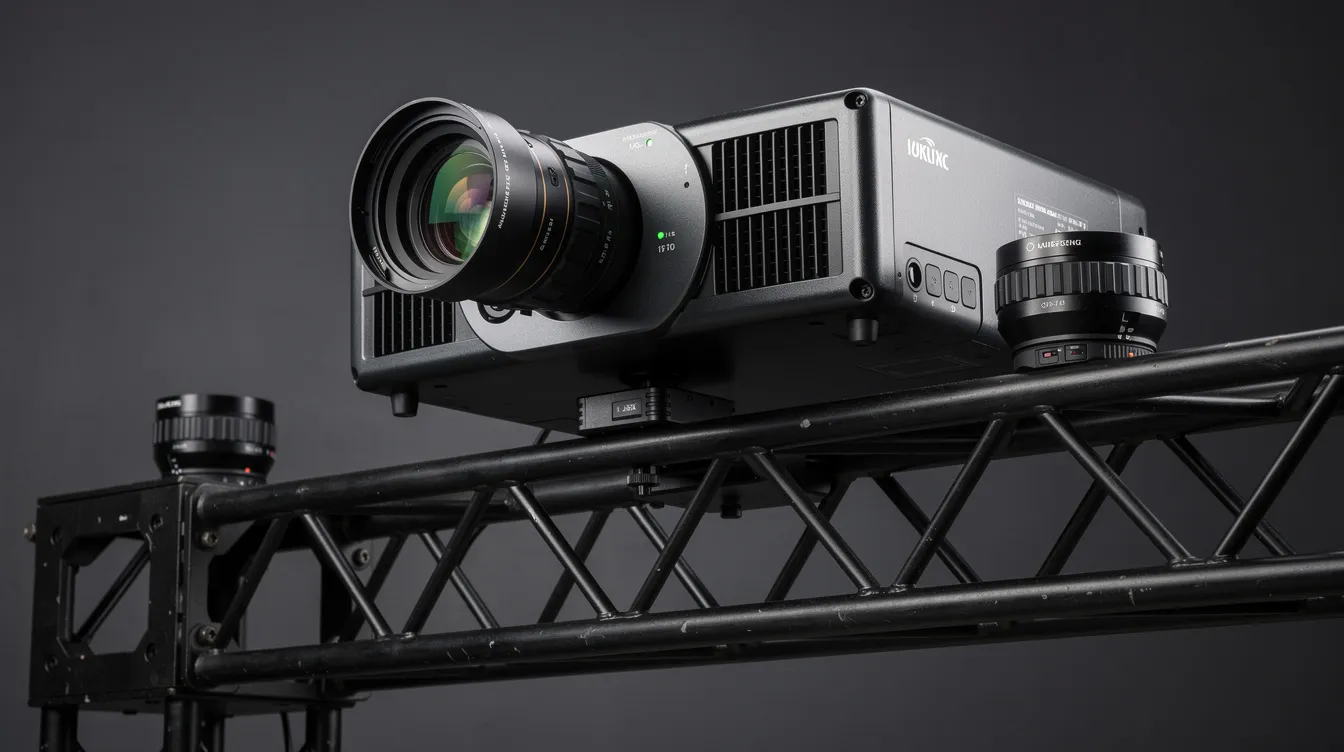
Wetterfestigkeit und Projektorgehäuse für den Außenbereich
Fast alle professionellen Projektoren – selbst High-End-Lasermodelle – sind für den Einsatz in Innenräumen konzipiert. Sie ohne Schutz ins Freie mitzunehmen, ist ein Risiko.
Ein geeignetes Gehäuse für einen Außenprojektor sollte folgende Eigenschaften aufweisen:
- Wetterschutz: Schutzklasse IP54 bis IP65 gegen Regen, Staubpartikel und Insekten
- Temperaturregelung: Thermostatgesteuerte Lüfter, Heizungen und teilweise Klimaanlagen zur Aufrechterhaltung des empfohlenen Betriebsbereichs von 5–35 °C
- Optische Klarheit: UV-beständiges, optisch klares Glasfenster, passgenau auf das Objektiv zugeschnitten und mit Antireflexbeschichtung versehen (Transmission 90%+)
- Sicherheit: Verriegelungen, Befestigungspunkte und vibrationsfeste Konstruktion
- Ausreichende Stromversorgung: Elektrische Anschlüsse mit ausreichender Nennleistung für mehrtägige Veranstaltungen
Die praktischen Anwendungsfälle variieren je nach Jahreszeit. Bei Winterfesten im Dezember und Januar sind Heizungen erforderlich, um Kondenswasserbildung und das Beschlagen der Objektive zu verhindern. Bei Sommerkonzerten in der Stadt ist eine leistungsstarke Belüftung notwendig, um einen thermischen Abschaltvorgang zu verhindern, wenn die Umgebungstemperatur 35 °C überschreitet.
Prüfen Sie vor der Installation die örtlichen Vorschriften. Für Installationen auf Dächern oder öffentlichen Plätzen sind häufig Genehmigungen, statische Nachweise für Halterungen und Tragkonstruktionen sowie Windlastangaben für Windböen von bis zu 100 km/h erforderlich.
Robuste Gehäuse schützen Projektorinvestitionen in fünfstelliger Höhe und minimieren das Risiko eines Ausfalls während der Veranstaltung. Branchenschätzungen zufolge sind feuchtigkeitsbedingte Probleme für 20–30% der Projektorausfälle bei Veranstaltungen im Freien verantwortlich – ein Risiko, das durch eine geeignete Unterbringung ausgeschlossen wird.
Wichtige Spezifikationen zur Bildqualität: Auflösung, Kontrast und Farbe
Da Outdoor-Mapping oft aus einer Entfernung von mehreren zehn Metern betrachtet wird, sind Helligkeit und Klarheit wichtiger als Spezifikationen für Ultra-Kino-Anwendungen. Dennoch haben Auflösung, Kontrast und Farbe einen starken Einfluss auf die wahrgenommene Qualität.
Hinweise zur Auflösung:
- Full HD (1920×1080): Die minimalste Lösung für kleine Fassaden und Veranstaltungen mit begrenztem Budget
- WUXGA (1920×1200): Gängiger Industriestandard mit 10% mehr vertikalen Pixeln für das mapping
- 4K (3840 × 2160): Empfohlen für sehr große Flächen oder ein Publikum, das physisch nahe herankommen kann
Empfehlungen zum Kontrast:
- Für nächtliche Architektur-Shows sollte ein dynamischer Kontrast von mindestens 10.000:1 angestrebt werden
- Aufgrund der Streuung an der Oberfläche sind die Schwarztöne an echten Wänden voraussichtlich schwächer – verwenden Sie zum Ausgleich dunklere Hintergründe für die Inhalte.
- Durch Lasermodulation lassen sich bei modernen Modellen Kontrastverhältnisse von 10.000:1 bis 1.000.000:1 erzielen
Faktoren, die die Farbwiedergabe beeinflussen:
- Streben Sie eine Abdeckung nahe dem Rec.709-Farbraum (85–100%) mit einheitlicher Farbwiedergabe zwischen den Geräten an.
- Bei Konfigurationen mit mehreren Projektoren vereinfacht die Verwendung identischer Modelle die Farbanpassung
- Ziegel- und Steinoberflächen lassen projizierte Farben um 30–50% blasser wirken; planen Sie den Inhalt entsprechend.
HeavyM’Die Content-Engine und die integrierten Effekte sind auf starken Kontrast und gute Farbsichtbarkeit auf schwierigen Oberflächen wie Beton, Stein und Ziegel optimiert – Materialien, die Licht von Natur aus absorbieren und streuen.
Warum bei großen Open-Air-Veranstaltungen Projektoren mit mehr als 30.000 Lumen zum Einsatz kommen (und warum Sie das vielleicht nicht tun sollten)
Bei Großveranstaltungen – wie großen Silvester-Shows, 3D Mapping an Kathedralen oder Feierlichkeiten zu bedeutenden Jubiläen – kommen regelmäßig Projektoren von Christie oder Barco mit einer Lichtleistung von 30.000 bis 50.000 Lumen zum Einsatz.
Zu diesen High-End-Konfigurationen gehören in der Regel:
- Projektoren, die jeweils $40.000+ kosten
- Redundante Einheiten, die zur Gewährleistung der Ausfallsicherheit gestapelt sind (N+1-Konfigurationen)
- Maßgeschneiderte Medienserver mit proprietärer Software
- Timecode-Synchronisation und maßgeschneiderte Steuerungssysteme
- Spezialisierte technische Teams, die für die Wartung der Anlagen zuständig sind
Für die meisten Veranstaltungsplaner, Kulturorganisationen und unabhängigen Künstler ist diese Art von Hardware und Technik finanziell nicht erschwinglich. Allein das Budget für einen einzigen Flaggschiff-Projektor übersteigt bereits die Mittel, die viele Projekte für ihre gesamte Produktion vorsehen.
Eine leichter umsetzbare Strategie liefert beeindruckende Ergebnisse:
- Setzen Sie mehrere Laserprojektoren mit einer Lichtleistung von 8.000 bis 15.000 Lumen ein, die jeweils kostengünstiger sind
- Kombinieren Sie sie mithilfe von Edge Blending, um eine gleichmäßige Abdeckung zu erzielen
- Verwendung HeavyM um Verzerrungen, Überblendungen, Echtzeit-Effekte und die Showsteuerung zu bewältigen, ohne einen Programmierer beauftragen zu müssen
Dieser Ansatz ermöglicht ein professionelles Architektur-Mapping für Festivals, Markeneinführungen und kommunale Veranstaltungen, ohne dabei das Budget zu sprengen. Drei Projektoren mit jeweils 10.000 Lumen kosten oft weniger als ein einzelnes Gerät mit 30.000 Lumen und bieten zudem Redundanz sowie eine einfachere Logistik.
Die Software-Seite: Verzerrung und Kantenüberblendung für Außenfassaden
Sobald eine Fassade die Reichweite eines einzelnen Projektors übersteigt, gewinnt die Software ebenso an Bedeutung wie die Hardware. Die richtigen Tools fügen mehrere Bilder zu einem nahtlosen Gesamtbild zusammen, das das Publikum als eine einzige, riesige Leinwand wahrnimmt.
Edge Blending erklärt:
Beim Edge-Blending werden die Projektionen von zwei oder mehr Projektoren überlappend dargestellt und im Überlappungsbereich allmählich ineinander überblendet, um sichtbare Übergänge zu beseitigen. Dieser Vorgang erfordert:
- 10–30%: Überlappung zwischen benachbarten Projektionsbildern
- Sorgfältige Anpassung von Helligkeit, Gamma und Farbe in überlappenden Bereichen
- Ausblendungen mit sanften Übergängen, die für das Publikum nicht wahrnehmbar sind
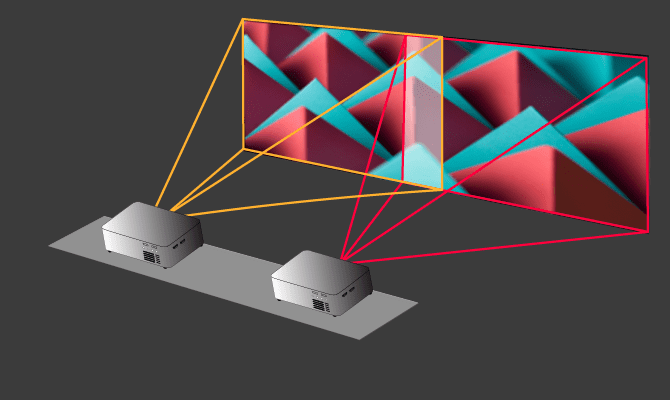
Was ist Warping? Eine Erklärung:
Bei der Verzerrungskorrektur wird das projizierte Bild geometrisch korrigiert, indem es gebogen und neu geformt wird, um es an unregelmäßige architektonische Gegebenheiten anzupassen. Dies ist unerlässlich, wenn:
- Die Projektoren stehen nicht senkrecht zur Oberfläche
- Zu den Fassaden gehören Bögen, Säulen oder schräge Dächer
- Die Inhalte müssen genau auf Fenster, Gesimse und dekorative Details abgestimmt sein
So bewältigt HeavyM diese Herausforderungen:
HeavyM bietet fortschrittliche und dennoch benutzerfreundliche Werkzeuge zur Kantenüberblendung Dadurch können Nutzer mehrere kostengünstige Außenprojektoren zu einer riesigen Leinwand kombinieren. Dank präziser 2D-Verzerrungskorrektur und meshbasiertem mapping lassen sich die Bildinhalte perfekt an architektonische Gegebenheiten anpassen.
Praxisbeispiel: Mapping auf ein 30 Meter breites Rathausgebäude mithilfe von drei nebeneinander aufgestellten Projektoren mit jeweils 10.000 Lumen. HeavyM verzerrt die einzelnen Projektionsbilder und fügt die Überlappungen nahtlos zusammen, sodass das Publikum ein einziges durchgehendes Bild wahrnimmt – so wird eine Geschichte über die gesamte Fassade hinweg ohne sichtbare Übergänge erzählt.
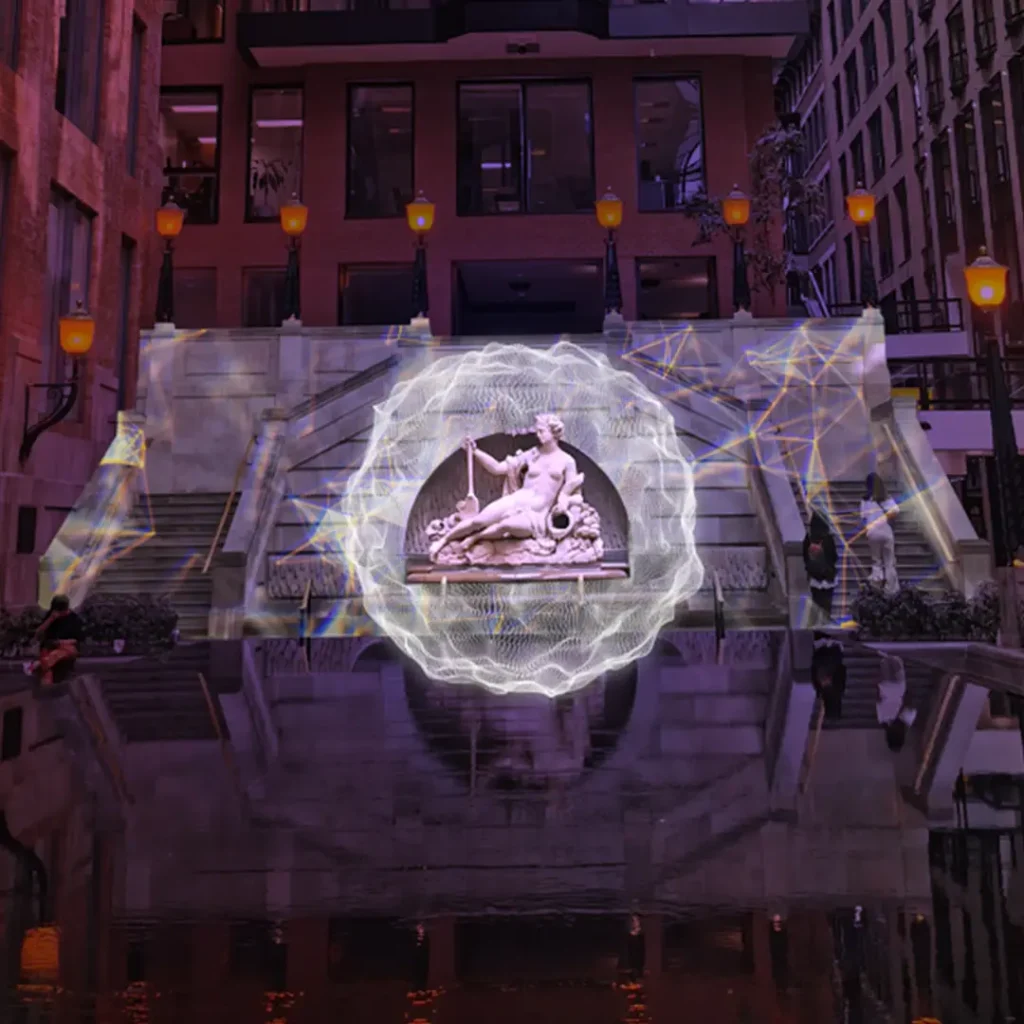
Warum HeavyM ideal für projection mapping im Außenbereich ist
Während einige große Shows auf komplexe, individuell programmierte Medienserver zurückgreifen, HeavyM wurde entwickelt, um Veranstaltungsplanern, Digitalkünstlern und ambitionierten Einsteigern professionelle Ergebnisse zu ermöglichen, ohne dass sie auch nur eine einzige Zeile Code schreiben müssen.
Die wichtigsten Vorteile des HeavyM für die Projektion im Außenbereich:
HeavyM ist die ultimative Software für projection mapping im Außenbereich, da sie umfangreiche Funktionen für Shows mit mehreren Projektoren bietet, die absolut keine Programmierung. Anstatt spezialisierte Programmierer mit der Konfiguration komplexer Medienserver zu beauftragen, können Veranstaltungsplaner eine intuitive Drag-and-Drop-Oberfläche um mehrere Standardprojektoren nahtlos über riesige Gebäudefassaden zu verzerren und die Bildränder zu verschmelzen. Sobald Ihre Projektionsfläche physisch abgebildet ist, können Sie die Architektur sofort zum Leben erwecken, indem Sie über 100 integrierte visuelle Effekte die sich perfekt an Bögen, Säulen und Fenster anpassen, während einheimische Echtzeit-Audio-Reaktivität sorgt dafür, dass Ihre Festival-Visuals perfekt im Takt pulsieren. Von lokalen Rathäusern bis hin zu riesigen Open-Air-Bühnen – die Software lässt sich problemlos an Ihre Ambitionen anpassen und bietet eine nahtlose Integration mit professionellen Lichtkonsolen und Show-Steuerungssystemen über OSC, MIDI, Art-Net/DMX, Syphon/Spout.
Planung Ihres projection mapping-Setups im Außenbereich: Eine Schritt-für-Schritt-Anleitung
Befolgen Sie diese praktische Checkliste für jede bevorstehende Architekturmesse, jedes Festival oder jede Markenveranstaltung:
Schritt 1 – Die Website analysieren Messen Sie die Abmessungen der Fassade, notieren Sie den Betrachtungsabstand und halten Sie die Umgebungslichtquellen fest, darunter Straßenlaternen und Schaufenster.
Schritt 2 – Projektionspositionen auswählen Skizzieren Sie, wo die Projektoren unter Berücksichtigung von Hindernissen, Kabeln und sicheren Befestigungsmöglichkeiten realistisch platziert werden können. Berücksichtigen Sie dabei die Sichtlinien des Publikums. Sobald der Projektor ausgerichtet ist, darf er sich nicht mehr bewegen. Schon eine Verschiebung um wenige Millimeter reicht aus, um das gesamte mapping zu beeinträchtigen. Befestigen Sie ihn nach Möglichkeit auf einer stabilen, gesicherten Halterung außerhalb der Reichweite des Publikums.
Schritt 3 – Helligkeit abschätzen Berechnen Sie die ungefähre Lumenleistung mithilfe der Formel „Fläche × lm/m²“. Legen Sie anhand Ihres Budgets und der verfügbaren Ausrüstung fest, wie viele Projektoren Sie kombinieren möchten.
Schritt 4 – Projektoren und Objektive auswählen Wählen Sie Lasermodelle mit geeigneter Auflösung und legen Sie passende Projektionsverhältnisse fest. Prüfen Sie, ob die Objektivverschiebungsfunktionen für Ihren geplanten Aufstellungsort geeignet sind.
Schritt 5 – Wetterschutz planen Legen Sie die Art der Einhausung, die Belüftung, die Stromverteilung und Notfallpläne fest – dies ist besonders wichtig bei mehrtägigen Veranstaltungen, bei denen sich die Bedingungen ändern können.
Schritt 6 – Inhalte in HeavyM vorbereiten Importieren Sie Fotos oder Zeichnungen der Fassade, erstellen Sie Oberflächen, wenden Sie Effekte an und testen Sie Verzerrungen und Kantenüberblendungen offline, bevor Sie vor Ort eintreffen.
Schritt 7 – Kalibrierung vor Ort Richten Sie jeden Projektor bei Einbruch der Dämmerung aus, optimieren Sie Warping und Blending in HeavyM und führen Sie vor der öffentlichen Eröffnung vollständige Testdurchläufe durch. Eine vollständige Nachtprobe dient dazu, die Helligkeit und Lesbarkeit aus 100 Metern Entfernung zu überprüfen.
Selbst kleinere Teams erzielen professionelle Ergebnisse bei der Außenprojektion, indem sie eine durchdachte Hardwareauswahl mit HeavyM’…s optimierter Arbeitsablauf.
Häufig gestellte Fragen zu projection mapping projektoren im Außenbereich
Kann ich einen Projektor mit 5.000 Lumen im Freien verwenden? Ein projection mapping projektor mit 5.000 Lumen eignet sich für kleine Wände an sehr dunklen Orten auf dem Land – man denke beispielsweise an eine Hausprojektion zu Halloween in ländlicher Umgebung. In Städten mit Straßenbeleuchtung und städtischem Licht ist diese Helligkeit in der Regel nicht ausreichend. Die Bilder sind vor dem Hintergrund konkurrierender Lichtquellen einfach nicht mehr sichtbar.
Ist 4K für die Projektion auf ein Gebäude notwendig? WUXGA (1920×1200) reicht für etwa 90% von Projektionsszenarien im Außenbereich aus. Eine 4K-Auflösung ist von Vorteil, wenn sich das Publikum physisch nahe am Projektionsbild befindet (unter 20 Metern) oder bei der Projektion auf sehr große, detailreiche Fassaden, bei denen die Pixelstruktur andernfalls sichtbar würde. Bei den meisten städtischen Gebäuden, die von der anderen Seite eines Platzes aus betrachtet werden, liefert WUXGA eine hervorragende Bildqualität.
Kann ich mit einem Projektor anfangen und später aufstocken? Auf jeden Fall. Mit HeavyM können Sie ganz einfach mit einem einzigen Gerät beginnen und später, wenn Ihre Projekte wachsen, weitere Geräte hinzufügen und diese per Edge-Blending zusammenfügen. Die Software lässt sich von einfachen Hausmappings bis hin zu Festivalinstallationen mit mehreren Projektoren skalieren, ohne dass dafür unterschiedliche Tools oder Vorgehensweisen erforderlich sind.
Brauche ich immer ein wetterfestes Gehäuse? Selbst vorübergehende Aufbauten, die länger als ein paar Stunden dauern, profitieren von Schutzgehäusen, da sich das Wetter schnell ändern kann. Sonnenlicht, Feuchtigkeit und Staubpartikel stellen eine Gefahr für teure Geräte dar. Für jede Projektion im Freien, die über einen kurzen Test hinausgeht, wird ein Schutzgehäuse dringend empfohlen.
Welchen Computer benötige ich, um HeavyM für Veranstaltungen im Freien zu betreiben? Für den Einsatz mit mehreren Projektoren liefert HeavyM die beste Leistung auf aktuellen Multi-Core-CPUs (Intel i7 oder AMD Ryzen 7), dedizierten NVIDIA-GPUs der RTX-30-Serie oder neuer sowie mit 32 GB RAM und schnellem SSD-Speicher. Diese Konfiguration bewältigt 4K-Inhalte auf vier Projektoren mit 60 fps – ideal für anspruchsvolle Festival- und Architekturprojekte.
Welcher Projektor eignet sich am besten für Gebäudefassaden? Die Wahl des richtigen Projektors hängt von Ihrem jeweiligen Standort, der Größe der Fassade und Ihrem Budget ab. Im Allgemeinen bieten Lasergeräte mit 10.000 bis 15.000 Lumen und austauschbaren Objektiven das beste Verhältnis zwischen Leistung und Preis. Konzentrieren Sie sich eher auf Faktoren wie Projektionsverhältnis, Kontrastverhältnis und Farbkonsistenz, anstatt nach einem einzigen “besten” Modell zu suchen.
Projection mapping im Außenbereich verwandelt gewöhnliche Architektur in außergewöhnliche Erlebnisse – allerdings nur, wenn Hardware und Software Hand in Hand arbeiten. Machen Sie sich zunächst mit den besonderen Herausforderungen Ihres Standorts vertraut, wählen Sie Projektoren aus, die eine ausreichende Helligkeit bieten und Spielraum für die Anpassung an das Umgebungslicht lassen, und kombinieren Sie diese mit HeavyM, um die Komplexität von Warping und Edge-Blending zu bewältigen, ohne auch nur eine Zeile Code schreiben zu müssen.
Bist du bereit, die Stadt zu erhellen?
Wenn Sie Ihr projection mapping im Freien umsetzen möchten, müssen Sie sich nicht unbedingt mit proprietären Medienservern herumschlagen oder im Dunkeln komplexe Skripte schreiben. Ganz gleich, ob Sie eine Weihnachtsbeleuchtung für Ihr Haus, ein Sommermusikfestival oder eine städtische Feier planen – die richtige Software macht den entscheidenden Unterschied.
Machen Sie sich keine Gedanken mehr über die technischen Hürden. Herunterladen der HeavyM kostenlos testen heute, schließen Sie Ihre Außenprojektoren an und entdecken Sie, wie einfach Sie riesige bauliche Strukturen in atemberaubende digitale Kunst verwandeln können.