

Der Workflow für projection mapping für Anfänger – einfach erklärt
Wenn Sie schon einmal gesehen haben, wie ein Gebäude, eine Bühne, eine Skulptur oder ein DJ-Pult durch bewegtes Licht zum Leben erweckt wurde, dann haben Sie bereits projection mapping in Aktion erlebt. Dieser einfach erklärte Arbeitsablauf für Einsteiger in das projection mapping zeigt Ihnen, wie Sie von einer leeren Wand oder einem leeren Objekt zu einer kleinen fertigen Show gelangen, ohne sich in 3D-Mathematik, Programmierung oder komplexen Medienserver-Konfigurationen zu verlieren.
TL;DR
Ein einfach erklärter Workflow für Einsteiger im Bereich projection mapping beginnt damit, eine Projektionsfläche auszuwählen, den Projektor aufzustellen, die Projektionsentfernung zu messen und das Umgebungslicht so zu regulieren, dass das Bild hell und stabil ist. Als Nächstes geht es beim projection mapping für Einsteiger zur Software über, wo man die Zielfläche mit Masken nachzeichnet, Verzerrungswerkzeuge einsetzt, bis die Projektion perfekt ausgerichtet ist, und Änderungen in Echtzeit in der Vorschau anzeigt. Schließlich ermöglicht dieser einfache projection mapping-Workflow das Hinzufügen von visuellen Inhalten, visuellen Effekten, Videoclips oder audio-reaktiven Looks ohne 3D-Modellierung, Knotendiagramme oder Programmierung, während er gleichzeitig kleine 3D-projection mapping-Tests und Live-Performances unterstützt.
Was ist projection mapping? (In einer Minute)
Beim projection mapping handelt es sich um eine intelligente Projektionsshow, bei der dynamische Bilder nicht einfach ein einfaches Rechteck ausfüllen, sondern sich um ein reales Objekt herum wickeln. Ein normaler Videoprojektor projiziert ein flaches Bild auf eine Leinwand; beim video mapping passen sich digitale Inhalte hingegen den Kanten, Ecken, Fenstern, Paneelen oder Rundungen einer Projektionsfläche an.
Projection Mapping ist eine Technik, bei der statische Oberflächen durch die Projektion von Videos, Animationen oder Grafiken auf Objekte wie Wände, Autos oder Gebäude in dynamische visuelle Darstellungen verwandelt werden. Die Technik des projection mapping entstand Anfang der 2000er Jahre und hat sich zu einem zentralen Werkzeug für Lichtkunstinstallationen, Projektionen bei Veranstaltungen und interaktive Darstellungen entwickelt.
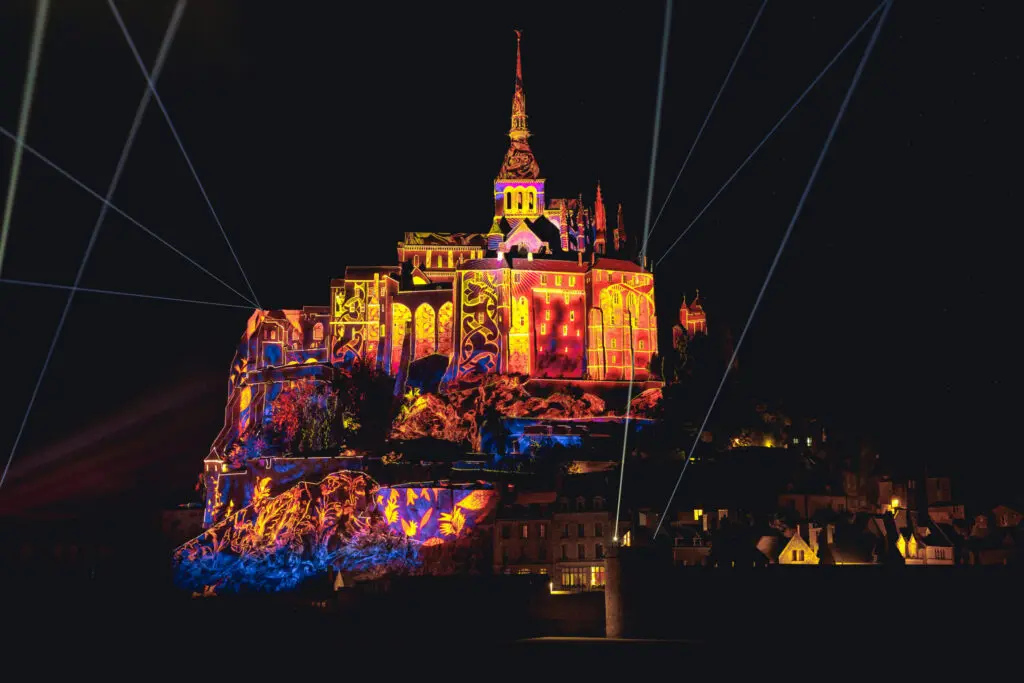
So könnten beispielsweise Kreativagenturen und AV-Unternehmen im Rahmen eines Stadtfestes Außenwände mit Mapping-Projekten gestalten, das Opernhaus von Sydney könnte zu monumentalen Mapping-Ideen inspirieren oder ein Galeriekünstler könnte Alltagsgegenstände in faszinierende visuelle Erlebnisse verwandeln. Beim 2D-Projection Mapping werden visuelle Inhalte auf flache oder gekrümmte Oberflächen projiziert, wobei der Schwerpunkt auf Länge und Höhe liegt, während beim 3D Mapping Tiefe und räumliche Aspekte berücksichtigt werden, was komplexere visuelle Effekte ermöglicht.
Der wesentliche Unterschied zwischen 2D- und 3D-Projection Mapping liegt in der Beschaffenheit der Projektionsfläche. Beim 3D Mapping ist es üblicherweise erforderlich, ein 3D-Modell mit einer Textur zu versehen und es präzise auf das reale Objekt auszurichten – obwohl diese Unterscheidung in der Praxis mittlerweile weniger klar ist: Viele Shows, die auf komplexe Oberflächen, darunter große Gebäudefassaden, projiziert werden, stützen sich vollständig auf eine 2D-Pipeline, bei der flache Videobilder so gestaltet werden, dass sie volumetrisch wirken, ohne dass jemals ein 3D-Modell erstellt wird. Tools wie HeavyM haben diesen Ansatz sogar auf unregelmäßigen Oberflächen praktikabel gemacht. Dieser Artikel konzentriert sich auf ein einsteigerfreundlicher Arbeitsablauf basierend auf diesem 2D-Ansatz: die Projektion individueller Grafiken auf physische Objekte zu Hause oder in einem kleinen Veranstaltungsort.
Vergleich der Arbeitsabläufe: Traditionell vs. einsteigerfreundlich
Früher war projection mapping gleichbedeutend mit langen Aufbauzeiten, maßgeschneiderter Software und technischen Arbeitsabläufen, die speziell für komplexe Projekte entwickelt wurden. Heute ermöglicht ein optimierter visueller Arbeitsablauf auch Anfängern, schnell mit dem Mapping einfacher Oberflächen zu beginnen und sich später an komplexere Designs heranzuwagen.
Vergleich der Arbeitsabläufe: Traditionell vs. einsteigerfreundlich
KATEGORIE | TRADITIONELLER, AUF KNOTEN UND CODE BASIERENDER ARBEITSABLAUF | OPTIMIERTER VISUELLER ARBEITSABLAUF |
|---|---|---|
Einrichtungszeit | Tage oder Wochen der Kalibrierung und Vorvisualisierung | Eines Abends, um einen kleinen Test durchzuführen |
Erforderliche Software | TouchDesigner-Stil-Knoten, 3D-Werkzeuge, Render-Pipeline | HeavyMVisuelles Mapping und Wiedergabe im -Stil |
Content-Pipeline | Ein digitales Modell erstellen, Assets rendern, schrittweise testen | Masken zeichnen, Inhalte importieren, live abspielen |
Frustrationsgrad | Für Anfänger geeignet | Gering, da das Feedback unmittelbar erfolgt |
Dieser Leitfaden nutzt den vereinfachten visuellen Arbeitsablauf als Einführung in das projection mapping für Anfänger. Sie lernen dabei zwar die Grundlagen kennen, die auch bei professionellen projection mapping-Projekten zum Einsatz kommen, vermeiden jedoch den technischen Aufwand, bis er wirklich notwendig wird.
Phase 1: Technische Einrichtung und Aufstellung des Projektors
In Phase 1 geht es darum, die Projektionsfläche auszuwählen, den Projektor aufzustellen und die Beleuchtung zu regeln. Genaue Messungen der Projektionsfläche sind entscheidend, um sicherzustellen, dass die Bilder während des mapping-Prozesses perfekt ausgerichtet sind, aber Sie können zunächst mit Klebeband, einem Maßband und gesundem Menschenverstand beginnen.
Beginnen Sie mit einer weißen, ebenen Fläche von etwa 1,5 bis 2 m Breite, beispielsweise einer Wand, einer Schaumstoffplatte oder einer kleinen Pappkonstruktion. Projection mapping lässt sich auf praktisch jede physische Oberfläche anwenden und eröffnet so eine Vielzahl kreativer Möglichkeiten – von Gebäuden und Bühnen bis hin zu kleineren Objekten und sogar Fahrzeugen. Für Anfänger sind einfache Oberflächen einfacher zu handhaben als glänzende, dunkle oder stark strukturierte Oberflächen.
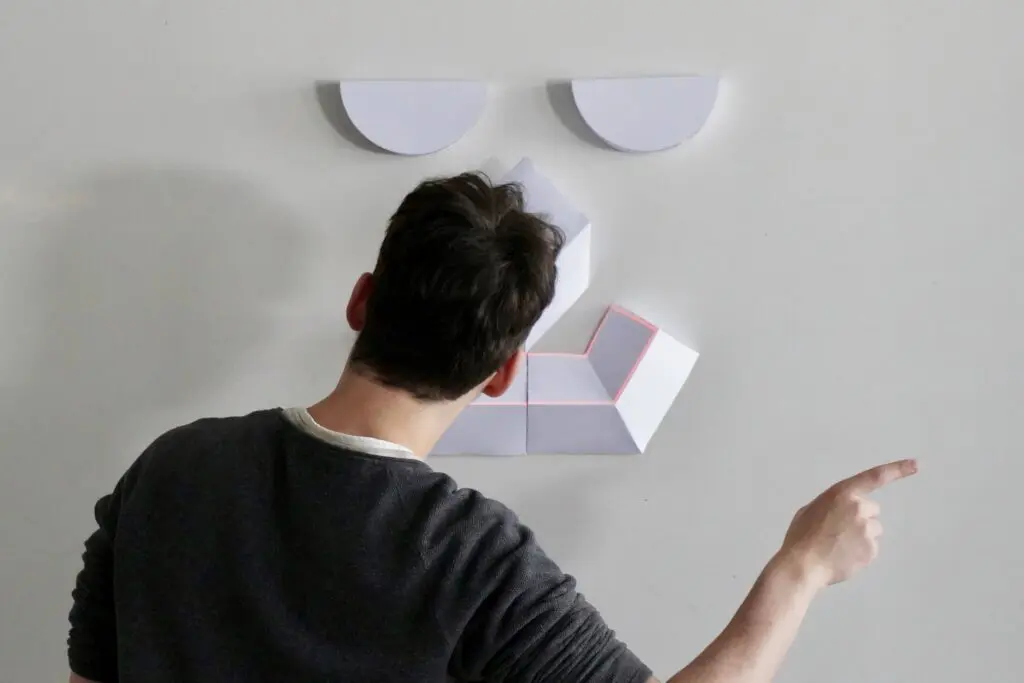
Bei einer Ersteinrichtung sollte die der richtige Projektor für den Raum. Achten Sie auf mindestens 3.000 ANSI-Lumen in einem abgedunkelten Raum, eine Auflösung von 1.080p und einen stabilen HDMI-Ausgang; gebrauchte Büroprojektoren eignen sich gut für erste projektion mapping-Projekte. Für Anfänger sind Kurzdistanzprojektoren ideal, da sie es ermöglichen, große Bilder aus kurzer Entfernung zu projizieren, ohne Schatten zu werfen. Achten Sie auch auf die Auflösung des Projektors, da die Auflösung der Videodateien für eine optimale Wiedergabe mit der Auflösung des Projektors übereinstimmen sollte.
Stellen Sie den Projektor möglichst nahe an die Augenhöhe des Betrachters und mittig auf die Projektionsfläche aus. Messen Sie die Projektionsentfernung grob mit einem Maßband oder indem Sie die Schritte abzählen, da die Entfernung die Bildgröße und die Verzerrung beeinflusst. Schalten Sie das Raumbeleuchtung aus, schließen Sie die Vorhänge und sorgen Sie dafür, dass kein direktes Umgebungslicht auf den Projektionsbereich fällt.
Sie können zwar schon im Voraus für den Einsatz mehrerer Projektoren planen, sollten aber nicht damit beginnen. Mit einem einzigen Projektor lernen Sie die physikalischen Grundlagen des mappings kennen; das Edge-Blending mit mehreren Projektoren kann warten, bis Ihre erste Projektionsfläche zuverlässig funktioniert.
Phase 2: Einfache Maskierung und Verzerrung mit Software
Phase 2 findet auf dem Laptop statt. Sie öffnen Ihre projection mapping software, leiten die Ausgabe an den Projektor weiter und arbeiten in einer Ausgabe- oder Projektionsansicht, während Sie die physische Oberfläche im Blick behalten.
Eine Maske oder Form ist einfach ein Umriss, der der Software mitteilt, wo Licht erscheinen soll. Sie können Rechtecke über Wandpaneele, Polygone über Kistenkanten oder Formen um Regale und Poster zeichnen. Das Maskieren dient dazu, das bei der Projektion über die Ränder physischer Objekte hinauslaufende Licht auszublenden, damit das Ergebnis gewollt und nicht unordentlich wirkt.
Unter „Warping“ versteht man das Verschieben von Ecken oder Kontrollpunkten, bis das Bild auf verschiedene Oberflächen passt. Dabei löst man keine Gleichungen, sondern passt die Werkzeuge der Software an, während man die Zieloberfläche im Blick behält. Aus diesem Grund fühlt sich projection mapping für Anfänger eher wie bildende Kunst als wie Ingenieurwesen an.
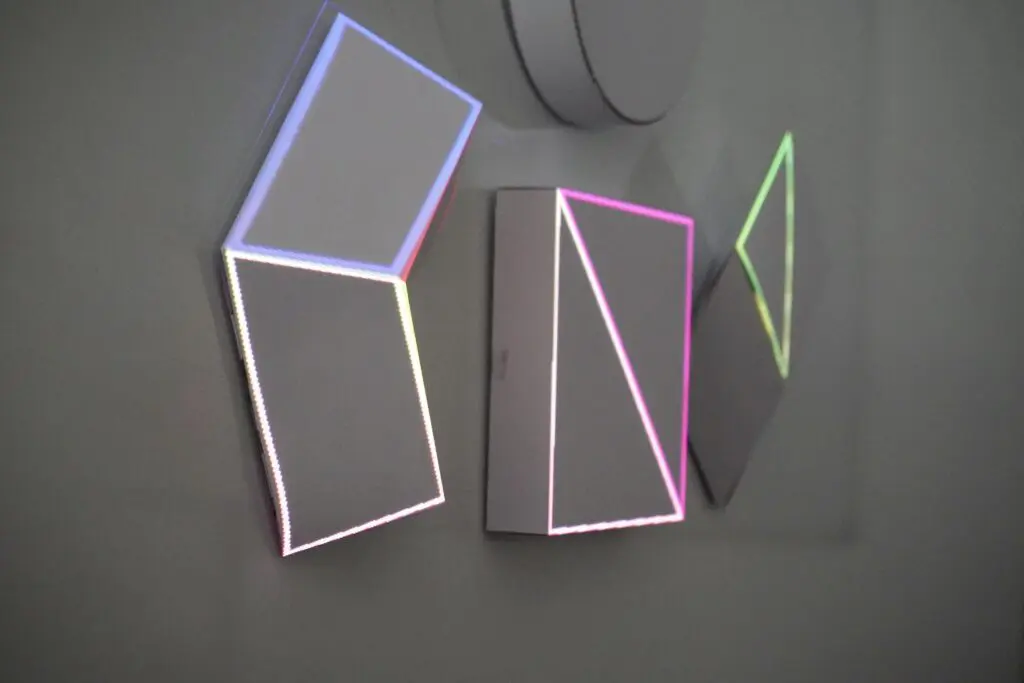
Der Workflow funktioniert auf einer ebenen Fläche, auf gestapelten Würfeln, auf Bühnenpodesten oder auf gewöhnlichen Gegenständen. Wählen Sie einen intuitive mapping software ist entscheidend für das Verzerren und Formatieren von Bildmaterial für die Projektion. Es gibt verschiedene Arten von projection mapping software, die je nach Plattform über einzigartige Funktionen und Möglichkeiten verfügen, wie beispielsweise Drag-and-Drop-Funktionen, Verzerrungswerkzeuge oder Edge-Blending.
Häufige Fehler lassen sich leicht beheben. Passen Sie das Seitenverhältnis der Leinwand an den Projektor an, deaktivieren Sie nach Möglichkeit die automatische Trapezkorrektur und vermeiden Sie es, die Projektor nach der Ausrichtung, und den Inhalt vor der Vorstellung zu testen, um sicherzustellen, dass die Projektionsillusionen aus der Perspektive des Publikums nahtlos wirken.
Phase 3: Einbindung visueller Inhalte (Die HeavyM-Geschichte)
HeavyM ist die ideale Lösung für Einsteiger, da sie die steile technische Lernkurve vollständig überwindet und professionelle Live-Visualisierungsfunktionen bietet, die absolut keine Programmierung. Anstatt eine aufwendige Render-Pipeline aufzubauen oder auf komplexe Knotengrafiken zurückzugreifen, verwenden Sie eine intuitive Drag-and-Drop-Oberfläche um Ihren physischen Raum innerhalb von Sekunden direkt aus der Perspektive des Projektors nachzuzeichnen. Sobald Sie Ihre Formen gezeichnet haben, können Sie Ihre Leinwand sofort ausfüllen, indem Sie über 100 integrierte visuelle Effekte in Kombination mit nativem Plug-and-Play Echtzeit-Audio-Reaktivität. Die Plattform eignet sich zwar als unkomplizierter, kompakter Medienserver für Ihre ersten Projekte im Wohnzimmer, lässt sich aber nahtlos an Ihre Ambitionen für groß angelegte Live-Performances und interaktive Installationen anpassen – und zwar mithilfe von branchenüblichen Show-Control-Protokollen wie OSC, MIDI, Art-Net/DMX, Syphon/Spout.
Über die Grundlagen hinaus: Mehrere Projektoren und unterschiedliche Projektionsflächen
Sobald Sie mit einem Projektor und einer Wand vertraut sind, können Sie dieselbe Konfiguration auf anspruchsvollere Projekte ausweiten. Weisen Sie jedem Projektor einen eigenen Ausgang und eigene Formen zu, vermeiden Sie zunächst Überlappungen und experimentieren Sie dann mit Soft-Edge-Blending, sobald Sie die Ausrichtung verstanden haben.
Der Übergang von Wänden zu anderen Oberflächen ist vor allem eine Frage der Denkweise. Unregelmäßige Hintergründe, Deckenbalken, kleine Skulpturen und Bühnenrequisiten folgen alle derselben Logik des Maskierens und Verzerrens. 3D-Projection Mapping ist ein breites Spektrum: Einerseits einfache optische Täuschungen auf Kisten, andererseits architektonisches Mapping. 3D-Projection Mapping wird häufig für monumentale Darstellungen genutzt, beispielsweise für die Projektion von Videos auf Gebäude, was im Vergleich zu 2D-Mapping eine immersive Erfahrung schafft.
Projection mapping kann eine Bühne, eine Aufführung oder sogar eine Person in eine lebendige Leinwand verwandeln und atemberaubende visuelle Effekte erzeugen, die das Gesamterlebnis bereichern. Mit projection mapping lassen sich dynamische Eingangsdisplays gestalten, die Gäste mit animierten Logos oder Botschaften willkommen heißen und das Publikum bereits bei seiner Ankunft sofort in den Bann ziehen. Projection mapping ermöglicht zudem immersive Kulissen, die eine langweilige Wand in eine faszinierende Unterwasserszene oder eine leuchtende Stadt-Skyline verwandeln und so das Veranstaltungsthema unterstreichen.
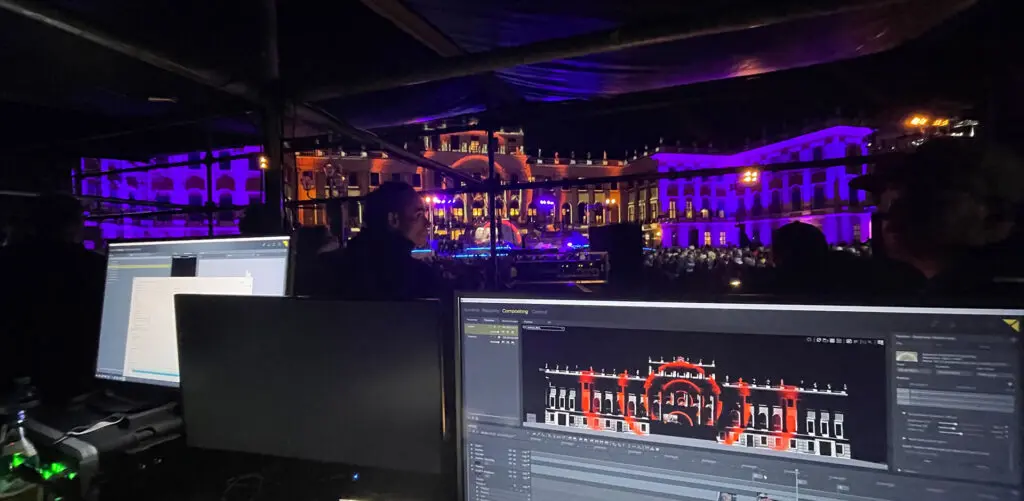
Stellen Sie sich eine Hochzeit im Jahr 2025 vor, bei der die Tischdekorationen mit animierten Mustern leuchten, oder ein Projekt an einer Kunsthochschule, bei dem ein 3D-gedrucktes Objekt in einer Galerie abgebildet wird. Interaktive Projektion kann Gäste in Echtzeit einbinden und es ihnen ermöglichen, die visuellen Darstellungen durch ihre Handlungen zu beeinflussen, wodurch eine noch immersive Erfahrung entsteht. In Zukunft können Sensoren, Kameras und MIDI-Controller statische Bilder in interaktive Erlebnisse verwandeln, die das Publikum in ihren Bann ziehen.
Praxisprojekt: Dein erstes einfaches projection mapping an einem Abend
Hier finden Sie eine Schritt-für-Schritt-Anleitung, die Sie in etwa zwei Stunden umsetzen können. Wählen Sie eine weiße Wand mit einer Breite von etwa 1,5–2 m, stellen Sie einen Projektor in einem Abstand von 2–3 m auf, schließen Sie Ihren Laptop an und installieren Sie die HeavyM kostenlos testen oder die kostenlose Version, sofern diese in Ihrer Region verfügbar ist.
Schalten Sie den Projektor ein und legen Sie den mapping-Bereich fest. Zeichnen Sie 3–5 Rechtecke oder Polygone an den Stellen, an denen Licht erscheinen soll, z. B. an Fugen von Paneelen, Plakaten, Regalen oder den Kanten von Schaumstoffplatten. Verschieben Sie jede Form so lange, bis sie genau an der tatsächlichen Kante anliegt.
Weisen Sie nun jeder Form unterschiedliche voreingestellte Looks oder importierte Clips zu. Probieren Sie einen langsamen Farbverlauf in einem Bereich, einen Puls in einem anderen und eine sich wiederholende Animation in einem dritten aus. Synchronisieren Sie die Szene grob mit einem Lieblingssong, indem Sie die Wiedergabe auf der Zeitachse nutzen oder den audio-reaktiven Modus verwenden.
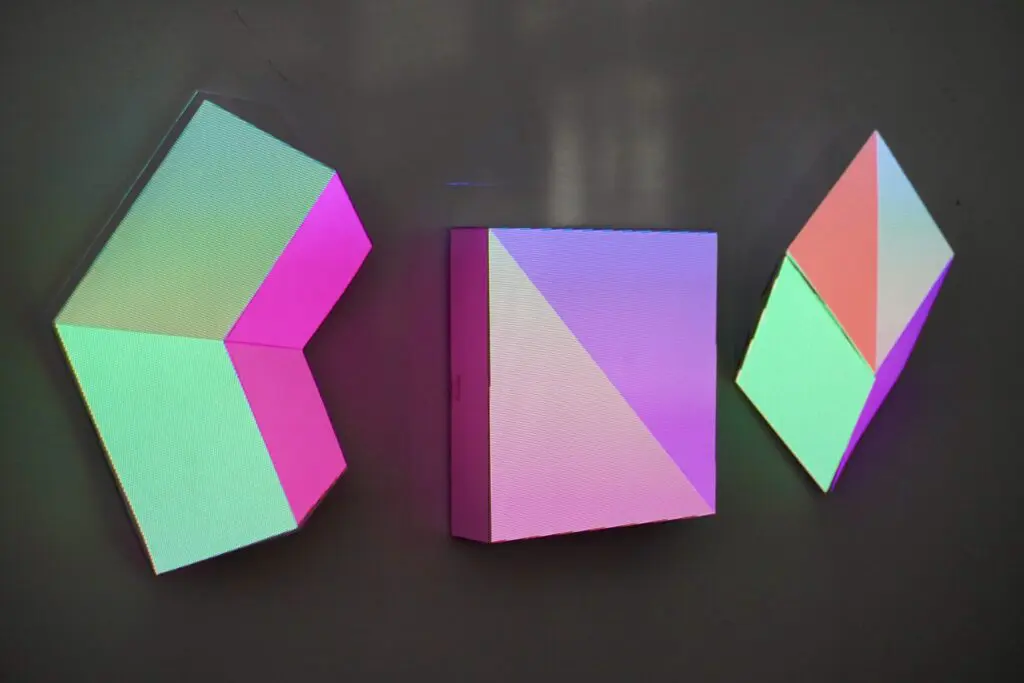
Nimm ein kurzes Video des Ergebnisses mit deinem Handy auf. So hast du eine Dokumentation deines ersten projection mapping-Projekts und kannst leichter erkennen, was du beim nächsten Mal verbessern möchtest.
Häufige Anfängerfehler und schnelle Lösungen
Probleme sind ganz normal, und die meisten haben einfache Ursachen. Wenn die Ausrichtung verrutscht, prüfen Sie, ob der Projektor angestoßen wurde, ob Formen aus dem falschen Blickwinkel gezeichnet wurden oder ob die Hardware-Trapezkorrektur mit Ihrer Software-Verzerrungskorrektur in Konflikt steht.
Wenn die Helligkeit zu schwach erscheint, verdunkeln Sie den Raum, verwenden Sie eine hellere Leinwand und vermeiden Sie glänzende Materialien. Projection mapping kann herkömmliche Beleuchtung durch dynamische, individuell anpassbare Effekte ersetzen und so leuchtende Wege oder stimmungsvolle Beleuchtung erzeugen, die die Atmosphäre einer Veranstaltung unterstreicht – allerdings nur, wenn der Projektor für den Raum hell genug ist.
Wenn die Wiedergabe ruckelt, hat Ihr Laptop möglicherweise Probleme mit zu großen Dateien. Verwenden Sie kürzere Loops, MP4-Dateien mit einer Auflösung von 720p oder 1080p sowie effiziente Codecs. Beginnen Sie mit bestimmten Bereichen, anstatt gleich am ersten Tag das gesamte Gebäude abdecken zu wollen.
Große professionelle Projekte stellen eine eigene Budgetkategorie dar. Bei Großveranstaltungen können die Kosten für projection mapping-Dienstleistungen bis zu $10.000 USD oder mehr pro Minute 3D-Videoinhalte betragen, zusätzlich zu den Kosten für Projektoren, Medienserver und Festplatten. Die Komplexität des Projekts, die Qualität der verwendeten Ausrüstung sowie die Dauer und der Umfang der Veranstaltung haben erheblichen Einfluss auf den Gesamtpreis des projection mapping.
So lernt man projection mapping schneller (ohne dabei auszubrennen)
Der schnellste Weg, sich mit projection mapping vertraut zu machen, besteht darin, denselben Arbeitsablauf auf immer anspruchsvolleren Oberflächen zu wiederholen. In Woche 1 projizierst du auf eine Wand; in Woche 2 fügst du ein Objekt davor hinzu; in Woche 3 testest du audio-reaktive Effekte; in Woche 4 bereitest du ein kleines Setup für eine Live-Performance vor.
Halten Sie die Übungssitzungen kurz: 30–45 Minuten reichen aus, um eine bestimmte Fertigkeit zu verbessern, beispielsweise präziseres Masking, flüssigeres Warping oder eine bessere Synchronisation mit der Musik. Speichern Sie Projektdateien, Voreinstellungen und Clips, damit Sie bei neuen kreativen Ideen nicht wieder bei Null anfangen müssen.
Zu den nützlichen Ressourcen gehören offizielle HeavyM Tutorials, Videoanleitungen zum visuellen projection mapping und Community-Anleitungen mit Schwerpunkt auf Arbeitsabläufen für Anfänger. Zu den beliebten projection mapping software zählen MadMapper, Resolume Arena und TouchDesigner, die jeweils auf unterschiedliche Nutzerbedürfnisse und Kenntnisstände zugeschnitten sind; MadMapper ist ein Branchenstandard für komplexe Installationen, während Resolume Arena häufig im VJ- und Event-Bereich eingesetzt wird. Es stehen kostenlose Optionen für projection mapping software zur Verfügung, die es Anfängern ermöglichen, die Grundlagen ohne finanzielle Verpflichtung zu erkunden, während kostenpflichtige Tools erweiterte Funktionen für professionelle Projekte bieten.
Fazit: Setzen Sie Ihre erste Idee in die Tat um
Das Verständnis des grundlegenden Arbeitsablaufs – Einrichtung, mapping und Inhalte – ist genau die Grundlage, die für jede groß angelegte visuelle Installation erforderlich ist. Sie müssen weder 3D-Mathematik beherrschen, noch komplexe Medienserver-Anlagen mieten oder Programmiersprachen lernen, um atemberaubende räumliche Illusionen zu erschaffen.
Sind Sie bereit, Ihr Gemälde zum Leben zu erwecken?
Mach dir keine Gedanken mehr über technische Hürden und fang an, mit Licht zu spielen. Herunterladen der HeavyM kostenlos testen heute, schließen Sie Ihren Projektor an Ihren Laptop an und erleben Sie noch heute Abend, wie magisch Ihr erstes projection mapping-Projekt sein kann.
FAQ
Diese FAQ behandelt praktische Fragen, die häufig auftauchen, nachdem jemand einen ersten einfachen workflow für projection mapping abgeschlossen hat.
Wie hoch ist das Mindestbudget, um zu Hause mit projection mapping zu beginnen?
Im kleineren Rahmen können Privatpersonen bereits ab $70 mit der projection mapping-Technologie experimentieren, insbesondere wenn sie bereits einen Laptop besitzen und sich einen projektion mapping projektor ausleihen können. Ein gebrauchter 1080p-Projektor kostet etwa $200–$500, während ein Einsteiger-Laptop, falls Sie einen benötigen, etwa $500–$1.000 kostet. Investieren Sie zunächst in die Helligkeit und Stabilität des Projektors und sparen Sie dann Geld, indem Sie kostenlose Medienclips und Testversionen von Software nutzen.
Brauche ich Kenntnisse in der 3D-Modellierung für meine ersten projection mapping-Projekte?
Nein. Verwenden Sie in den ersten Monaten 2D-Formen und einfache Tiefen-Tricks auf Kisten oder Platten. Echte 3D-Modellierung wird erst bei hochkomplexen architektonischen oder skulpturalen Arbeiten wichtig, bei denen die Oberfläche vor dem mapping als digitales Modell nachgebildet werden muss.
Kann ich projection mapping im Freien für kleine Veranstaltungen einsetzen?
Ja, aber im Außenbereich sind eine höhere Helligkeit, ein dunklerer Zeitrahmen nach Sonnenuntergang, Wetterschutz und eine sichere Befestigung erforderlich, damit sich nichts bewegt. Bei einem Garagentor, einer Gartenmauer oder einer temporären Installation kann derselbe Arbeitsablauf angewendet werden, doch Außenwände erfordern in der Regel mehr Lumen als Tests im Innenbereich.
Wie kann ich mein projection mapping später interaktiv gestalten?
Fügen Sie zunächst einen MIDI-Controller, einen Sensor oder einen Kamera-Trigger hinzu, der die Effekte in Echtzeit verändert. Die Kernfunktionen „Masking“ und „Warping“ bleiben unverändert; die Interaktivität verändert lediglich, wann die visuellen Elemente erscheinen, wie sie sich bewegen oder wie die Gäste die Szene beeinflussen.
Welche Dateiformate und Auflösungen eignen sich am besten für Inhalte für Anfänger?
Verwenden Sie für leistungsmäßig bescheidene Laptops MP4-Dateien mit dem H.264-Codec in einer Auflösung von 720p oder 1080p. Halten Sie die Clips kurz, lassen Sie sie in einer Schleife ablaufen und ordnen Sie sie in Ordnern, damit Ihre projection mapping software oder Ihr Medienserver sie während Live-Performances reibungslos abspielen kann.